Dynon HSI
- Details
- Written by Kevin Horton
- Hits: 5124
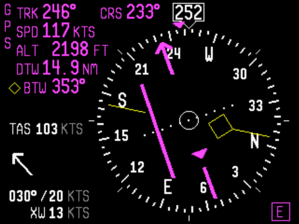
Dynon added an HSI function to their EFIS systems a few months ago. I would really like to have an HSI, as they provide a much more intuitive display than the CDI that I currently have. But, the Dynon HSI is only capable of displaying GPS information from the Garmin GNS 430, not VOR or ILS information.
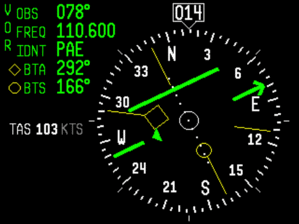 Two days ago Dynon stated on their forum that they are working on a solution to allow the HSI to display VOR and ILS information from the GNS 430. Yeah!! Assuming their new implementation works properly, I will almost certainly eventually replace the CDI with a second Dynon D-10A. The lower D-10A will normally be used as an HSI, but it would also provide a backup attitude display, in case the upper D-10A fails. In that case, I would use the CDI display on the GNS 430 for navigation.
This picture shows the HSI in VOR mode.
Parking Brake Valve Clip
- Details
- Written by Kevin Horton
- Hits: 3776
I was planning to go to the local scrap yard to purchase a piece of thin stainless steel to make a clip to hold the parking brake valve control arm in the OFF position. But, this evening my eye chanced upon a stainless steel hose clamp, and I realized that it was made from the perfect piece of metal. 1/2" wide, and just the right thickness. So I hacked a piece off, and bent it into a clip.
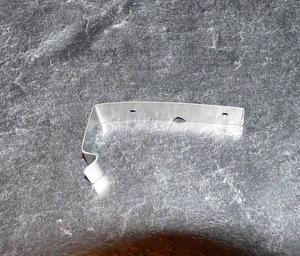 The clip. It was much easier to make than I expected, as I started with a piece of material already the correct width. Stainless steel is a pain in the butt to work with, so I wasn't looking forward to making this.
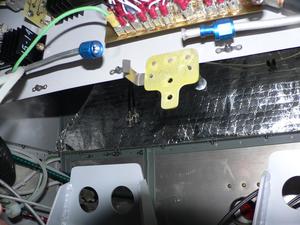 Here you see the clip clecoed in place. Tomorrow I'll countersink the holes on the bracket and rivet the clip in place.
Safety Wire on Flap Actuator
- Details
- Written by Kevin Horton
- Hits: 4585
The flap actuator is a linear actuator, but the round tube that comes out of it has a tendency to rotate. The force of the motor somehow puts a torque on the rod. This tends to cause the tube to unscrew from the rod end at the top end. This would result in a failure of the flap system. Several such failures have occurred in service.
Van now recommends that the jam nut at the top of the flap actuator be safety wired to ensure it does not loosen. I had been putting off making this mod, as I had such a hard time getting the top bolt in place when I installed that actuator. But, Thursday I had a Eureka moment when I realized that I could unscrew the tube from the rod end and avoid having the remove the rod end from its bracket, which meant I could leave the top bolt in place.
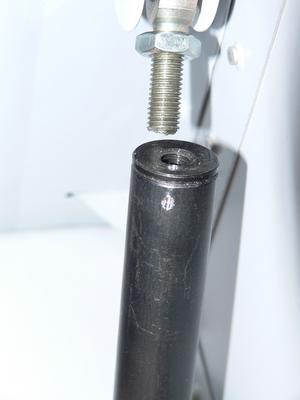 I drilled holes in the nut and the top of the actuator tube. Then I discovered that I couldn't simply use these holes as-is, as the nut would cover up the safety wire hole on the end of the tube. Drat.
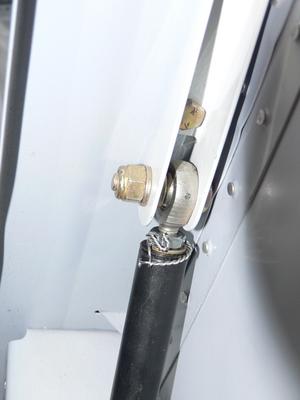 I woke up in the middle of the night, and realized that I could solve this problem by cutting a slot in a washer to make clearance for the safety wire. Bingo!
Here is the actuator with the nut safety wired in place. One more item to cross off on the To Do list.
Parking Brake
- Details
- Written by Kevin Horton
- Hits: 7294
The basic RV-8 design does not have a parking brake. I thought about adding one, but couldn't come up with a simple way to add one. The recommended routing of the brake system holes is very nicely laid out, and I didn't want to add several feet of hose to go to a parking brake valve.
But, I eventually realized that I really should have a parking brake, as I plan to do a fair bit of traveling, and that means some times I will end up on a sloping ramp, or with lots of wind. I would be a real trick to leap out of the aircraft quickly enough to stop it from rolling too far.
A few weeks ago I saw a message on theVAF WWW forumsfrom Mickey Coggins describing a very nice way toinsert a parking brake valveinto Van's recommended hose layout. I decided to order aMatco parking brake valveand add it to the system.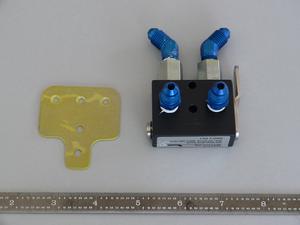 The first task was to remove the old bracket that held some elbows in the brake system hoses, and manufacture a new bracket to put the parking brake valve in this location. This sounds simple enough, but I was trying to do it on 31 Dec, and we had done a bit of a work up for New Year's Eve the evening before. I made two minor screw ups, then decided that maybe this was not a good day to be working on the aircraft. We didn't hit it too hard on New Year's Eve, so I was able to finish the bracket and paint it on New Year's Day.
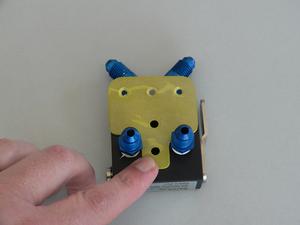 This shows how the bracket fits against the valve.
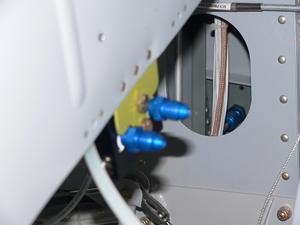 Here is a shot from the front baggage door area showing the fittings going into the front side of the parking brake valve.
After I put the bracket in place, I saw a problem that I hadn't expected. The 45 deg angled fittings at the top of the valve forced the brake lines high enough that they would interfere with some other stuff I had installed on that bulkhead. Big depression. I needed to have 90 degree elbows there, but there wasn't room to screw the second elbow in without it hitting the first one.
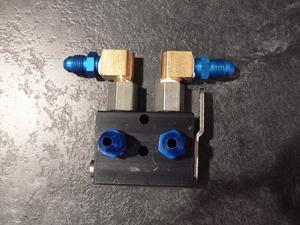 I went back into the house, and started flipping through my Aircraft Spruce catalog, hoping for a revelation. I stumbled across the AN914 elbow, which is much more compact than the AN822 elbow that I would normally have used. This elbow was short enough that it could be screwed in place without hitting the other elbow. I would need to then install straight nipple in the elbow, but that was OK. The AN914 elbow reminded me of a Street Elbow, used in automotive fuel systems. I rushed to the aviation aisle at Canadian Tire, and purchased two brass Street Elbows.
Here is the parking brake valve after replacing the 45 deg elbows with street elbows and straight nipples.
Next, I removed the section of aluminum tubing that went from the parking brake valve area down into the right landing gear box. I shortened it a bit, and flared the end to match up with the parking brake valve. But, when removing it, I had managed to bend the part that went down into the landing gear box. I straightened it out, but I didn't quite get the same angle. There was hardly any room to work down in the landing gear box, so I was working by feel. I spent hours trying to get the fitting to screw back onto the elbow at the bottom of the landing gear box. I couldn't get it line up perfectly, so it wouldn't go. Arrgh.
Today I finally realized that I could loosen the nut holding that elbow in place at the bottom of the landing gear box so I could wiggle it around into different orientations. I was finally able to get the fitting to screw onto the elbow. Whew! I'll attempt to modify the tubing on the other side without removing from that fitting. Lesson learned.
The orientation of the control arm on the parking brake valve is such that a push-pull cable from the top would work in the sense of Pull to release the parking brake, and Push to engage it. This is not acceptable. I would need to add a bellcrank to reverse the motion of the cable. Too heavy and too complicated. Fortunately I can reach the control arm by leaning forward a bit and reaching under the instrument panel. So, I will not install a Bowden cable to control it. I will need to install a spring-loaded clip to hold the control arm in the OFF position, to ensure that the parking brake does not get engaged when I don't want it.
Christmas
- Details
- Written by Kevin Horton
- Hits: 3244
We had a very nice Christmas break. We took the train to Nova Scotia to visit my folks for a week, plus several days of travelling. In the past, we have drove and took the ferry across the Bay of Fundy, or used the airlines. Well, we've had bad luck with the airlines in the winter, with one trip with huge delays, and another one where we got stuck in Detroit for several days. Driving is a bit of a crap shoot too, and the ferry schedule has changed such that we would need to spend two nights enroute. The train fare was almost identical to air fare, so we decided to give it a try.
We had a compartment with two seats, fold-down bunk beds, a toilet and a shower. Plus there was a dining car and several lounge cars. We really enjoyed the trip - it was a very relaxing way to travel.
Placards Redux
- Details
- Written by Kevin Horton
- Hits: 4458
I had made the instrument panel placards with black text on a clear background as I was afraid that clear text on a black background might not look nice with the beige instrument panel. But, I didn't like the way the placards looked. So, today I pulled them off and replaced them with ones with clear text on black background. The new ones stand out a lot better. Now all the placards in the cockpit will be the same.
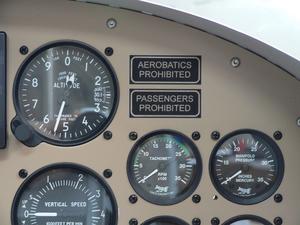 I also added a small placard by COM 2 with the aircraft registration.
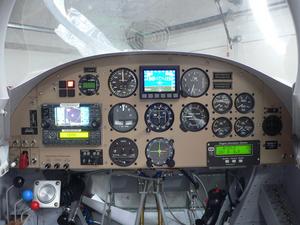 Here is a shot of the whole instrument panel.
Yesterday I finally installed the mount for the fire extinguisher. I had been looking for a good place for months, but wasn't happy with any of the obvious locations. I finally realized that there was a nice spot on the floor just below the rear seat throttle. The fire extinguisher is reachable from either seat, and doesn't get in the way of the passenger. I did the sums, and decided that I didn't need to add a doubler. I used FAR 23 criteria for items of mass in the cockpit - the mount must be able to withstand 18 g forward, 3 g upwards and 4.5 g sideways. The 18 g forward criteria seems a bit extreme - if the accident is severe enough to put 18 g accelerations on the cockpit, I'm not sure it really matters whether the fire extinguisher comes loose or not.
I had to remove the floors to fit the fire extinguisher mount, and I won't put them back in until they are painted. I'll take a picture of the fire extinguisher mount after the floors go back in.
It was a nice warm day today, so I took advantage by assembling and painting the g-meter mount. I should have painted it a lot time ago, but forgot all about it. I was in a rush, so didn't leave enough time between coats, and ended up with a run. I had to remove the paint and start over. Lesson learned (again) - slow down to save time.
