Very Misc Progress
- Details
- Written by Kevin Horton
- Hits: 4129
I was in Lawrence, KS all week, only getting home very late Friday evening. Yesterday I had a bunch of stuff that needed doing around the house, and today Terry and I spent most of the day just enjoying the wonderful weather. So very little progress was made this week.
While I was in Lawrence, I went to Topeka to attend a local EAA chapter visit to Eric Kerns RV-8 project. Eric is moving much faster than I am, and has a very nice looking aircraft that is well into the finishing stage.
I picked up two tubes of Lexel adhesive in Lawrence (I couldn't find a local distributor), as it is reported to be a good choice to bond the windshield fairing to the windscreen. I'm not sure whether I will also use it to bond between the fairing and the fuselage, or whether I should use epoxy resin. Yesterday I used the Lexel to do a test bond between a piece of fibreglas and a piece of aluminum. I'll give it a week to cure then see how strong it is.
Today I put the windscreen back on temporarily, then marked the outline of the windscreen fairing. I sanded the portion of the windscreen that will bond to the windscreen fairing, to give a better surface for the adhesive to bond too. I also attempted to wash the windscreen, using soap and water. That didn't get it really clean - there is still some sort of residue from the 3M 471 vinyl tape. I need to find a proper Plexiglas cleaner.
This evening I installed the sniffle valve in the bottom of the engine's induction tract, and fabricated a piece of aluminum tubing to act as a drain. I used a short length of automotive fuel line to act as a transition between the sniffle valve and the aluminum tube. I need to get some small hose clamps to finish this off.
Misc Progress, Updated To Do List
- Details
- Written by Kevin Horton
- Hits: 4088
Today I polished out the scratches on the windscreen, as I figured it would be easier to do before I permanently installed it. I used the Scratch Off Optica 4 kit, sold by Van's. It does a very nice job. Now I just need to acquire some Lexel adhesive, and I can install the windscreen and the windscreen fairing. I can't find a local distributor, but I will be in the US next week and I hope to find some at a hardware store.
Some needed hardware arrived earlier in the week, so I was able to finish replacing the plastic low pressure brake lines with Teflon tubing.
I've slowly ground down the To Do List - now it has about 33 items before going to the airport, and a bunch of those can be done once I receive some more Teflon tubing and fittings I ordered from Pegasus Auto Racing Supplies - they carry a good selection of Teflon tubing, including premade tube assemblies of various lengths. I intend to put a length of flexible Teflon tube at the bottom of each landing gear leg to connect up the brake lines to the brake calipers. I managed to damage one of the aluminum brake lines, so I either need to replace the whole thing, or cut off the bottom part. I decided this was just the excuse I needed to install Teflon lines there.
Stick Grip Labels
- Details
- Written by Kevin Horton
- Hits: 3943
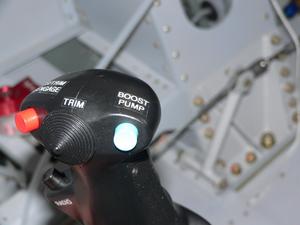
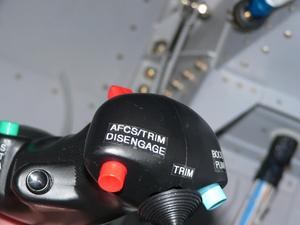
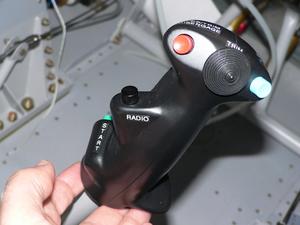
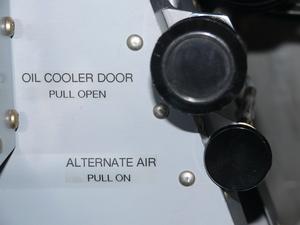
One of the items on my To Do List was to finish off all the labels on cockpit controls. I pulled out the Brother PT-2600 label maker, and cranked out labels for the stick grip, alternate air and oil cooler door.
Glare Shield Edge - Complete
- Details
- Written by Kevin Horton
- Hits: 4912
In the last three weeks I was on the road for several days, and then got nailed by a pretty bad sinus infection that slowed me down for a few more days.
I spent quite a bit of time working on the glare shield. I agonized over how to glue the vinyl covering to the aluminum glare shield. Many people use a spray-on adhesive, so I purchased a can of 3M 77 adhesive and did a test on some scrap. It seemed to work well, but you had to be quite quick to get the vinyl in place after spraying the adhesive, and I was not too happy about the risk of over-spray. I searched the RV-List archives, and found one person that used rubber cement, so I tried that on some more scrap. It was not compatible with the vinyl - the vinyl puckered up and did not lay flat.
I looked at the dozens of different adhesives at a local craft store, and found a tube of Goop adhesive that claimed to have all the right properties - sticks to vinyl and aluminum, and withstands fairly high temperatures. I did a test on some scrap, and it did a good job.
 The glare shield turned out very nice. I put a small bead of Goop around the edges, as there didn't seem to be any point to trying to glue down the whole surface. For the hole where the defrost fan is, I left some extra material and wrapped it around the edge of the hole and glued it to the bottom of the glare shield.
 I purchased some windshield washer tubing, and put a slit in it to cover the aluminum tube on the aft edge of the glare shield. It is almost the same sheen and colour as the vinyl, and looks quite nice.
 The aluminum tube doesn't go all the way to the edge of the glare shield, as I didn't want it to hit the windscreen. I found some little rubber guards to go on the edges of car doors, and used that to cover the part of the glare shield edge that didn't have aluminum tube on it.
Glare Shield Edge, etc
- Details
- Written by Kevin Horton
- Hits: 4690
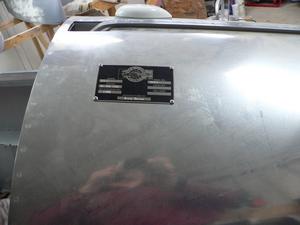 I've made progress on a few small items this week. A hardware order arrived from Aircraft Spruce, so I was able to install the data plate on the fuselage skin just behind the rear seat. It is visible with the canopy open or closed, but it isn't exposed to the air flow going around the aircraft, so it should stay fairly clean. This location wouldn't be legal for a US registered aircraft, but the Canadian regs are worded differently than the US ones.
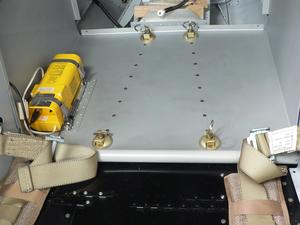 That ACS box also had the hardware I needed to install the baggage tie downs on the floor of the aft baggage compartment.
One of the items I need to finish is the glare shield. It is a piece of aluminum sheet that extends aft over the top of the instrument panel. Some people just put a piece of plastic trim over the edge of the aluminum, but the aluminum would probably slice right through the plastic if my head hit it during an accident, and the aluminum would then slice open my head. Some people put a slit in a piece of aluminum tubing, and use that as an edge protector. That seemed like a much safer idea, but I spent quite a bit of time trying to figure out how to put a slit along the tubing. I tried several different ideas, and wasted quite a bit of tubing in the process. The first lesson I learned was to not cut the tubing to length before making the slit. If you cut the tubing to length, then screw up the first couple of inches of it, now that whole piece of tube is wasted. I eventually learned to just unroll a bunch of tube, and not to cut it off until I had successfully made a slit.
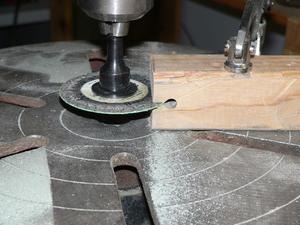 I spent quite a bit of time surfing the web, and digging through e-mail list archives. I finally come across a message by Mark Nielsen from Green Bay. He had drilled a hole in a piece of wood, and then cut a slit from the edge to the centre of the hole. Clamp the wood to the drill press table, and put a cut off wheel in the slit. Feed the tube through the hole, and voila - a slit in the tube. It took several tries to get a hole with a slit running right to the centre, lined up with the hole, but once I had the wood made it did a great job.
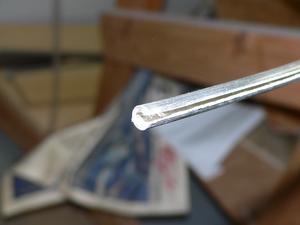 I will probably use some JB Weld to bond the tubing to the edge of the glare shield. I found some fairly tough vinyl leatherette stuff at a fabric store to cover the glare shield with. Now I need to sort out whether I will try to use one piece of vinyl to go on the glare shield and over the edge of the tubing. Or, whether I should just have the edge of the vinyl butt up against the tubing, and find some sort of rubber or plastic to cover the tubing. I'm leaning for the second option. I think I can put a slit in a piece of rubber tubing, and slip it over the aluminum tube.
I finished making and installing the labels for all the cockpit controls, except for the switches on the front stick grip. I had forgotten about those, and I just realized it now. I added that task to the master list. I also closed off three or four other small items on my list, and added a couple of things. Three steps forward, two steps back. Overall, the list is maybe three items shorter than it was a week ago.
I spent several hours poring over catalogs seeing which mix of vendors I should order from to get a whole bunch of hardware I need to finish various tasks. No one vendor carried everything, so you need to order from several places. I've got two more orders coming, and I need to put two more orders in tomorrow.
And, I've spent too much time watching the NHL playoffs. The Ottawa Senators are on a roll, and look to be on their way to the Stanley Cup finals. Knock wood.
Progress
- Details
- Written by Kevin Horton
- Hits: 4680
I spent several days in Toronto (not work related) over the last two weeks. I've also spent some time running around to car dealers shopping for a new car. But I have managed to make some progress on the aircraft.
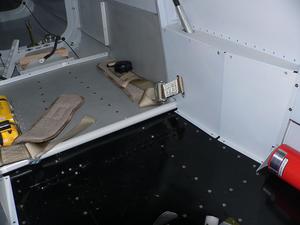 I painted the cockpit and aft baggage compartment floors and installed them. I didn't install the passenger footwells, as I will need to get under there to run the wires and antenna coax to the wings later. I also didn't install the aft part of the baggage compartment floor, as I will need to crawl back there to install the elevator pushrod later.
I modified the cockpit and aft baggage compartment floors to make them removable, so I would later be able to inspect the wiring, structure for corrosion, etc. I installed nutplates and used Micro Fasteners countersunk stainless steel fasteners with Torx heads. These fasteners aren't as strong as alloy steel fasteners, so they shouldn't be used in areas where a failure could cause a significant problem.
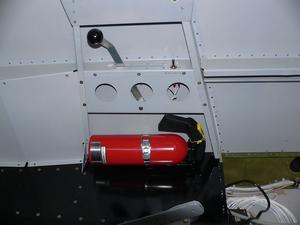 I installed the fire extinguisher mount on the left side of the cockpit. It tucks nicely in between two bulkheads, and can be reached from either seat.
I finished the alternator wiring, vacuumed out the rear fuselage, torqued a bunch of fasteners, and finished securing the wiring for the engine preheater. I also replaced all the O-rings in the brake calipers, master cylinders and parking brake valve with ones made from Viton. The Viton seals have a higher temperature rating than the original Buna-N O-rings (400°F vs 250°F). Several RV owners have had the Buna-N caliper seals fail if the brakes get too hot. The brake fluid then pours over the hot brake disk and catches fire, as the normally used Mil-H-5606 brake fluid is very flammable, and has a flash point of about 250°F. Several RV owners have had brake fires. The Viton O-rings can be used with automotive brake fluids, which have the advantage of being non-flammable. There are some disadvantages to automotive brake fluids (some of them attack paint, and the ones that don't attack paint do not absorb water, so any water pools in the bottom of master cylinders or calipers, causing corrosion). I'm still trying to decide whether to use an automotive brake fluid, or the aviation MIL-H-83282 brake fluid. MIL-H-83282 is flammable, but it has a much higher flash point, so it is much less likely to be ignited. It also does not attack paint. Most of the joints in the brake system are in the cockpit, so there is a good chance of spilled fluid on the floor if there is ever a leak.
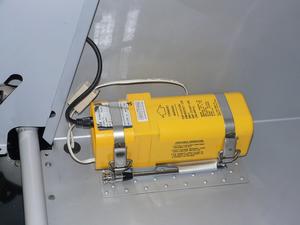 Today I finished running the ELT antenna cable from the ELT in the aft baggage compartment to the antenna which will be mounted on the right side of the cockpit, with the antenna sitting on the right side of the canopy. This should provide a much better antenna transmission pattern than the other commonly used locations of underneath the empennage fairing, or right up against the bulkhead behind the rear seat.
I also finished trimming the aluminum lower empennage fairings. Last weekend I managed to get the list of items to do before going to the airport down to less than one page long. Big celebration. Since then I've knocked several things off the list, and added a few more, but it is perhaps two items shorter. Progress :)
Saturday Steve Bushby, owner of Aerolite Flight Services, in Oxford Mills, ON hosted a gather of local RV builders and flyers. There was an excellent turnout, and a good time was had by all. Thanks Steve. Steve has a beautiful workshop, and he is busy building an RV-7 for someone (unlike the USA, builder assistance is now completely legal in Canada).
Steve is working full time in his shop, providing builder assistance, custom machine shop work, aircraft repair, etc. If you need assistance, or some machining, give Steve a call.
