Riveting the aft fuselage upper skin
- Details
- Written by Kevin Horton
- Hits: 4476
I started riveting the aft fuselage upper skin, but I've only finished about 80% of it.
I had to make a bunch of small shims to go between the F-808 and F-809 bulkheads and the skin. There were small gaps between the sides of these bulkheads and the skin - this caused the skin to be pulled inwards in those areas, making an unsightly depression. The F-809 was the worst - I needed some shims up to 0.063" thick in places.
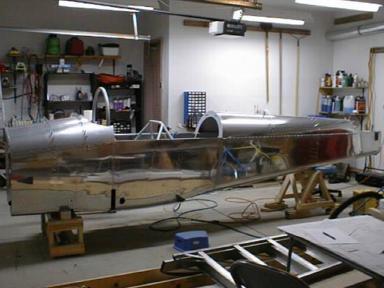 I've still got a couple of minor tasks to do on the fuselage. I'll finish the forward baggage compartment door after I buy the lock mechanism. The forward fuselage upper skin will be riveted after I finish the wiring and avionics, as I have much better access to the forward fuselage area with the skin off.
Strobe light power supply mount
- Details
- Written by Kevin Horton
- Hits: 4811
I was away most of this week, so I didn't get too much done. Yesterday, I fabricated and primed a mount for the power supply for the strobe lights. I decided to mount it against the side of the fuselage, just behind the aft baggage compartment. I made four little brackets from 0.063 x 3/4 x 3/4 angle, riveted them to the lower and mid longerons, and bolted two long vertical pieces made from the same size angle to the brackets. The power supply attaches to the vertical pieces.
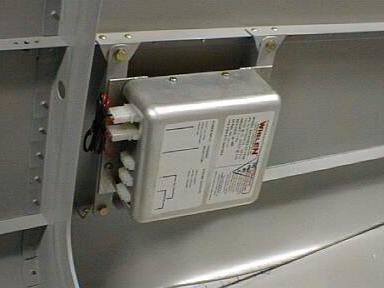 Today I riveted the mount in place, and then crawled inside the forward fuselage to drill and cleco the inner skin of the door to the frame. I haven't order the lock yet, so I'll fit the door latch in the next millennium. I also drilled a couple of holes to mount Adel clamps which will secure the wires going to the tail strobe and position lights. I'm pretty much ready to rivet the aft fuselage upper skin in place. I just have to make and prime some shims to improve the fit on two of the bulkheads. Hopefully, I'll get that skin riveted this week, so I can start fitting the canopy frame.
Forward Baggage Compartment Door
- Details
- Written by Kevin Horton
- Hits: 4055
This week, I mostly assembled the front baggage compartment door, and started to fit it to the opening in the fuselage. Here you see it in place, with a bunch of 0.125 tabs holding it flush with the outer skin. The next step is to crawl inside the forward fuselage and drill and cleco the inner skin of the door, which stiffens it up and locks the shape. It is pretty flexible now, and not quite the right shape. Hopefully it will fit a bit better once the inner skin is helping hold it in the right shape. I can't completely finish the door now, because I forgot to order the lock from Van's. I'm not going to order it until I have a bunch of other items to add to the order.
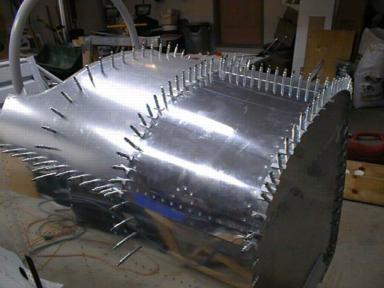 I also drilled and installed the aft fuselage static ports, and did a bunch of filing on the aft shoulder harness mounts to make them fit better.
Forward Baggage Compartment
- Details
- Written by Kevin Horton
- Hits: 5797
This weekend, I did the final adjusting on the most aft elevator pushrod, and torqued the rod ends. I fabricated and drilled the aft seat shoulder harness mount.
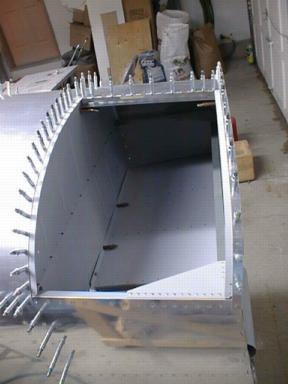 Then I attacked the front baggage compartment door. The instructions give you the option of riveting the upper front skin now, or later. I elected to just cleco it in place and rivet it later. This will greatly improve the access in the forward fuselage during the wiring phase, but I have to be careful where I run the wires to make sure I leave room for a bucking bar to get those rivets later.
There are more front baggage compartment photos from earlier in the construction process on another page. The door hinges at the inboard edge (top in this photo). I got the first stage of fitting, drilling, deburring, dimpling etc done today, and primed those parts. Tomorrow I'll starting riveting it together.
Rear Seat Back
- Details
- Written by Kevin Horton
- Hits: 4347
The rear seat took a lot longer than I expected. I had to trim every edge of the fibreglas top. It was a bit of an iterative process, as you couldn't get it properly assembled until it was trimmed, and you couldn't be sure how much you needed to remove until it was assembled.
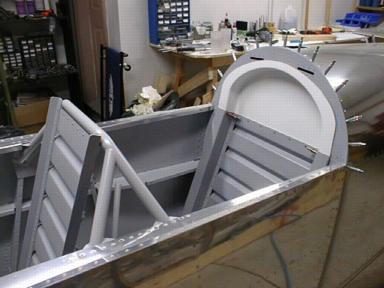 A thin cut-off wheel on a die grinder does a good job of trimming the stuff, but you sure get fibreglas dust everywhere. I ended up taking a shower at the end of the evening to get the stuff off me, and out of my hair. Yuck! I can't understand those guys who build composite aircraft. One piece of fibreglas was enough for me.
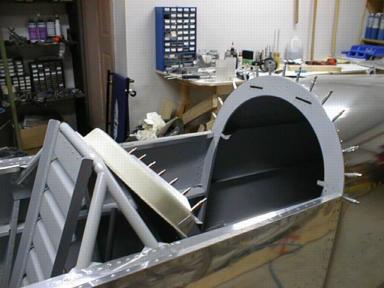 The rear seat back is hinged at the bottom so it can fold forward to allow access to the rear baggage compartment.
Canopy bow, etc.
- Details
- Written by Kevin Horton
- Hits: 3945
After righting the fuselage, and installing the fuel valve, I installed the front seat back support, and the canopy bow. The canopy bow is huge, which is comforting as it also serves as the roll over protection.
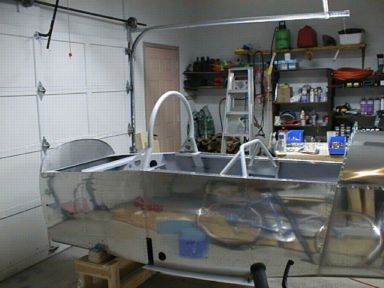 Next, I finally got around to mounting the control sticks, pushrods and bellcrank, drilled the holes in the elevator control horns where the elevator pushrod attaches, and built up the last pushrod. To drill the control horns, I drilled a hole in one horn, then installed the elevators on the horizontal stab, and got them both lined up in neutral. A friend used a thickness planer to make a piece of hard wood that was the same thickness as the distance between the elevator horns. I drilled a pilot hole through it at right angles, and used it as a drill guide to ensure the hole in the other elevator horn was perfectly lined up. Worked great - once I put the pushrod in between, and tightened up the bolt, both elevators were at the same angle.
In ended up going on several road trips in the midst of all this, which explains the slow pace. I need the overtime though to help pay for the engine and avionics, so I guess I can't complain too much.
