Seat back...
- Details
- Written by Kevin Horton
- Hits: 3676
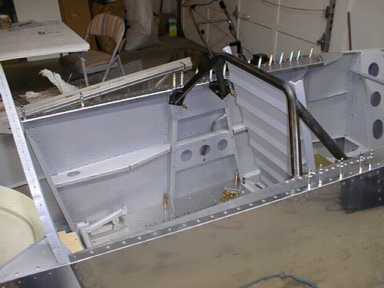 I got quite a bit done in the last week. I deburred and dimpled the cockpit sill parts and countersunk the longerons to accept the dimples. I fabricated the front seat back, and got a good start on the rear seat back. Yesterday I primed most of the aforementioned parts. Today I riveted the front seat back, finished some other odds and ends, and got a good start at riveting the cockpit sills.
Canopy sills, seat back, etc
- Details
- Written by Kevin Horton
- Hits: 3943
After fitting the instrument panel, I worked on the cockpit sills (the long flat pieces on the top edge of the fuselage sides at the cockpit) and the Wd-808 Front Seat Back Support (the bunch of black tubing in the photo). I also did the final riveting on the Landing Gear Boxes, now that I have the Wd-813s back from being powder coated. I've done all the work I need before flipping the fuselage over and fitting the main landing gear legs, but I'll delay that until a convenient point.
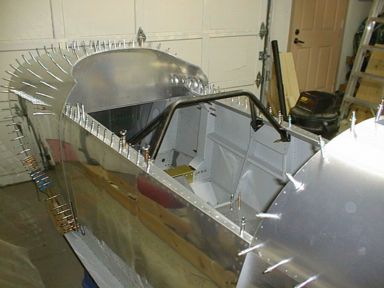 Next, I started work on the front seat back, but managed to dork up two parts in quick succession, so I decided to stop work for the day before I really messed something major up. Some times the force just isn't with you. I'll stop by a local metal supplier tomorrow and get some more aluminum angle to replace the parts I messed up.
The Canadair Regional Jet series 700 flight testing is finally starting to wind down, so I should be home a lot more now, which bodes well for making some progress.
Fitting the Instrument Panel
- Details
- Written by Kevin Horton
- Hits: 3221
This weekend, I worked on installing the instrument panel. The instrument panel itself is in three pieces - a big one in the centre, and a small sub-panel on each side. The main instrument panel piece is removable, but the sub-panels will eventually be riveted in place. Of course I can't do that until I sort out exactly where everything is going to be mounted on the sub-panels, and make the required holes.
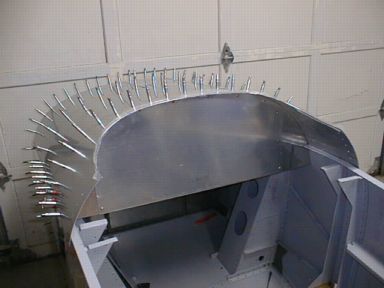 The edges of the skin above the instrument panel look weird in this photo because I peeled the plastic coating back so I could smooth the edges of the glareshield cutout. I'll peel the rest of the plastic off once I take the skin off for deburring and dimpling.
It was real fun drilling some of the holes in the forward upper skin, as some had to be back drilled from the inside. I ended up with my head and torso crammed up inside the forward fuselage - fortunately Terry didn't come by with the camera.
Forward Upper Skin
- Details
- Written by Kevin Horton
- Hits: 3810
The normal sequence of events after drilling the aft upper skin is to mount the main landing gear legs, and to install the skin and ribs that fair in the gear legs to the fuselage. Well, I decided to powder coat some of the steel parts needed for that exercise, and I took them in to the powder coating place much later than planned. So, I moved ahead to the next series of stuff - the upper fuselage ahead of the cockpit.
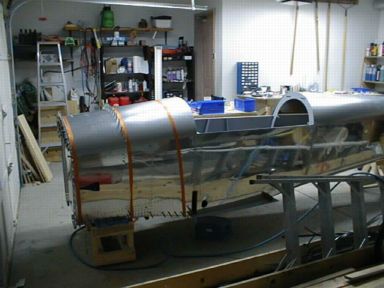 Here you see the F-821 forward upper skin drilled and clecoed in place. The strap clamps were used to make sure it was tight against the bulkheads. The aft upper skin (right side of the picture) is just sitting in place - I won't rivet it until I install the wiring, etc in the aft fuselage.
Aft Upper Skin
- Details
- Written by Kevin Horton
- Hits: 3642
Today I drilled and clecoed the aft upper skin to the fuselage. It fits perfectly at the front and rear, but I can see that I have a bit of a gap between the skin and the two bulkheads in the middle. 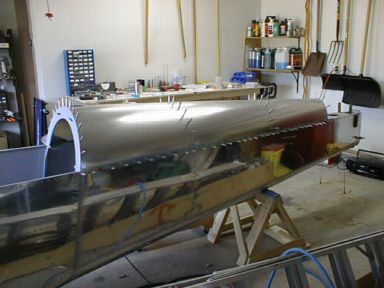 I'm going to have to put some shims between the skin and those bulkheads - otherwise I'll have an unsightly depression at each rivet.
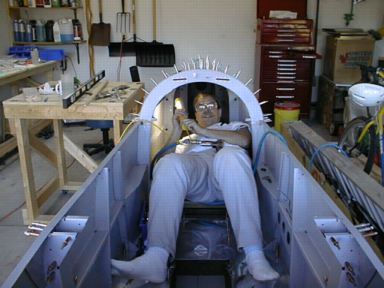 After drilling and clecoing the aft upper skin to the fuselage, I had to crawl inside to drill the canopy track receptacle. Terry found the sight on me in there pretty amusing, so she grabbed the camera. I don't think she realizes yet that one of us has to crawl all the way back in there to buck all the rivets.
Rear Seat Rudder Pedals
- Details
- Written by Kevin Horton
- Hits: 6356
The basic design has rudder pedals for the front seat only. I purchased the optional rear seat rudder pedals.
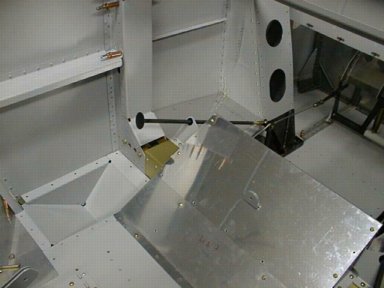 The rear seat rudder pedals are pretty "Mickey Mouse", but they are light and cheap, two of my favourite things. They are just long pushrods with a pad on the end, that connect to the rudder cables. Here you see the left foot well for the passenger's foot, and the left rear seat rudder pedal. You can see the pilot's left rudder pedal at the far right side of the picture.
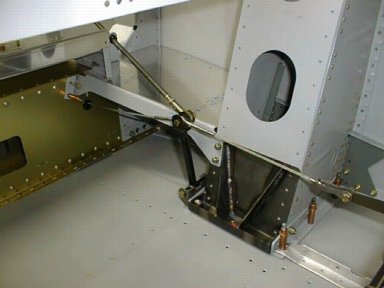 This is a view looking aft, at the left side of the cockpit. You can see the rear seat rudder pedal, and the idler arm that controls the motion of the front end of the rear rudder pedal. The idler arm pivots on a bolt at the bottom, and connects to the rudder cable at the top.
