Ground Adjustable Rudder Pedals
- Details
- Written by Kevin Horton
- Hits: 6074
The basic design has rudder pedals that slide back and forth on a tube, with an adjusting mechanism similar to that seen on many gliders. Van is a big soaring fan, so I guess we shouldn't be surprised.
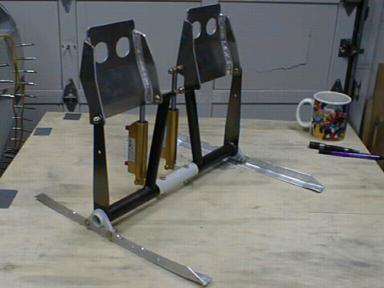 I bought the optional "ground adjustable" rudder pedals. They are lighter, cheaper and simpler, but they cannot be adjusted in flight. The rudder pedals can be bolted to one of four different fore and aft locations on the two angles that you see here. The aluminum angles are riveted to the floor.
The rudder pedals can only be adjusted on the ground, if you are willing to dive under the instrument panel with a wrench (or take the floor out of the forward baggage compartment, and come in through the forward baggage compartment door). I'm going to be the only guy flying in the front seat, and my legs stopped growing years ago, so I don't expect to have to move them once I figure out what position I like the best.
Argentina July 2000
- Details
- Written by Kevin Horton
- Hits: 31875
I was involved in the flight testing of the Canadair Regional Jet series 700, which is a stretched version on the original Canadair regional jet. The flight testing in icing conditions was supposed to be done in North America in the winter of 1999/2000, but the schedule slipped, and Bombardier had to go to the southern hemisphere to find winter conditions. They ended up in Comodoro Rivadavia, Argentina in July 2000.
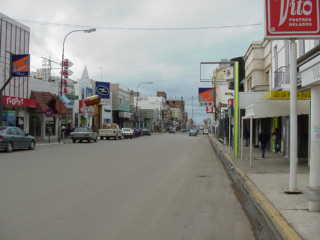 I didn't know what to expect when I went to Argentina. Comodoro Rivadavia is an "oil town" of about 150,000 people, on the Atlantic coast in southern Argentina, at about 45 degrees south latitude. It has a very nice European type downtown shopping and restaurant area, which is very busy as there were no shopping centres. The pace of life is very different from what I was used to. The siesta still is king down here. All businesses close for three hours after lunch, and many people take a nap. In the evening, the restaurants don't open until 8 PM, but most people don't eat until 9 or 10. Eating is a very social event, so the typical dinner in a restaurant takes 3 hours. The bars don't start to fill up until midnight, and they are busy until 5 or 6 in the morning (actually, they are busy until at least 7 AM Sunday morning). We meet for the preflight briefing at 8 AM every morning, and we are flying during the siesta period, so we couldn't really do the bar scene.
The locals don't speak much english, and I don't speak any spanish, so it was pretty much just point and grunt as far as communications go. They are friendly people though. We didn't fly one day, so we drove around and stumbled across a small airfield with a private flying club. The only guy there was a mechanic, but we had a long talk with him, then he phoned up El Presidente del Aeroclub who came to the airport to meet us. The aeroclub is 60 years old, and has very nice facilities, with a nice hangar, and a great bar/lounge/kitchen area that looks like a formal restaurant/bar. They were having their monthly dinner the next night, and invited us to come by, but we had to decline as he needed to get to bed early to fly the next day.
 The sunrises were typically very spectacular, and we got to see them all, as the sun didn't come up until 9 AM. Comodoro Rivadavia is really in the wrong time zone for some strange reason.
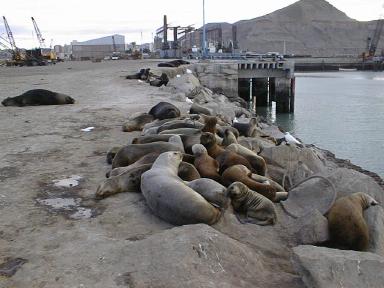 There was a large group of seals and sea lions that took their siestas on the local wharf, napping in big piles. They would pretty much ignore us, as long as we stayed at least 10 feet away from them.
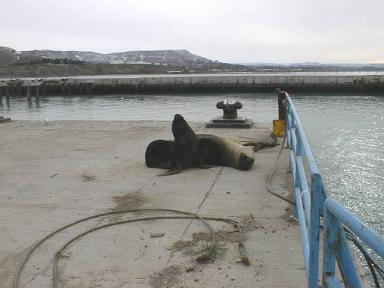 The seals were about the size I expected, but the sea lions were huge. They were up to eight feet long, and looked to be very well fed.
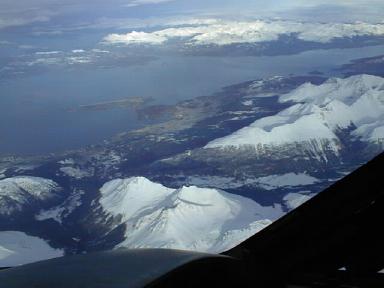 We ended up landing for fuel in Ushuaia, Argentina one day. Ushuaia is almost at the southern tip of South America, and bills itself as the southernmost city in the world. It's on the web, so it must be true :-)
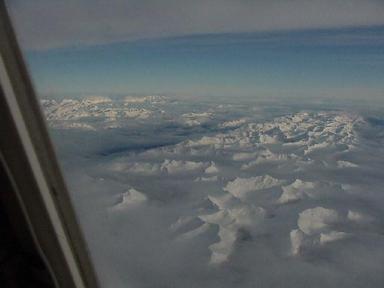
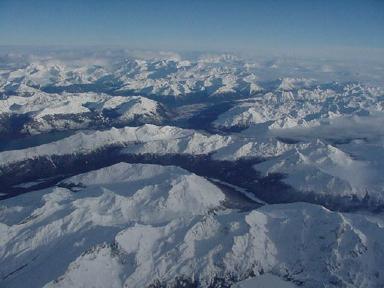
This shot shows Ushuaia from 15,000 ft altitude (about three miles up). The runway is on the peninsula south of town. The town is the area on the coast at about 4:00 from the airport. These three shots show some of the mountains around the town. The area was very beautiful - the digital photos don't really do it justice.
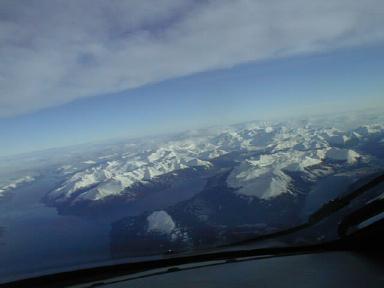 These two shots show some of the mountains and fiords around the town. The area was very beautiful - the digital photos don't really do it justice.
More tail surface fitting
- Details
- Written by Kevin Horton
- Hits: 4434
I've been on the road most of the time since 13 Jul 00, so I haven't made too much progress lately. I had a very interesting two week trip to southern Argentina at the end of July, one night home, then off to Green Bay, WI and Wichita, KS. I was back home for two weeks, but had to take care of a lot of other odds and ends, so I didn't spent much time in the garage. Then I went up way up north to Churchill, Manitoba for some flight testing where we needed cool temperatures, then down to Wichita again. Whew!
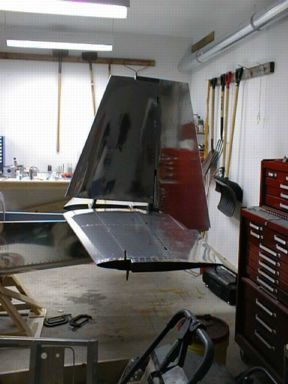 Before heading on the road, I started fitted the horizontal and vertical stabilizers to the fuselage. This was a very finicky process, as you have to get them properly located, and at the right angle, in all 6 dimensions (3 for position, and 3 for rotation in all axes). It is a matter of clamp, measure, unclamp, move, clamp, measure, etc. Yesterday I built two of the three elevator pushrods and fitted the front control stick. Today I discovered that the pushrod that goes between the front and rear sticks binds on a weldment. This is a common problem with the early fuselage kits. I'll get Vans to send me the updated part that fixes the problem.
My finishing kit (canopy, engine mount, wheels and brakes, etc) arrived while I was on the road. That canopy sure is a huge piece of plexiglas. Note that I didn't buy the cowling yet - I still considering using a cowling from Sam James, and a plenum chamber type cooling system, in a an attempt to decrease the drag from the cooling system. See Randy Lervold's web page for pictures of what I'm talking about.
Fitting the tail surfaces
- Details
- Written by Kevin Horton
- Hits: 3847
During last week, I worked on the mid-cabin braces, and mid-cabin consoles. I also did the first stage of work on the front seat bottom. I tried to install the rudder pedals last week too, but one of the parts was screwed up (looks like the part was upside down when the pilot holes were drilled at Van's, and there isn't enough room to drill new holes. Van's will send a new part at their expense - they are pretty good that way.
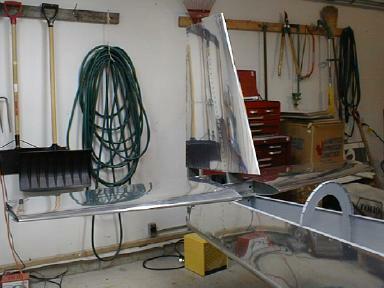 Yesterday I started fitting the horizontal and vertical stabilizers (HS & VS) to the fuselage. This was a very finicky process, as you have to get them properly located, and at the right angle, in all 6 dimensions (3 for position, and 3 for rotation in all axes). It is a matter of clamp, measure, unclamp, move, clamp, measure, etc.
Saturday, 1 July, was Canada Day - Canada's 133rd birthday. Terry and I enjoyed the festivities downtown in the afternoon and evening, and watched the fireworks from a 25th floor hotel room. What a view! This cut into my building time, but you have to have some balance in your life. Today, some old friends that we haven't seen in years came by - they are moving from Alberta to our part of Ottawa. After they left, I finished fitting the HS, and started on the VS. Tomorrow is a holiday, so I'll finish fitting the VS and work on getting the elevators and rudder fitted. Sure looks good to see the tail on the fuselage!
Gotchas - Rear Seat Hinges and Front Baggage Angle
- Details
- Written by Kevin Horton
- Hits: 6086
Gotchas
Note - The following info is based on fuselage parts that were shipped in January 1999, and on the drawings as received. Some of this information may not be valid with later fuselage parts, later revisions to the drawings or amendments to the Construction Manual.
- F-833D Rear Seat Hinges - The dimensions on DWG 29 (rev 1) that show where to put the F-833D Rear Seat Hinges are wrong. Ignore them. The only one that is right is the 1/4" distance for the hinge hole centerline to the edge of the hinge. The outer edges of the hinges need to be 18" apart, as that is the width of the rear seat back.
Drill both floor pieces (F-830 & F-831) to the seat ribs, then remove and cleco them together on your bench. I put the clecos in from the bottom, plus put a bunch more in other holes over the whole floor area. This allowed the clecos to support the floor as it sat on the workbench. Put a long straight edge (I used a carpenters level) along the line of holes that mount the hinges. You'll probably find that the holes are not all in a straight line (of course I didn't notice this until after drilling my first set of hinges). You want to mount both hinges on the same line, which means you need to average the 1/4" edge distance on the hinges.
On my floor, I needed to put the most outboard hole in each hinge 9/32" from the aft edge of the hinge. Your mileage may vary. I put a pilot hole in the right hinge, 3/4" from the outboard edge. I clecoed it to the floor, measured between the outboard ends of the hinges (18"), and found that I needed a pilot hole 23/32 from the outboard edge of the left hinge (your floor may be different, depending on the exact width of your fuselage at this point). I clecoed both hinges in place with those pilot holes, then flipped the other half of hinges up 90 degrees from the floor, and clamped them to a long straight edge. This ensured that the two hinges were on the same line when I drilled the rest of the holes.
- F-866C Front Baggage angle - DWG 21 (rev 2) shows this angle being attached to the bottom of the F-866A with AN470 rivets. But, the most inboard rivet is behind the flange on the F-870 Front Baggage Floor. I needed to make this rivet an AN426, flush head forward to avoid interference.
Rear baggage compartment
- Details
- Written by Kevin Horton
- Hits: 4730
The rear baggage compartment is right behind the rear seat. The aft part of the baggage compartment is stepped up to make room for the elevator bellcrank, and an optional location for the battery. My battery will be in the normal place, on the firewall, but there is an optional rear battery location if you have a heavy engine (200 hp IO-360).
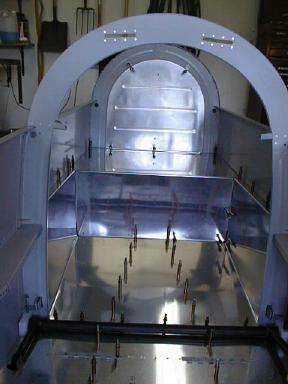 The rear baggage area measures about 30 inches long, by 22 inches wide by 25 inches high. The shelf at the rear is 10 inches high by 12 inches long. There is quite a bit of room back there, but you have to be careful not to put too much weight in it, or the centre of gravity would be too far aft.
In the photo, we are looking rearwards from the cockpit into the rear baggage compartment. The dark horizontal tube at the bottom is the torque tube that connects the two flaps. The bulkhead behind it will be just behind the rear seat back. You can see the rearmost armrests just ahead of that bulkhead.
