More Canopy Skirt
- Details
- Written by Kevin Horton
- Hits: 3633
I was on the road all week, so I made limited progress on the canopy.
It has turned quite cold again, with overnight lows around -18°C (0°F). I want the plexiglas nicely warmed up if I'm doing anything that could cause it distress, as it is much more brittle when it is cold, and more likely to crack. Yesterday we ended up running errands most of the day, and I don't like leaving the heater on in the garage when no one is home, so I wasn't able to get it warmed up enough before it was time to go to bed. I left the heater on overnight, and it was nice and toasty in there today (24°C or 75°F).
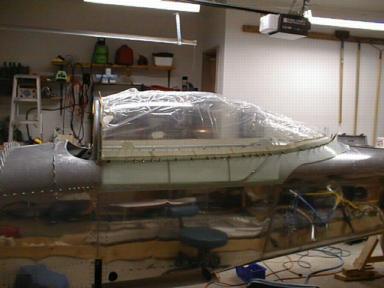 Today I finished drilled all the holes in the top edge of the fibreglas skirt that attach it to the canopy frame. This is a tricky exercise, because you are trying to match holes that are already in the plexiglas and canopy frame, but the canopy skirt covers those holes up, so you are sort of drilling blind. Before taping the canopy skirt in place, I ran a strip of wide masking tape along the bottom edge of the canopy. I drew a long vertical line centered on each hole, and put a mark exactly two inches above every hole. Once the canopy skirt was in place, I simply extended that line down onto the canopy skirt, and measured down two inches from my mark. This worked out very well - all but three holes that I drilled matched up perfectly with the existing ones, and the three errant holes aren't out by much.
I wanted the garage warm for today's work, just in case the drill nicked the plexiglas as it came through the fibreglas skirt. Now that this part is done I don't have to worry about the temperature so much.
Tomorrow, I'll attack the holes along the bottom of the skirt.
The skirt seems to fit well along the sides, but I'm not happy with the back third. There are several areas where there is a gap between the skirt and fuselage. This gap is generally less than 3/8 inch, but it is up to 5/8 inch in one spot. It looks like I will need to cut some thin wedges out of the skirt to shorten the bottom edge. Oh well - it'll be a lot of fibreglas work, but I'm confident that it'll look fine in the end.
Canopy Skirt Tribulations
- Details
- Written by Kevin Horton
- Hits: 5909
I didn't make too much progress on the canopy this week, as I got sidetracked sorting out some computer issues.
The front of the canopy frame was sitting a bit high with respect to the canopy bow, so I had to trim about 1/8 inch from the bottom of the canopy frame. Today I drilled the holes that attach it to the rollers at the bottom.
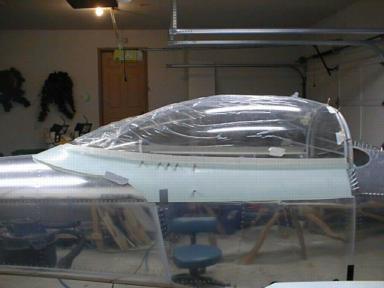 The canopy skirt as delivered has quite a bit of extra material around the edges. Van's provides a scribed trim line that shows where they think the edge of the average canopy skirt will be. I had to get my head at just the right angle to the light to find the trim line, then I marked it and made my first cuts well outside it.
Once I put it in place, I discovered that it fit very poorly at the back, and there was no way to make it go to the right shape. Many builders have reported that the skirt is much easier to fit if you cut it at the back and splice it back together later - the current kits have it in separate left and right halves. It still looks like I will have to do quite a bit of cutting and fitting to get this thing to sit tight to the fuselage at the rear. Oh well :-(
I'm going to be on the road all week, and most of the next three weeks, so things are going back into slow mode.
Fixing Fuselage Boo Boo
- Details
- Written by Kevin Horton
- Hits: 6981
At this stage, I reached a decision point where I had to decide whether to fix a small mistake in the fuselage, or leave it as is forever. I had discovered a few weeks ago that the F-804H doubler on the left side was perhaps a bit longer that it should have been, and it was not butting up against the upper longeron like it was supposed to. Instead, it had slipped outboard and the top corner of it was hitting against the side of the longeron, which prevented the skin from sitting flush against the longeron like it should.
I agonized over it for weeks - I didn't think it was a critical problem, and I almost called Vans to discuss leaving things as they were. But I finally decided I would be happier if it was fixed. So, I unclecoed the front upper skin, removed the instrument panel and canopy bow, and carefully drilled out about a dozen rivets so I could peel the fuselage open. Then I spent hours working away with a needle file getting rid of the interference problem. Today I primed the bare metal, riveted the works back together again, and reassembled the forward fuselage.
Read How to avoid this gotcha.
Now I have to trim the bottom of the canopy frame where it mounts to the rollers to let it sit down a bit lower, then I can attack the fibreglas canopy skirt.
I have never worked with fibreglas before, so I'm considering doing the empennage tips first, as they are smaller and cheaper. They are also a bit more out of sight than the canopy skirt, so it might be better to use them to learn about fibreglas.
Trimming and Drilling Canopy
- Details
- Written by Kevin Horton
- Hits: 3424
I was on the road all week, so I didn't get anything done until the weekend. On Sunday, I finished trimming the plexiglas for the sliding part of the canopy, and got the back third of it drilled and clecoed to the frame. I had the shop heated up to about 30 deg C (about 85 deg F) to make the plexiglas softer, and more forgiving of minor abuses. I was sweating buckets, but there weren't any cracks.
Monday evening, it took too long to get the shop up to temperature, so I abandoned any thought of working on the plexiglas. I drilled out the holes in the canopy frame to the final size.
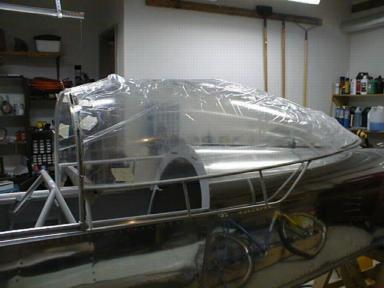 Tuesday, I managed to get home early to turn the heater on in the shop. I drilled the holes in the plexiglas to the final size, did the final trimming at the front and back, and smoothed all the edges. Then I screwed up my courage and got out the pop rivets to temporarily rivet it in place. I just about died when the "nail" on the first pop rivet let go, as they make a loud "bang!". I immediately thought a crack had started. Once I got my heart slowed down, I finished putting in a rivet every 10 - 12 inches. They hold the canopy nicely in position so I can fit the fibreglas canopy skirt.
I'm quite happy with the way the canopy has gone so far. No cracks! I figure that there are five points in the process when cracks could happen (cracks could happen when trimming the plexiglas, drilling it to the frame, enlarging the holes to final size, temporarily riveting it to the frame, or final riveting it to the frame) and I've made it through four of them on the sliding part of the canopy, and two of them on the fixed windscreen portion.
Canopy Frame, Trimming Plexiglas
- Details
- Written by Kevin Horton
- Hits: 3612
This week, I finished tweaking the canopy frame to fit, and started on the plexiglas work. I wasn't sure how I was going to get the aft end bent down, but I found a good suggestion from another builder. I figured out how much I needed to lower it, then removed the canopy frame and put it down on our tile floor. I measured how high the aft end was above the floor, and subtracted the amount I knew I needed to lower it. Then I moved it onto a rug, and turned it outside down. I was able to push down on the aft bow where I needed to bend it. Bend a bit, turn it back over and measure, bend some more, measure again, etc. It took several iterations, but I got it exactly where I wanted it. I had to actually stand on it to get enough force to move it the last little bit.
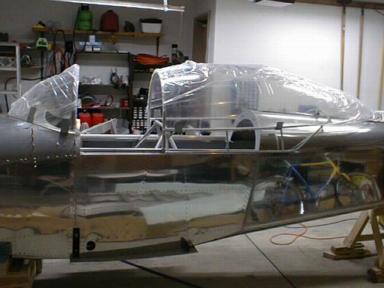 Then I started trimming the plexiglas. Van supplies two thin cut-off wheels that mount in a drill. They do a great job, but the little pieces of molten plastic go everywhere. The first step was to cut off the flange around the bottom, then I set it on the fuselage to see how much I needed to cut and where. A series of small cuts at the front and the rear gradually let it come down close to the roll bar. Then I taped it in place on the fuselage, gritted my teeth and cut it into two pieces - the fixed wind screen and the sliding canopy. I was worried about this step, but it came out perfectly. Once it was cut into two pieces, the canopy became a lot more flexible, and it was much easier to get it to conform to the canopy frame. I started trimming it along the bottom edge, but I won't get this finished until I get back from my next trip to Wichita (I leave tomorrow).
In the picture the canopy is still covered with a protective layer of plastic, hence the horrible appearance.
Canopy Tracks and Frame
- Details
- Written by Kevin Horton
- Hits: 3271
I fabricated the tracks that the canopy slides on. Today, I fitted the canopy frame, tweaked it to improve the fit, and drilled the holes that fasten the canopy tracks. I've got a bit more frame tweaking to do, and then I can start fitting the plexiglas to the frame. The frame was a fairly close fit as delivered, except at the very rear. It sure takes a lot of force to bend it - that 4130 steel tube is strong, springy stuff. I had to use a strap clamp to pull it in over 3.5 inches just to get it to make it 1/8 inch narrower. I've still got to pull the aft end down about 3 inches - that is going to be a challenge.
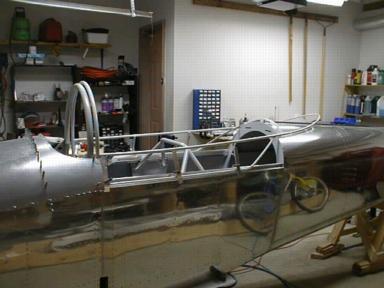 In the picture you can see the little strips of metal that I clamped to the bottom edge of the canopy frame to help judge how well it fit laterally. It must be bent so the canopy skirt (simulated by the strips of metal) will just ride against the outside edge of the fuselage.
