Baffling
- Details
- Written by Kevin Horton
- Hits: 4566
The last few weeks have been a blur. I was in Wichita for three weeks doing some flight testing, but that got all fouled up in the aftermath of the monstrous terrorist attacks. We eventually gave up on doing any more flying, but it wasn't easy to get home either.
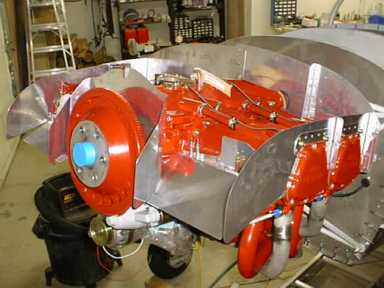 I bought a lot of stuff to bolt on the engine in the last few weeks - electronic ignition, main alternator, B&C SD-8 standby alternator, mixture cable bracket, inverted oil system, etc. But, every time I started to install one of them I discovered I needed some small bolt, seal, screw, etc. So, I moved on to the cooling air baffle installation. I bought the baffle kit that Van sells, and I am glad I did. The baffle kit for the IO-360 fits very well, with only a tiny bit of trimming required on some parts. I can't finish the most forward section until I fit the cowling, as I need to make sure the baffle and cowling mesh well together. I can't fit the cowling until I buy a propellor.
Access Door in Forward Baggage Compartment
- Details
- Written by Kevin Horton
- Hits: 13164
I spent several evenings this week, plus this weekend fabricating a large access door in the aft wall of the forward baggage compartment. It was a bit of extra work, but it will give good access to the area ahead of the instrument panel, which will greatly facilitate the installation and maintenance of the avionics, instruments, etc. Today I assembled the bulkhead and riveted it in place. 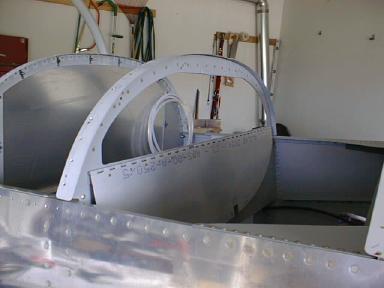
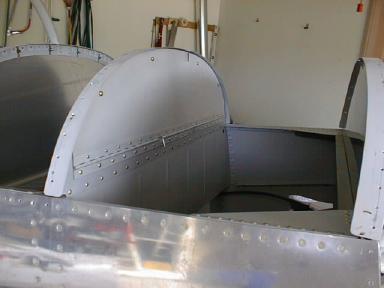 I cut away most of the upper half of the F-866 bulkhead, then fabricated a one-inch wide 0.090 thick doubler to go around the hole to restore the lost strength. 0.090 is really overkill - I wanted to use 0.063, but the local metal supply place didn't have any. The door is hinged at the bottom, and held closed by four #8 screws. I'll mount my fuse blocks on the aft side of the door, so they will be readily accessible once I open the door.
Mounting the engine
- Details
- Written by Kevin Horton
- Hits: 4866
I managed to borrow a home built engine hoist from an RV-6A builder - thanks Dale! It is very nicely constructed - very sturdy, and it comes apart into several pieces to simplify the transportation and storage.
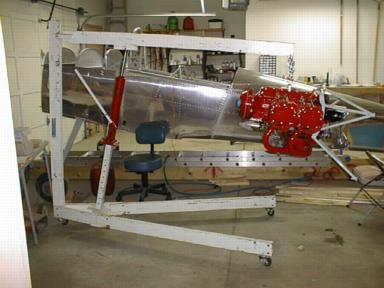 I mounted my engine today, and learned a few things worth sharing.
You must install an AN823-4 45° fitting near the upper right engine mount. The line to the oil pressure gauge or pressure transducer will attach here. It is so close to the engine mount that it will be impossible to screw the fitting in once the engine is on the mount.
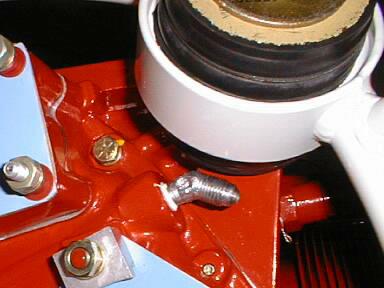 The fitting should be steel (to minimize the chances of it breaking), should be modified with a restrictor orifice (to minimize the rate of oil loss if the line should ever break), and must be oriented straight down. I had been warned about the need to install this fitting first, but it turned out that my engine overhaul shop (Aero Sport Power) had already installed it for me.
Wing Stands
- Details
- Written by Kevin Horton
- Hits: 4646
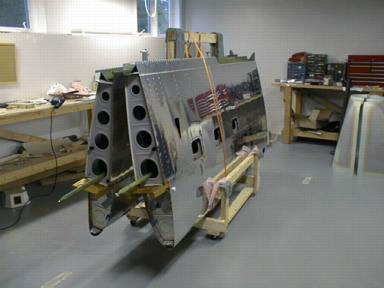
I left the wings sitting in the jigs while I built the fuselage, as it was the path of least resistance. But, one of the jack posts came crashing down when we pulled the wings off to take them up to the garage to fit to the fuselage. So, it was clear that I needed to come up with another way to store the wings.
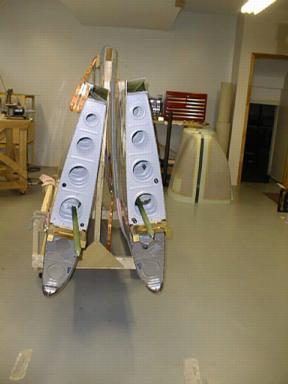 I built up a simple stand from 2x4s. The wings sit leading edge down supported by strips of old carpet. The stand is on castors.
Wing Intersection Fairings, Fuel Lines, etc
- Details
- Written by Kevin Horton
- Hits: 4116
The last four weeks have been very busy, so I have made much less progress on the project than I hoped. I spent two weeks on a refresher course at the National Test Pilot School. There was a fair bit of classroom stuff, but the highlight of the course was the flying - seven flights, all in interesting aircraft. Then we had some relatives visiting for the last few days of the Tulip Festival, so I spent all my time touring, eating, drinking, etc. It was great to see Donna and Mary again though.
Since the last update, I've fitted the intersection fairings between the wing and fuselage, and fabricated the fuel tank vent lines, and almost finished the fuel feed lines from the fuel tanks. I've got held up twice because I discovered I needed extra fittings. The basic kit includes all the fittings if you build the aircraft as Van intended, but I used an Andair fuel selector instead of the one that Van supplied, and I modified one of my fuel tanks for inverted flight. These mods meant I needed additional fittings, but I hadn't figured that out ahead of time. Fortunately the head maintenance guy at a local flying club was very cooperative, and he ordered the parts from his supplier. They cost me a bit more than they would have if I used my normal supplier (Wicks), but he got them for me in two days instead of two weeks (I could get things quickly from Wicks too, but the courier charges would be ten times the value of the parts). So, I hope to pull the wings off later this week and start the engine installation.
Rigging Ailerons and Flaps
- Details
- Written by Kevin Horton
- Hits: 5419
This week I got the ailerons mounted, and adjusted the length of the pushrods so they were in neutral when the control stick is vertical. I expected that I would have to fiddle around with the pushrod lengths to get the correct up and down travel, but they were exactly where I wanted them after I sorted out the neutral position. It seems that the measurement that Van gives for the bellcrank position is bang on the money, because I had carefully adjusted it to this position when I originally fitted the ailerons to the wings, during the wing construction phase.
Then I trimmed the inboard end of the top skin on the flaps to clear the fuselage, and fabricated the flap pushrods. It took a lot of trial fits to get the trimming the way I wanted, but I finally was able to connect up a battery and run the electric flaps up and down yesterday.
Today I fabricated and fitted the brackets that bolt to the side of the fuselage to take the loads from the front inboard end of the fuel tanks (which form the inboard leading edge of the wing). Next I'll fabricate the fuel lines and the fuel tank vent lines, fit the intersection fairings between wing and fuselage, etc. I'll start the engine installation after I remove the wings.
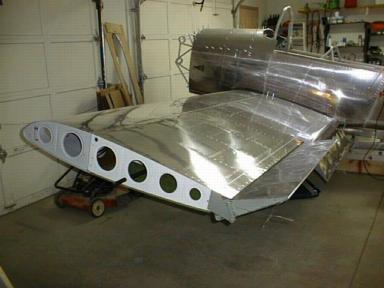 The picture shows the left aileron in the full up position, and the flap full down. The wires sticking out the end of the aileron are to hang it from hooks after I take it back off the wing.
