RMC Reunion and cowling status
- Details
- Written by Kevin Horton
- Hits: 5333
RMC 20 year reunion - I just got back from three days in Kingston at my RMC Class of 82 20 year reunion. There was a very good turnout, and it was great to see everyone again. It's hard to believe that it has been 20 years already.
Cowling - This week I put in and sanded some more filler to help match up the two cowling halves at the front. There is still a bit more filling to do to fill in small low spots, but I'm getting pretty close. Then I countersunk all the holes for the rivets that will attach the pieces of hinge to the cowling.
Wing tip lights
- Details
- Written by Kevin Horton
- Hits: 5788
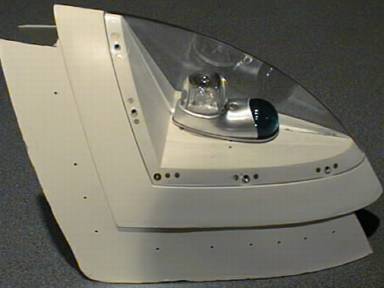
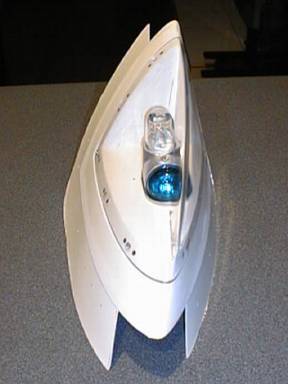
This week I sorted out some uneven fibrelgas that was keeping the last two nutplates from sitting flat and then I riveted them in place. I cut the holes to allow the nav and strobe lights to sit in place and riveted the nutplates that they use.

Wing tip progress
- Details
- Written by Kevin Horton
- Hits: 3527
This week\'s progress
- Details
- Written by Kevin Horton
- Hits: 3305
Cowling update
- Details
- Written by Kevin Horton
- Hits: 4100
Cowling update
- Details
- Written by Kevin Horton
- Hits: 4903
This week I had to build up the edge of cowling a bit in three places where I trimmed it too much. I'm using West Systems epoxy fibreglas - I mixed some West Systems 403 Microfibers in with resin to make a very thick slurry. I roughed up the edge of the cowling, and clecoed a strip of aluminum covered with tin foil to the outside of the cowling to be sure I got a smooth transition between the surface of the cowling and the added material. I wasn't sure how good a bond I would get to that thin edge of the cowling, but it seems be a very strong bond. I also had to build up the flat area behind the spinner to get an even gap. I've still got lots more filling and sanding to go yet to get a nice match between the two halves of the cowling at the front.
I tried something a bit different when I fitted the two pieces of hinge at the back of the top cowl half. These pieces of hinge make a continuous curve, due to the fact that the top of the fuselage is rounded. The hinge is designed to take a 1/8 inch diameter aluminum hinge pin, but the plans say to use a 3/32 diameter stainless steel hinge pin instead, as you must be able to pull and replace these pins to allow the cowl to be removed, and it would be impossible to push a 1/8 inch pin around the tight curve at the outboard edges of the top cowling. Even so, many builders report that it is difficult to insert the hinge pins. The instructions have you use the smaller 3/32 hinge pins when you are drilling the cowling to the hinges. But, this means that there is some slop between the two halves of the hinge, and thus the eyes won't be perfectly lined up, which might explain why the hinge pins would be difficult to insert. I decided to leave the 1/8 inch aluminum hinge pins in place when I drilled the hinges to the cowling, to ensure the hinge halves were perfectly aligned right from the start. Today I cut the 3/32 hinge pins, and tried them out, inserting the two halves of the hinge pin by reaching in through the oil filler door - they slipped right into place without any difficulty. Mind you, the hinges were only clecoed in place, I hope everything is still nicely line up after I rivet them.
