Baffle left front piece
- Details
- Written by Kevin Horton
- Hits: 3383
The last couple of days I've been working on the pieces that close off the baffles at the front. I managed to finish drilling the left piece tonight, after a long hard battle. It was a royal pain in the you-know-what to drill some of the holes. You have to have the various baffle parts in position on the engine while you drill the holes, otherwise it is pretty much guaranteed the holes won't match up when you put them on the engine.
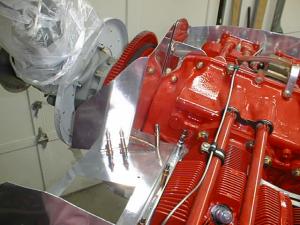 It would have been easy if I was willing to pull off the prop and flywheel, but I went through enough trouble to get the prop on, so I'm darned if I'm going to pull it off now. I finally managed to cobble together a way to get at enough holes with my angle drill that I could drill them in place, pull it off, cleco it back together and drill the rest of the holes on the bench.
Read on for more.
RV-10 Update on Van's web site
- Details
- Written by Kevin Horton
- Hits: 3496
There is another update on progress on the RV-10 prototype on Van's web site. See RV-10 update. I think this model will be a real winner for Van's as many previous RV builders have families now, and need a four seater. There is little competition in four seat all-metal homebuilts. The only other ones that jump to mind are the BD-4, (not many built) and the Zenith CH-640 (an ugly poor performer, in my opinion, but I might be biased).
Hole in baffle floor for air filter
- Details
- Written by Kevin Horton
- Hits: 12581
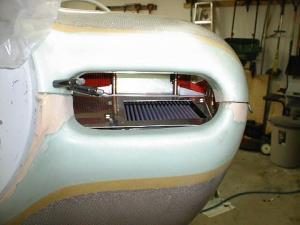
Today I trimmed some excess fibreglas off the lower end of the snorkel, and started to enlarge the outlet air hole to make it match the inlet in the fuel injection servo. I had thoughts of laying up some fibreglas on the outside of the snorkel near the bottom so I could move the outlet air hole upwards a bit without coming through the fibreglas, but I lost motivation after getting covered in fibreglas dust from the sanding. So, I switched gears and nibbled the hole in the baffle floor where the snorkel goes.
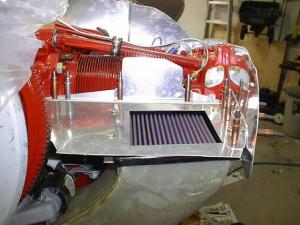 You can see the rectangular K&N inlet air filter at the top of the snorkel.
Font Size
- Details
- Written by Kevin Horton
- Hits: 3294
One viewer noted that the font size was too small. So, I did some research and learned that I could have specified the font sizes in a way that made them better respect the default size that viewers have in their web browser. So, I made a few experimental changes to a new theme that I would like you to have a look at, if you don't mind. The new theme should set most text to whatever size you have set as the default in your browser.
Go to the "Theme Changer", near the top right. Select the "Simple_Orange_larger_font" item, and click the Go button. If you are a logged in user, there will be a "Use Permanently" line - if you click this you will get this theme ever time you log in.
Please vote in the new poll I created (just a bit lower on the right side) to let me know if this modified theme is better. Leave a comment in the poll to tell me whether the font size in the Simple Orange Larger Font theme is too small, too large, or just right? Also, I would like to know which browser and version you are using, if you don't mind.
If this new theme is better, and if it works on most browser versions, I will probably make it the default for the site. I eventually also want to create a theme based on the Golden Hawk paint scheme that I intend to use.
Thanks,
Kevin
Gap filled at snorkel flange
- Details
- Written by Kevin Horton
- Hits: 7157
I checked the fibreglas resin on the flange of the snorkel late this morning, and it had cured almost completely. So I unbolted it and pulled it off. It took a pretty good whack with my fist to jar it loose, and one of the little spacers that go between the upper end of the snorkel and the baffle floor went flying somewhere.
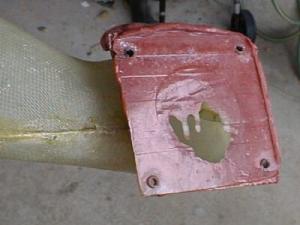 The gap between the flange and the face of the fuel injection was completely filled. In the picture you can see where the edges of the packing tape pieces were - the ridges look huge, but in reality they are only a couple of thousands of an inch high - the paper gasket will take care of that. I've still got a bit of trimming to do on the edges of the flange, and I've got to go some filling and trimming to move the big hole where the air flows to the centre of the flange.
Improving the fit of the snorkel to the fuel injection servo
- Details
- Written by Kevin Horton
- Hits: 3490
I didn't get much done the last few days, as Terry was getting ready to head back to Green bay for 10 days, and I wanted to spend time with her, rather than in the garage. One of her sisters finally got season tickets to the Packers (all the seats in the stadium are held by season ticket holders, and there is a 25 - 30 year waiting list to get tickets). So when she called Terry and said her husband was going on a hunting trip, and she wanted Terry to go to the game with her on Sunday, Terry jumped at the chance.
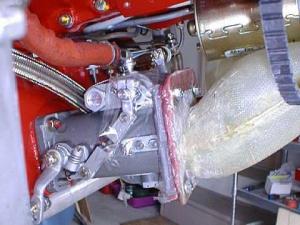 I've been wrestling with the induction air snorkel for several days now. I've got the holes drilled at the upper end where it attaches to the left baffle floor, but the fit of the lower end to the fuel injection servo has been a trial. The flange of the snorkel didn't extend high enough to allow enough edge distance on the two upper bolts that attach it to the fuel injection servo. So, I waxed up a piece of aluminum sheet, and taped it to the forward side of the flange, then mixed up some resin and microfibres to extend the edge of the flange.
And there was a wedge shaped gap between the flange on the snorkel, and the face of the fuel injection servo. I've gone through two rounds of adding fibreglas material and then sanding it flat, but I still wasn't happy with the fit. So, today I tried something that was a bit creative (or maybe a really, really stupid idea - only time will tell). I put a couple of layers of plastic packing tape over the face of the fuel injection servo, overlapping it well over onto the sides and top of the servo. I sprayed some WD-40 on the servo, and on the bolts that attach the snorkel to the servo. Then I mixed up another batch of fibreglas with microfibres to thicken it, gooped it onto the snorkel flange, and then bolted the thing in position. The extra fibreglas goop oozed out between the flange and the fuel injection servo, but it should leave a perfect fit once it cures. Assuming I can get the snorkel off without having to destroy it with a hammer. I'll have to trim the excess fibreglas off the sides of the flange, but that doesn't have to be a precision job. I'll know late tomorrow how this turned out.
Now I'm going to attack the baffle floor in front of the left cylinders.
