Gotchas - Landing Gear Boxes
- Details
- Written by Kevin Horton
- Hits: 22361
Gotchas
The combination of parts and instructions create a few potential problem areas that builders should be aware of. Fortunately, previous builders provided a lot of advice on what areas to look out for, so I was able to avoid most of the pitfalls listed here.
Note - The following info is based on fuselage parts that were shipped in January 1999, and on revision R2 to DWG 24. Some of this information may not be valid with later fuselage parts, later revisions to DWG 24 or amendments to the Construction Manual.
Read on for more info.
Riveting the Landing Gear Boxes into the Fuselage
- Details
- Written by Kevin Horton
- Hits: 4078
The landing gear boxes slipped back in place inside the forward fuselage without any fuss. All the holes matched up nicely. I put hardware store nuts and washers on a bunch of the countersunk screws at the bottom to hold everything tight together while Terry and I riveted them in place.
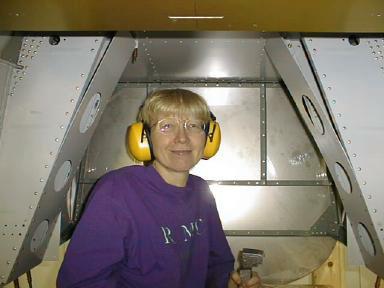 Terry prefers to use the bucking bar, so she got to go up inside the forward fuselage during the riveting. This picture was taken from the cockpit area, looking forward towards the firewall. The fuselage is still upside down in the jig, so the floor is at the top.
Landing Gear Box Riveted Together
- Details
- Written by Kevin Horton
- Hits: 4959
I started riveting the left landing gear box together today. I found the Avery "C-Frame" tool worked well for riveting the F-802A, B & C to the two pieces of angle.
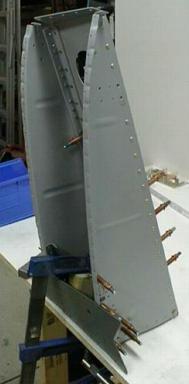 The instructions say to cleco the Wd-822 (the big grey-green piece at the bottom left of the picture) and the rest of the landing gear box to the inside of the fuselage, then rivet the whole thing together. But, this means you have to buck all the rivets holding the Wd-822 to the rest of the landing gear box with your hand stuck through a pretty small area.
Many builders rivet the whole thing together on the work bench, then stick the works up into the fuselage and rivet it in place. This gives much better access to those rivets on the sides, because you can come at them from the big opening where the fuselage skin would be (the left side of the box in the picture attaches to the side of the fuselage).
But, one builder reported that he had an alignment problem when he tried to rivet his already assembled landing gear box into the fuselage. Clecos don't fill the hole quite as much as a rivet does, so it is possible to have a tiny bit of misalignment even though the hole thing clecos nicely together.
So, I tried a hybrid solution. I clecoed the whole works into the fuselage, and stuck rivets through a bunch of holes to make sure that every thing was aligned. Then I riveted two rivets on each side of the landing gear box to lock the Wd-822 and the rest of the assembly together. Then I took the whole thing out, and clamped it to the workbench to do the final riveting.
Finished Riveting Fuselage Skins (well, almost)
- Details
- Written by Kevin Horton
- Hits: 5587
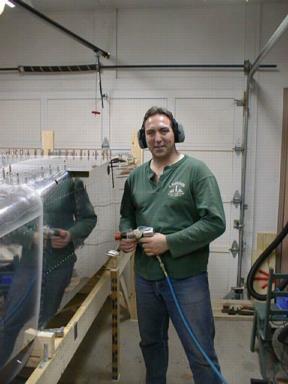 Jim Manton, an old friend from when I was in the Canadian Armed Forces, is staying with us for awhile until he finds a place to live here in Ottawa, and moves his wife and family here. He has been helping me rivet the fuselage skins - Thanks Jim!
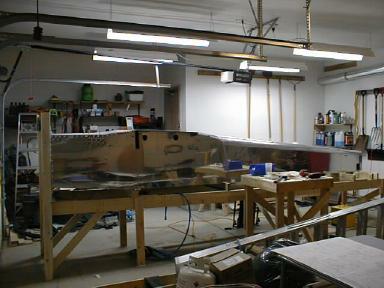 We finished riveting the fuselage skins today, except for two rivets. I screwed one of them up, and need to drill it out, and make a special bucking bar to get it, and the same rivet on the other side. But, I'm heading on the road tomorrow for a week or so first.
Progress on Fuselage Skins
- Details
- Written by Kevin Horton
- Hits: 3967
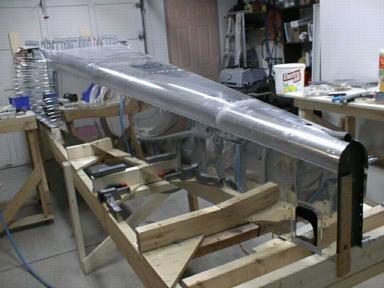 This view gives a good idea how far I've got in riveting the fuselage skins. So far, I've done the tail spring skin, aft bottom skin, forward bottom skin and the right aft side skin. Four down, and seven to go.
Riveting Fuselage Skins
- Details
- Written by Kevin Horton
- Hits: 4470
I started riveting the fuselage skins today.
The first skin (F-828 tail spring skin) was a real pain in the butt because the tail spring mount takes up a lot of room inside that area, leaving little room for a bucking bar. I tried making a very small bucking bar from scrap steel, but it wasn't heavy enough, so it was tough to buck the rivets. I eventually figured out that I had a bucking bar that would work, so I could have saved the couple of hours I spent going to the scrap yard, and polishing up that useless bucking bar.
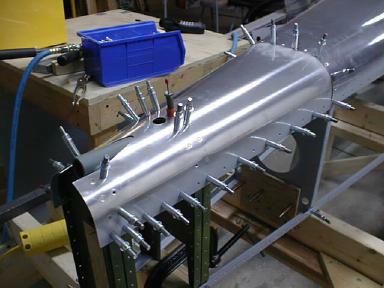 Here you see the tail spring skin, which covers the bottom end of the aft fuselage. You can see the end of the tail spring mount, where the tapered round tail spring fits into.
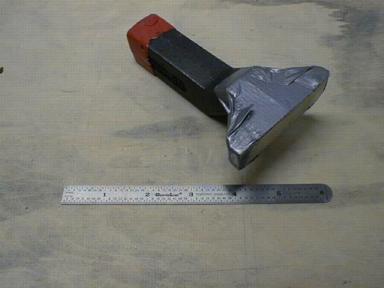 Here is the bucking bar that I eventually used. It is a pretty strange shape, but it worked great for this job. I found it at a used tool place in Wichita, and bought it on a whim, figuring I would need to get into some strange corners someday.
