Wing progress update
- Details
- Written by Kevin Horton
- Hits: 3536
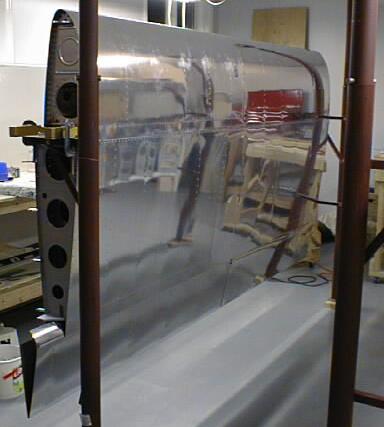
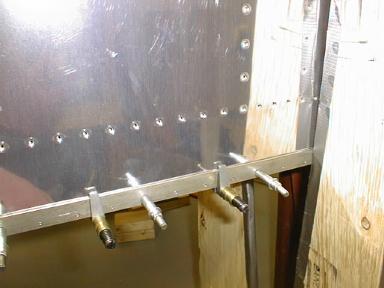
I just got back Friday night from two weeks on the road. Since the last update, I finished fitting the left aileron, fitted the left flap, and fitted both aileron gap seals. The first attempt at fitting the left aileron gap seal didn't go very well. I was concerned about getting the aft edge of the upper wing skin nice and straight, so I clamped a 4 foot long level to it, to force it straight. Well, with the level clamped in place, I could no longer check that the part of the skin that extended aft of the rear spar was still nicely aligned with the rest of the skin. After I drilled all the holes I removed the level, and has horrified to find that the weight of the level had put a curve in the aft edge of the skin, and it no longer was properly aligned with the rest of the wing skin. So, I had to drill some more holes in the gap seal, get it all lined up, and redrill it to the rear spar. The second go came out OK. I've got a bunch of extra holes in the rear spar now, but they are near the centre, where the stresses are at a minimum, so it will be OK.
I've got to deburr the aileron gap seals, countersink the flap braces, prime them (and the aileron push rods), rivet the flap braces in place, rivet the aileron push rods, do a final inspection myself, and then I am ready for the official inspection I need before I can put the lower wing skins on. Almost there :-)
Fitted the left aileron
- Details
- Written by Kevin Horton
- Hits: 3435
I did the initial fitting of the left aileron tonight, and drilled pilot holes where the bolts will go between the aileron hinge brackets and the aileron spar. Tomorrow I will do a final check of the alignment of the aileron to the wing, and then drill out the holes to the final size.
Upper skins on left wing riveted
- Details
- Written by Kevin Horton
- Hits: 3395
Terry and I riveted the upper skins on the left wing today.
Drilling flap to wing
- Details
- Written by Kevin Horton
- Hits: 4066
I drilled and clecoed the flap hinge to the right wing tonight. Turned out pretty much perfect, at least as far as I can tell right now.
 The inboard end of the flap (bottom left part of picture) is sticking out because the fuselage is tapered where the wing mounts. It gets narrower the further you go aft. The space between the wing and fuselage is of variable width, but it is covered by a fairing, so you never see it. The flap doesn't get covered by the fairing, so it has to be longer to come right up against the side of the fuselage.
Drilling the flap brace
- Details
- Written by Kevin Horton
- Hits: 6332
When I started fitting the flap, I ran into a gotcha that has been reported by many other RV-8 builders. On earlier models, you can adjust where the flap brace mounts on the rear spar to get the flap in the correct vertical position. On the RV-8, you can't make that adjustment because the flap brace and rear spar come predrilled. The flap brace is a bit too big as delivered, so it tends to push the flap too low with respect to the rest of the airfoil. I had to trim about 0.050 inches off the trailing edge of the flap brace to make things work out right. That didn't' leave quite enough room for the flap hinge, so I had to chamfer the forward edge of the flap hinge so it wouldn't hit the bend in the flap brace.
 Here you see the drilling jig I made to help drill the holes where the flap hinge mounts on the aft edge of the lower wing skin. I wasn't brave enough to drill the holes freehand.
Fitting right aileron
- Details
- Written by Kevin Horton
- Hits: 4357
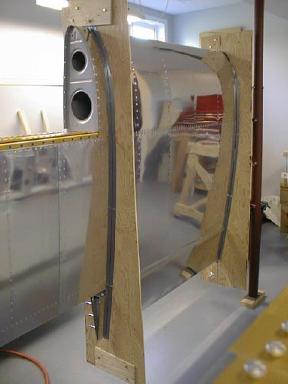
The ailerons and flaps must be mounted to the rear spar so that they are properly aligned with the rest of the wing. They must form a nice smooth continuation of the wing surface. Van suggests to make some two piece wing wing profile templates from plywood, and to use these to help get the ailerons and flaps in the right place. Here you see the right aileron in position.
 Once you get the aileron in the right location, you are supposed to clamp the hinge brackets to the aileron and drill the holes the hold them in place. I clamped things in place, but then couldn't get a good shot at them to drill the holes. So, I made a million measurements that basically confirmed that they should be located exactly as per the plans, then drilled everything on the bench. I held my breath when I put it all back in the templates, but everything worked out fine.
After mounting the right aileron, I went on the road to Brazil for two weeks to fly the EMBRAER EMB-145 Regional Jet. It was a fascinating trip, beautiful country, and great people.
After I got back, I made the various spacers that fix the aileron in position laterally, made the pushrod that goes from the aileron bellcrank to the aileron, and pinned the aileron in the neutral position.
