Aft Fuselage Bulkheads
- Details
- Written by Kevin Horton
- Hits: 3317
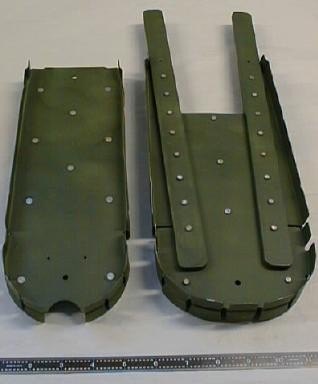 Here are two most aft bulkheads (F-811, and 812).
The horizontal stabilizer rear spar attaches to the two bars that stick out of the top of the F-811 bulkhead.
I've got to prime and rivet the firewall (F-801 bulkhead), and finish the wing spar carry through (F-802 bulkhead), then I need to get a fuselage jig, which means I have to convert the garage into a workshop, because the fuselage is too big to get out of my basement if I built it there.
Seat Ribs
- Details
- Written by Kevin Horton
- Hits: 3647
Here are the seat ribs after drilling and clecoing them together. You are looking from the right side.
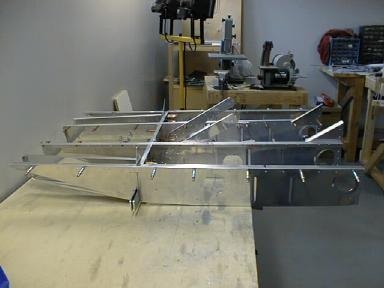 The seat ribs form the structure under the cockpit floor. They support the seats, the seat belt attachment points (front seat only), and the control stick mounts. They also connect the carry through structures for the main and rear spars.
The end on the right side of the picture will be riveted to the back of the main spar carry through structure. The aft spar carry through structure can be seen about two thirds of the way from the right side of the picture. The little pieces stick out toward the camera are where the rear spar attaches.
The pieces running diagonally up from left to right are where the front seat lap belt attach. As of today, I've got all of these parts deburred except four, then I will prime them and rivet them together.
Fuselage Bulkheads
- Details
- Written by Kevin Horton
- Hits: 3210
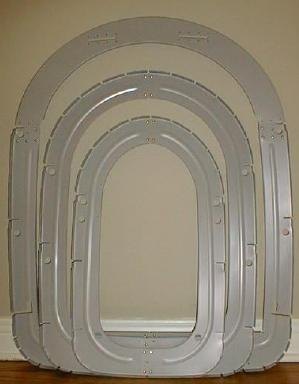 Here are three of the six aft bulkheads (F-807, 808 and 809). Each comes in two or more parts that must be riveted together.
The largest one goes right behind the rear seat. The horizontal slots near the top are where the shoulder harness comes through. The holes in the sides are for running electrical wires, rudder cables, etc.
I had these done a long time ago, but never got around to taking any pictures til today.
Two of the remaining aft bulkheads are all prepped for priming, then I'll rivet them together.
Dimpling wing skins with mammoth pneumatic squeezer
- Details
- Written by Kevin Horton
- Hits: 5911
Two local RV-6A builders (Marc Guay and John Lukes) made a neat attachment for a pneumatic rivet squeezer to allow it to be used to dimple large skins.
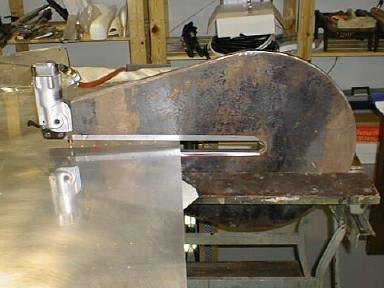 It was made from a piece of 3/4 inch steel plate about 32 inches long by 20 inches high. It is essentially a very large squeezer yoke, with a 20 inch throat depth.
I clamped it in a Work Mate table (also graciously loaned by John Lukes), and used a piece of 1/4 inch plywood with a 1/2 inch hole (to go around the male dimple die) as a table. This thing does super job! Quick, perfect dimples. Thanks John!
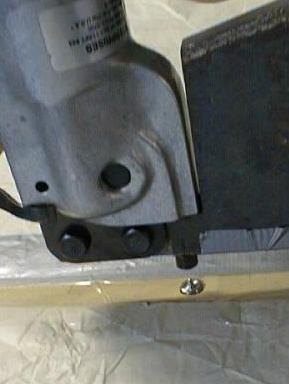 Here is a close-up of the dimple dies and the plywood table.
Landing and Taxi Lights
- Details
- Written by Kevin Horton
- Hits: 5329
The basic aircraft design does not include provisions for landing or taxi lights, but several builders have produced installation kits that they sell.
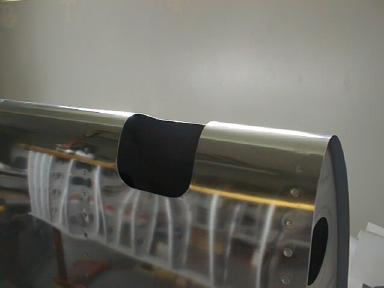 I bought two landing light kits from Duckworks, owed by RV-6 builder Don Wentz, a.k.a the "Duck". The Duckworks lights mount in the most outboard bay of the leading edge. A template is provided to show where to cut the hole to let the light out. An automotive quartz-halogen driving light mounts in an adjustable bracket which attaches to the ribs at each end of the bay.
I am extremely impressed with the quality of the parts, and the instructions are clear and complete. Van should hire Don to rewrite his construction manual.
Here you see the bottom side of the outboard end of the left leading edge. Don provides a paper template to use to draw the cut line on the skin.
Riveting fuel tank ribs
- Details
- Written by Kevin Horton
- Hits: 3616
I started riveting the ribs in the fuel tanks. I need to let the proseal cure between riveting sessions, which takes several days. I got three ribs done on the right wing on 18 Apr 99, and hope to do several more on 25 Apr 99. Then I go on the road again for a few weeks, so the project takes a time out.
