Forward baggage compartment
- Details
- Written by Kevin Horton
- Hits: 5822
The RV-8 has front and rear baggage compartments, to help in keeping the centre of gravity where you want it. You put the heavy stuff in whatever compartment you need to. I started working on the front baggage compartment today. It is is right behind the firewall, over top of where the pilot's feet are. On the right side, there is a 14 inch deep well that extends all the way down to the floor. The baggage compartment is about 14 inches from front to rear, and about 14 inches high in the centre.
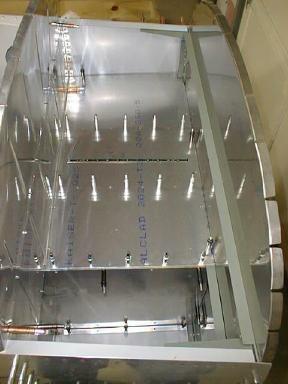 The baggage compartment floor and the deep well at the right side are removable so you can do maintenance in the rudder pedal area by sticking your head into the baggage compartment. So, that means I've got to install another gazillion nut-plates :-( That'll keep me busy for a couple of nights.
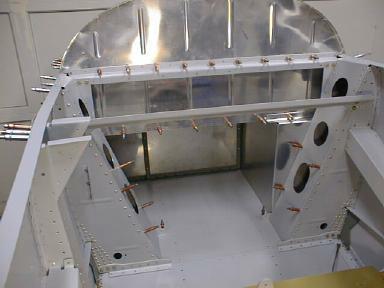 Here we are looking forward from the cockpit area. The large semi-circular piece of unpainted aluminum is the back wall of the baggage compartment. Below it, to the right ahead of the landing gear box, we can see the deep well in the baggage compartment.
Throttle quadrants
- Details
- Written by Kevin Horton
- Hits: 5968
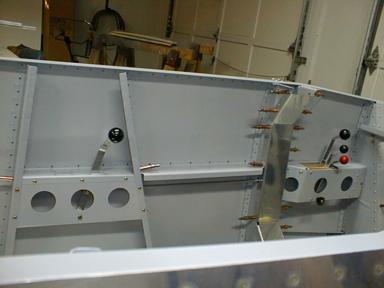 The last week, I've mounted the flap actuator bracket, drilled and clecoed the covers that hide the flap actuator, and drilled and clecoed the right front console (used to mount switches and circuit breakers. Last weekend, I worked on the front and rear throttle quadrants. The basic design only has a front throttle, but I bought an optional rear seat throttle. The rear throttle is connected to the front one with a push-pull rod.
Monday afternoon I painted a huge pile of parts, so I can rivet a bunch of little stuff this week.
Three steps forward, two steps back...
- Details
- Written by Kevin Horton
- Hits: 5340
Last week, I installed the weldment that goes between the front and rear control sticks (the dark thing in the bottom left of the picture). I also drilled and clecoed the arm rests on each side of the cockpit. I partially installed the flap actuator, but I need to get a battery so I can run the actuator to make sure I've got the mounting bracket properly located before I drill the holes.
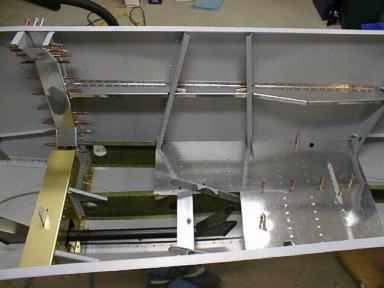 Recently, it has sort of been three steps forward, and two steps back. I dove back into the project, after getting back from Wichita a week ago. But, I was in a bit too much of a rush, and did some major cosmetic damage to the bulkhead behind the rear seat (F-807) while I was riveting. I tried to touch up the damage, but everything I did just made it look worse. It wasn't a structural issue, but it was really horrible looking, and I would have seen it every time I got in the plane. Plus, passengers would have seen it, and it would have given them cause to worry about the workmanship. Luckily, the upper third of the F-807 bulkhead is a separate piece, so, I bit the bullet and drilled out the rivets. I threw that part away, and borrowed a new one from Mark Richardson, who is also building an RV-8. He has his fuselage kit, but he is still working on his wings. He has been kind enough to loan parts to another builder and me.
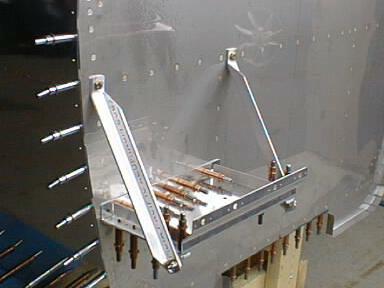 The last couple of days, I've been working on the electric aileron trim, and the battery tray. The battery tray can be mounted on the front side of the firewall, or behind the rear baggage area, depending on where you need it for centre of gravity reasons. Van recommends mounting it on the firewall for the engine and prop combination that I plan to use, but I also drilled the holes behind the rear baggage area, so I can move the battery back later if need be.
Saturday, there was a Van's Air Force-Ontario Wing fly-in at Smiths Falls, with about a dozen RVs in attendance. Terry Jantzi took Jim Manton and I up for rides in his gorgeous RV-6. It is so clean you would never guess he has flown almost 800 hours in the three years since his first flight. Thanks Terry!
Cockpit Floor Boards
- Details
- Written by Kevin Horton
- Hits: 4734
I just got back this afternoon from six days in Wichita. Before heading down, I finished prepping the cockpit floor boards, primed all the parts, and riveted them together.
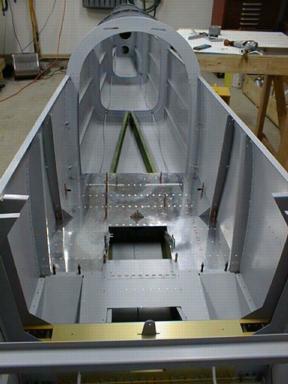 Here we see the cockpit area, looking aft. The passenger foot wells can be seen just behind the gold coloured wing carry through structure.
You can also see the rudder cables running through the aft fuselage.
Back from Roswell, progress...
- Details
- Written by Kevin Horton
- Hits: 4316
Two days after getting the fuselage out of the jig, I went to Roswell, NM for 10 days to do take-off and landing performance flight testing on the Canadair Regional Jet series 700. It was great flying, but it was frustrating to have to put the fuselage on hold again. But, every cloud has a silver lining - thanks to Larry Pardue and Brian Denk, I was able to get rides in an RV-6 and RV-8 while I was there. Wow! I'm all fired up and anxious to get building. I hope to be back in town for at least a couple of weeks, so I want to make progress on the fuselage.
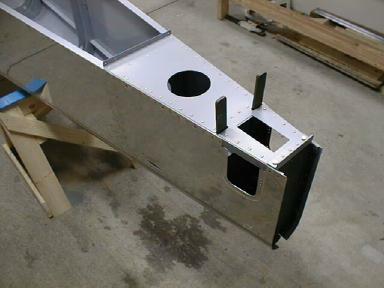 After getting back from Roswell, I fabricated, drilled, deburred and primed the various angles and spacers needed to install the F-819 Aft Deck. The Aft Deck is a thick, flat piece of metal that sits on top of the longerons at the aft end of the fuselage. It forms the surface that the horizontal tail mounts on, and ties the longerons together to give the fuselage some torsional rigidity.
Jim Manton an old friend from when I was in the military, is moving to Ottawa, and is staying with us for a few weeks while he looks for a house to buy. He is interested in building a plane someday, so he has been helping me. He has to crawl up the learning curve with metal working tools, reading plans and instructions, etc, so it is a bit like being helped by a five year old. He is very enthusiastic, but you have to keep a close eye on what he is doing. He helped me prep the cockpit floor boards.
The Fuselage is out of the jig!
- Details
- Written by Kevin Horton
- Hits: 3800
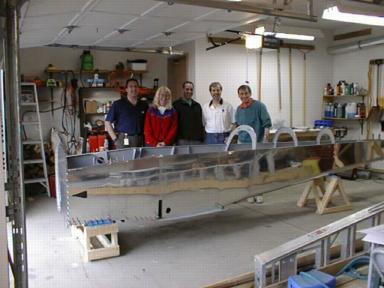 Several co-workers came by after work today to help me pull the fuselage out of the jig and flip it upright. Thanks, Jim, Robin, Michel and John!
