Switch Console Labels
- Details
- Written by Kevin Horton
- Hits: 2922
 Today I attacked the labels for the switch console on the right side of the cockpit. It took a few attempts to sort out a method that allowed me to place the label exactly where I wanted, at 90 degrees to the edge of the console. But it was worth the effort, as I am very happy with the result. I ended up using label tape with a matte finish, and it is difficult to see the clear tape unless you really look for it.
Draft Flight Test Program
- Details
- Written by Kevin Horton
- Hits: 4292
I spent a few hours putting together a list of test points for the flight test program about two years ago, then left it alone. I need to get back at it over the next few months. I'm sure there is a bunch of stuff missing from my list, but you can see the current version further down.
I left the spins out of this list. I initially decided to use the same list of spin tests that would be required for a FAR 23 approval. There is a huge matrix of variables - left and right spins, starting from wings level, left turns and right turns, power at idle and max, ailerons neutral, left and right during the spin, elevator released before or after rudder during recovery, etc. With and without a fuel imbalance. 6 turn spins with flaps up, and one turn spins with flaps at 1/2 and fully extended. Put all the combinations of variables together and it works out to 72 spins at aft CG. But, you don't want to start at aft CG though - you should start at forward CG, then mid CG, and finally aft CG. So that means each test point gets done three times, for 216 total spins. Holy Crow. The FAR 23 spin test programs I had done in the past relied on company test pilots to do the bulk of the spins, and I just did a subset of the worst case points. 216 spins seems like major overkill - I don't really want to do that many, so I need to work on how to rationalize the list of spin tests.
The current version is a very large flight test program. I am not suggesting that all the test points are necessary. I enjoy flight testing, I am interested to learn the fine details of how my aircraft performs and handles, and I am interested to see how it compares against the FAR 23 criteria (design requirements for type certificated light aircraft). So I modeled large portions of my testing on the testing that would be conducted to show compliance to FAR 23. FAA Advisory Circular 23-8B Flight Test Guide for Certification of Part 23 Airplanes has much more detail on how to conduct many of the flight tests required for FAR 23 compliance.
Trim Indicator Labels
- Details
- Written by Kevin Horton
- Hits: 3459
I spent several hours this weekend working on the wing tips. I finished the plate nuts on the right wing tip and fitted the rib that supports the wing tip trailing edge. The left wing tip trailing edge may require a bit of tweaking after the wings are installed and I fit the ailerons. So, I can't fit the tip rib yet, and I need to leave a few holes without plate nuts to make it easier to put the wing tip on and off. So, I'll just do two-thirds of the plate nuts now, and finish the rest after I do any trailing edge work.
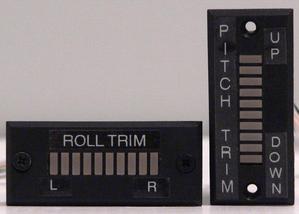 I played around with my Brother P-Touch label maker. It took several attempts, but I finally got some nice labels for the pitch and roll trim indicators. Tomorrow I'll attack the labels for the switch console on the right side of the cockpit.
The clear tape for the labels is slightly visible, but it isn't quite as bad as it looks in the picture.
Annunciator Lights Control
- Details
- Written by Kevin Horton
- Hits: 6006
I spent way too much time trying to puzzle out how to best control the 28V annunciators that I will use. I have a lead on how to make a 28V DC to DC converter, but I need a way to allow a lower voltage to be used for night operations. This is complicated by the fact that the signals that determine when the annunciators should be on are all HIGH = ON. I.e. I have four 12V signals that determines when to send power to the annunciators, but I will only have one 28V power supply. This would have been a lot simpler if the annunciators where controlled by grounding them.
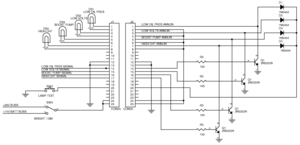 I posted a question on the AeroElectric-List. No one answered on the list, but the guy who sold me the annunciators replied privately with a suggested schematic which will do exactly what I need.
Note - the annunciator labels in this schematic are not exactly the same as the ones I have. But my annunciators will be wired in the same way.
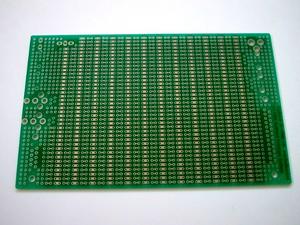 I went out yesterday and picked up the components I need. Now I have to figure out how to lay them out on the BusBoard prototype breadboard. I bought the BusBoard-3U-CONN, which has provisions for a DB-25 connector that will allow the board to be removable. I'm going to be on the road for several nights this week, so hopefully I will have enough time to puzzle out how to lay this thing out. I should be able to lay the components out in a small part of this board, then trim it down to a more manageable size.
Misc Progress
- Details
- Written by Kevin Horton
- Hits: 3705
I had last week off, so I tried to get a fair bit of work done on the aircraft. I fiddled around with the instrument panel to sort out the final fit with some of the instruments, then bolted the fixed panel in place. I took great pleasure in putting it in place for the final time, as it has been in and out more times than I can count. It feels great to be doing a task for the last time. I installed the switches on the left side of the fixed panel, and the head set jacks on the right side, and secured the wiring. I took great care to get everything "just so", as it was going in for the last time.
I had the instrument panel labels done at a silk-screening shop, as it is the most visible part of the cockpit, and I wanted them to look perfect. But there are many other labels required on various items in other parts of the cockpit, and it isn't practical, or cost effective, to have everything done professionally. So, I needed to come up with a way to make some good looking labels. I spent a few hours going through RV-List archives, and doing on-line research. I ended up purchasing a Brother P-Touch 2600 labeler. It can work in a "stand-alone" fashion, or it can be connected to a computer to get even more control over what it prints. It prints labels on laminated tapes, with a clear strip over the label to protect it. And it will do black or white text on clear labels. It took a few hours of experimenting to figure out how it worked, but it will do the job. 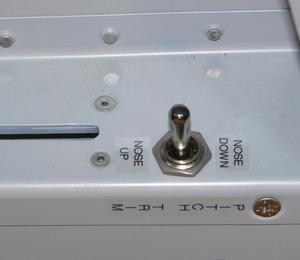 I tried making the rear seat pitch trim labels, and they turned out pretty good, except the shiny clear tape is a bit more visible than I wanted. I've ordered a different cartridge with matte surface clear tape, so hopefully this will be better. The picture makes it look like these labels are on crooked, but that is just the effect of parallax.
In the spirit of doing things for the last time, I decided to do the four rivets that attach the bottom part of the fixed panel to the fuselage. I was quite put out to discover that there wasn't enough clearance for the bucking bar, and I had to remove the head set jacks and several switches. I did the riveting, then put the switches and head set jacks in for the last, last time (I hope).
I spent some time recording a block of raw serial data output by the Garmin GNS 430, in aid of sorting out the program to record its data. It always amazes me that this thing locks onto the GPS constellation from inside the garage. That low power GPS signal gets through a bunch of snow on the roof, the shingles, plywood, insulation then the drywall in the garage ceiling. Magic.
I spent way too many hours driving around to electronics shops looking for a suitable bulkhead plug for the flight test event marker connection. I wanted something that went in a circular hole, was small, light, inexpensive and easy to install. I eventually found a nice round five-pin audio connector that will do the job. I drilled the hole for it this morning. The hardest part was cleaning the swarf out of the landing gear box afterwords. I've discovered that the cover for the male part of the connector is broken, so I need to head back to get a replacement (it was in a surplus parts bin, and I obviously didn't look at it closely enough). Next I'll need to solder the wires to the bulkhead connector and install it.
Yesterday evening and much of this afternoon were devoted to taxes. Ugh.
Then I spent a few hours reviewing my draft flight test plan, and started to create test cards for the ground testing and first flight.
Canopy Sill Painting
- Details
- Written by Kevin Horton
- Hits: 3780
This morning I braved the snow storm (1 foot of snow predicted) to go get some Sharpie Ultrafine markers, as all the ones I had were on their last legs. I messed around with the wing tips, but didn't really accomplish much.
This afternoon I decided to install the fixed part of the instrument panel, for what I hoped would be the last time. I was quite looking forward to putting it in, and never taking it out again. I dimpled the holes on it where the top skin attaches, then wrestled it in place. Then I noticed that the unpainted forward part of the canopy sill would be right up against the instrument panel. It would be a real trick to paint that canopy sill without getting paint on the instrument panel, so I had to pull the panel out yet another time.
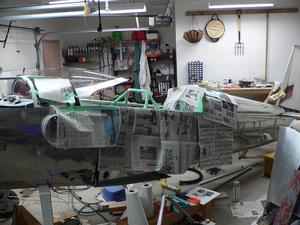 The canopy sill would ideally have been painted before I installed it, but I had no idea what colour to use. I studied it today, and decided to paint the parts that are visually inside the cockpit the same gray as the rest of the cockpit. The parts that are outboard of the canopy slider rail will eventually be painted the same gold colour as the outside of the aircraft, I think. The front portion, from the canopy bow forward, is visually in the cockpit, so it will be gray
I discovered I had very little masking tape left, so I went out in the storm again to get some more. Two trips into town in one day - not efficient. Arrgh.
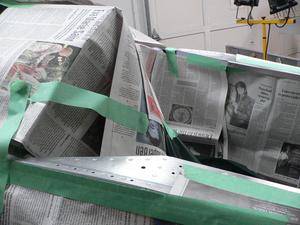
I removed the canopy rails, and masked the whole way around the canopy sills. Lots of paper and tape. The painting job was almost stymied by a spray bomb that just dribbled, but I did a huge amount of shaking, and eventually turned the can upside down to get a clear shot of gas to blow the crap out of the nozzle.
