Rear Seat Riser Complete
- Details
- Written by Kevin Horton
- Hits: 4631
We had an absolutely beautiful weekend here, which made it much more pleasant to work in the garage. It also meant that there are a few spring chores to do, which cut into the available building time. I had a visit from an RV-7 builder today, so that motivated me to finally clean up the garage a bit. I'm sure Steve and Denise thought it looked like a disaster area, but it really does look better than it did a week ago. :)
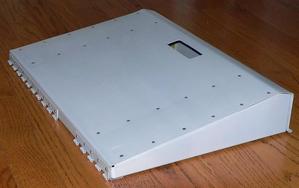 Yesterday I took advantage of the warm weather to go outside and paint some parts. I also riveted the hinges that secure the rear seat riser to the cockpit floor. Today I finally riveted the rear seat riser together. Some of the rivets were hard to get at, and I screwed one of them up so badly that I had to drill it out and use a larger one, but in the big picture it came out very nice.
I've also spent some time working on the test cards. I've got test card templates completed for over 85% of the test points that I have identified to this date. I'll pick away at this over the next few months.
Bill Randolph - Around the World by RV-8
- Details
- Written by Kevin Horton
- Hits: 4204
I stumbled across an on-going story about another RV-8 builder that you may be interested in. 76 year old Bill Randolph is in the midst of an around-the-world flight attempt in his RV-8. He built the plane himself, and added fuel tanks in the rear cockpit and in one or both baggage areas. He left his home in California on March 9th, and headed south-east to Brazil. He crossed the Atlantic from north-eastern Brazil to Dakar in Africa. He got stuck in Dubai for a few days, went through India, and is now stuck in Thailand, after blowing two tires on landing. He will be there until new tires and tubes arrive.
You can read the background here and here. His EAA chapter is posting updates on Bill Randolf's progress, as news arrives from his wife.
Slow Week
- Details
- Written by Kevin Horton
- Hits: 3246
It was a bit of a slow week from a project perspective. I spent some more time with Terry, watching two DVDs, etc. The project took a bit of a hit, but we need to spend some time together before I go into major travel mode again.
Spring has definitely sprung - we had a very nice weekend, and I opened the garage door for the first time this year. The nice weather made it a lot more pleasant to be working in the garage, but I felt I needed to clean it up a bit, as it looks a disaster area from outside.
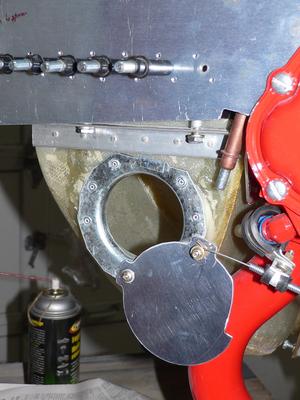
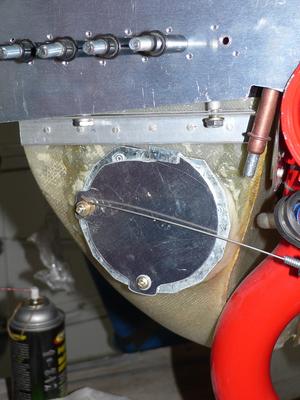 Yesterday I finally finished off the alternate air door installation. Van's design is very simple, light and cheap. It is a much better design than I was thinking of doing. I just have to come up with a label for the knob on the push-pull Bowden cable.
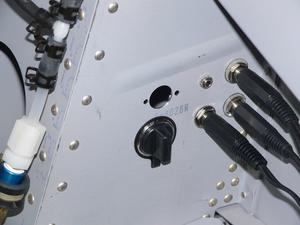 Today I ran the wires and installed the receptacle for a cockpit aux power plug. I'll use it to provide charging power for my iPod, a handheld GPS, handheld COM, and the laptop that will record flight test data, etc. I've got it wired to the battery bus via a 10 amp fuse. So, it will be live even if the battery master is OFF, which means I can use it to connect a trickle charger if needed. And if I ever have a smoke in the cockpit event and have to kill the battery master, I can use the aux power to help run a handheld COM, etc.
The three large jacks to the right of the aux power plug carry the serial data from the EFIS, Engine Monitor and GNS430 GPS. The little jack allows my iPod to feed music into the intercom. The hole above the aux power receptacle will have a multi-pin plug that will carry various discretes that will also be recorded on the flight test data.
I was in and out of the rear fuselage and cockpit numerous times today, as I ran the wires for the aux power plug from the battery bus next to the battery. My back eventually started complaining, so I downed tools and worked on the flight test program and test card generation program. Things are coming along nicely here, but I still have lots of work to do.
Riveting Fiasco
- Details
- Written by Kevin Horton
- Hits: 3075
We spent Friday afternoon and Saturday in Montreal, as Terry had a continuing education course there on Saturday. We had a very nice dinner Friday night, and I worked on the automatic flight test card system while she was at her course. I added a section that calculates the weight and balance, and creates a graph showing the weight and CG at take-off and with all fuel consumed.
Today I finished off as much of the left wing tip as I can do until final assembly. They I put the right console switches back in the console, carefully adjusting the amount that each switch protrudes as I installed it. I tidied up the wiring under that console, then went to screw it in place. I noted that I couldn't permanently install it until I riveted the F-804N channel that finishes of the F-804 bulkhead. I studied that part for several minutes, and couldn't see any reason why I couldn't rivet it in place now, so I got out the pop riveter and had at it.
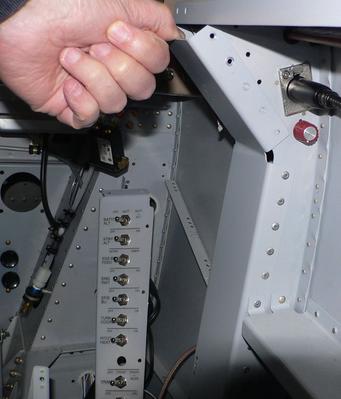 I was almost finished riveting the right F-804N in place, when I noted three bolt holes that will help attach the canopy bow. I had just closed off the access I would need to installed the nuts. Blast!
I said a few choice words, then started drilling out rivets. The F-804N is bent into three sections. I got lucky, and found that I only had to drill out the rivets in the upper section. There is enough flexibility that I should be able to get at the nuts by flexing the F-804N inwards.
After that fiasco, I downed tools, and had a beer. Today's lesson - don't rivet anything in place until you absolutely have to.
Annunciator Lights Control - Round 2
- Details
- Written by Kevin Horton
- Hits: 4483
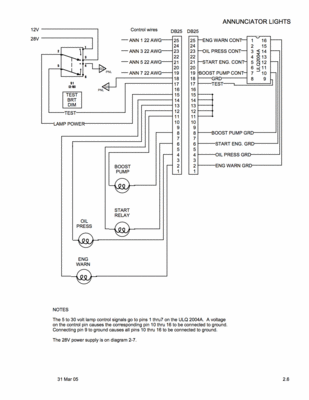
I had planned to use four transistors, with resistors and diodes, to control the four annunciator lights. But Don Goris suggested that the ULQ-200X Darlington arrays would be a better choice. I did some research, and learned that this approach would yield a simpler architecture, with less soldering required. I ordered a ULQ-2004A, and it arrived two days ago.
The ULQ-2004A replaces all the transistors, resistors and diodes from the original schematic. The BusBoard-3U-CONN circuit board I will use has a very convenient layout, so that soldering in the ULQ-2004A makes all the connections from it to the DB-25 connector. I will just have to solder in the jumpers that connect the four annunciators to their power lines. And I need to trim the board down to size before I start. I will only need a tiny corner of the original board.
Yesterday I read the spec sheet again to confirm my understanding of how to hook this up, then I put it in a solderless breadboard, got out my patch leads and hooked it up to some batteries and my four annunciators. It worked! The 12V control signals caused the ULQ-2004A to control the ground path from the annunciators, allowing me to run them from 28V. And, pin 9 acts as a test switch - it I connect pin 9 to ground, all four annunciators light.
Now I need to figure out whether I should fabricate an enclosure, or whether it is OK to simply have the circuit board sitting exposed. It will probably eventually get some dust on it if it sits enclosed, but I don't know whether that is a problem or not. If I need an enclosure, I have no idea yet how to make one.
Automatic Generation of Flight Test Cards
- Details
- Written by Kevin Horton
- Hits: 5892
I started fiddling around trying to create a flight test card template a few days ago. I originally planned to use a spreadsheet, but I found that the fact that the column widths were the same for the whole document was a major constraint. I then tried a word processor, but the obvious need for a lot of cut and paste, and the difficulty in getting the auto number to work properly became a frustration.
I then decided to experiment with something completely different. I used LaTeX to create my POH. And I've been playing around with Perl scripts to run my flight test data gathering. LaTeX files are just text files, and perl is very powerful at manipulating text files. So why not use perl to automatically create LaTeX test cards?
It only took a few minutes to move my list of tests into a MySQL database. Then I created a LaTeX template for the parts of the test card that will be the same for every flight. I added a database table to hold data for each flight (date, crew, purpose, etc). And I added a field in the test point table to hold a pointer to a LaTeX template for that type of test.
The basic flow is:
- I decide which test points I will do on the next flight, and put the flight number in the test point database table.
- I put the flight details in the flight table (date, crew, test purpose, etc).
- I run a perl script which pulls the details for the flight and uses them to fill in the blanks on the first page of the test card. It then searches the database for the list of tests for that flight, grabs the templates for each type of test, and populates the template with the details of that test point from the database (speed, altitude, power, flap angle, etc).
- The perl script writes a complete LaTeX file, then runs pdflatex to create a PDF file of the test card, opens the test card so I can inspect it and print it.
It took about four hours of work to get the prototype working. I need to create a bunch more templates for different types of test. But, once that is done I will be able to create a test card in just a few minutes. No more cut and paste errors.
