Windsceen Fairing Layup
- Details
- Written by Kevin Horton
- Hits: 6054
I've taken the rest of the week off to get some work done on the airplane.
Yesterday I set out to lay up the fibreglas for the windscreen fairing. I thought that it would take two hours of work in the morning to finish the prep work, then perhaps two more hours in the afternoon to lay up the fibreglas. Should be an easy day. :)
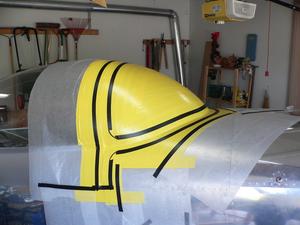 I didn't get done the prep work until 3 PM. Seeing that things were taking a lot longer than planned, I took a break to have a quick early dinner. I started trying to lay up the fibreglas at 3:30, but quickly discovered that my can of epoxy hardener was almost empty. I opened a new can and moved the epoxy pump to it. But I couldn't get the pump to prime properly. It keep on pumping air, then it would pump hardener for a stroke, then more air. I quickly went through five aborted attempts to mix up a batch of epoxy resin before admitting defeat.
I was trying to use the slow hardener, to get a slow cure time to allow me to use larger batches. I pulled out my can of fast hardener, and it worked fine. But I had to make small batches, which meant more time mixing, and less time working.
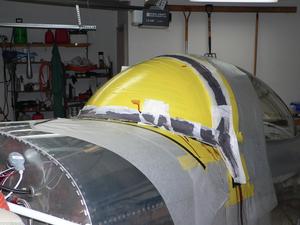 Things went well enough once I got going, but it took a long time. I didn't get done until 8:45 PM. The cold Heineken I had after I finished tasted great!
Here you see the complete layup, with peel ply on top to soak up the excess resin. The peel ply also removes the amine blush when you pull it off.
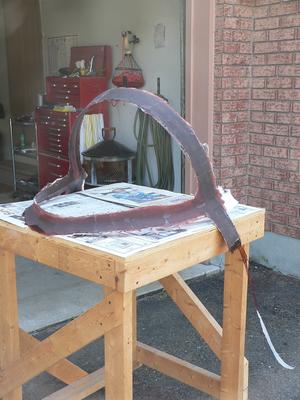 After lunch today I checked the layup, and it seemed to be completely cured. So I screwed up my courage and decided to pop it off. It was pretty much impossible to get a grip on anything, so I eventually used the edge of a chisel to get between the lower edge of the layup and the vinyl tape. It came off without too much difficulty once I got it started.
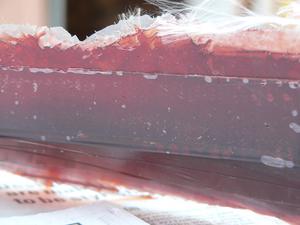 You can see a few small voids, but this part doesn't take too much load, so they don't worry me. The idea of using several layers of electrical tape to mark the planned edge worked well. There is a very distinct ridge line that I will use as a trim mark. I used four layers of electrical tape, but three would seem to be more than sufficient.
Windscreen Progress
- Details
- Written by Kevin Horton
- Hits: 6767
I'm making slow progress on the windscreen. I've spent a lot of time gradually trimming the lower edge along the sides to get it to be just clear of the skin. I figure that it the skin may put stress on the edge of the plexiglas if they are touching. I think it is better to have the loads from the skin to the plexiglas go via the fibreglas fairing, as they will be distributed over a larger area, rather than being concentrated on the edge in the places where it is touching the skin. This has been a painfully slow goal to achieve though, as every time I trim a bit more off the sides that allows the plexiglas to move inwards a bit more, and the skin is higher the further inwards you go. I finally got the final trimming and edge smoothing done this morning.
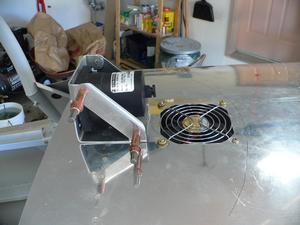 I have been planning to install a defrost fan, as other builders report that it is needed in cold weather ground operations to keep the windscreen from frosting up on the inside. I purchased a 90 mm computer "muffin fan" to mount under the top skin just behind the front edge of the windscreen. I had planned to install it later, but I realized that the presence of that large hole might change the contour of the front skin a bit, which could affect the fit of the windscreen fairing. So, yesterday I cut the hole for the fan.
Before cutting the defrost fan hole, I decided to do some quick and dirty electro-magnetic interference testing, just to be sure that it would be compatible with the rest of my avionics. I installed the GPS, COM, intercom and EFIS, as they were the most likely victims. I confirmed that the running fan had no effect on any of those items, except that it perturbed the EFIS's internal magnetic heading flux valve. But I will be using a remote flux valve, so this is of no import.
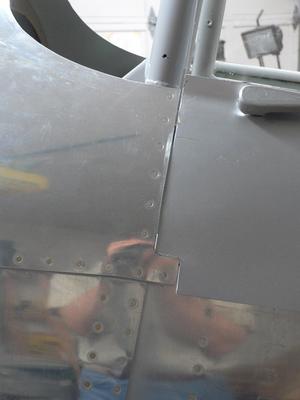 I had partially trimmed the aft edge of F821 forward skin where it meets the canopy skirt, but I still had some interference. I finally realized that I was going to have to extend the windscreen fairing downwards to extend over the front edge of the canopy skirt, so there was no reason to try to keep the aft edge of that skin. Today I trimmed the aft edge so it no longer hit the canopy skirt.
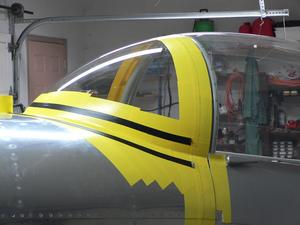 I started covering the windscreen, forward fuselage skin and front of the canopy with 3M 471 vinyl tape. This stuff is a bit expensive, but it is great for this job. It comes in many widths up to 4" wide, but the 2" width I've got seems to be about right. It sticks well, but doesn't leave any residue when it comes off. I stole an idea from someone else and will use electrical tape to mark the planned edges of the fairing. This will allow me to see how much area I need to cover with the fibreglas. And I put several layers of the electrical tape on top of each other to make some thickness. This will make a visible trim line on the bottom of the fairing that I can use to trim it after I pop it off.
Tomorrow I'll finish covering the windscreen, etc and lay up the windscreen fairing.
Windscreen Near Disaster
- Details
- Written by Kevin Horton
- Hits: 3664
I decided to use some sort of release agent underneath the fibreglas when I do the windscreen fairing, so I can pop it off to finish it. This will make it a lot easier to get nice smooth edges. I'll bond it in place later. John Huft has a good description of what I plan to do.
I used electrical tape as a release agent when I did the canopy skirt, but I wasn't completely happy with it, as it leaves a bit of a greasy residue when you pull it off. Not a big deal on the fuselage where I used it before, but I hope to avoid that on the canopy. Several other builders reported good results with 3M 471 vinyl tape. Fibreglas doesn't stick to it, it doesn't leave much residue when you remove it, and it comes in widths up to 4 inches. I drove to all the major hardware stores in the Ottawa area, and no one seems to carry this stuff. I sent 3M an e-mail on Friday - hopefully they will give me a hint as to who might carry the stuff locally. There are a multitude of places I can order it on-line, if it comes to it.
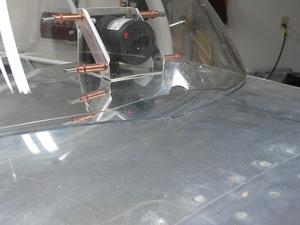 Near Disaster - I was cleaning up the edges of the windscreen today on a portable table in the driveway. It was a beautiful day, sunny, with almost no wind, and I didn't want to have the plexiglas shavings in the garage. I turned to walk into the garage, when a freak gust of wind blew the windscreen off the table onto the driveway. I rushed over, and saw a big chip of plexiglas missing, with a small crack. Arrgh!!
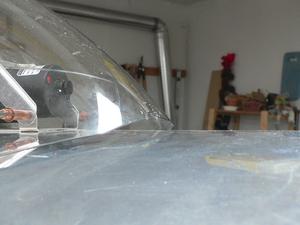 Fortunately the damage occurred on the bottom edge, and it didn't extend too far in. The windscreen fairing will cover the damaged area.
I trimmed the edge to remove the part with the crack, and to smooth out where the chip shattered off. And, to cap it all off, I now have a long rub line where the plexiglas slid along the edge of the table as it blew off, and several small gouges where it landed on the pavement. I'll have to purchase a Micro Mesh plexiglas polishing kit, and invest a few hours of sweat.
Baggage Bay Door 99.9% Complete
- Details
- Written by Kevin Horton
- Hits: 4256
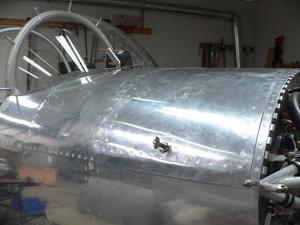 I got the forward baggage bay door locking pin receptacles mounting holes drilled earlier in the week. Today I tweaked the edges of the door outer skin a bit to try to improve the fit to the fuselage. It is as good as I can get it without acquiring a metal shrinker. I need to get some longer mounting screws, then I can mount the door pin receptacles for good.
Windscreen and Baggage Bay Door Progress
- Details
- Written by Kevin Horton
- Hits: 4315
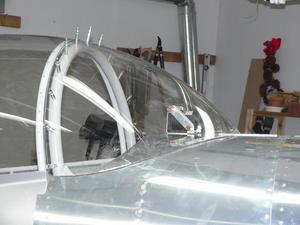 Earlier in the week I got the windscreen trimmed enough to sit properly against the roll bar, and drilled the rest of the holes where the screws will go to secure it. The holes aren't drilled full size yet - that should happen soon. I finally decided to use some carbon cloth to reinforce the fairing along the top. There is a risk that someone could grab it when getting in or out of the aircraft, and fibreglas could fail. I should have made this decision months ago, so I could order the carbon cloth. But I only decided last week. It took some hunting around, but I eventually found some at Phil's Foils, a local custom sailboat centerboard and rudder maker.
I was ready to start working on the windscreen fibreglas fairing, when I realized that the hinge pin for the forward baggage bay door went in from the rear. I wouldn't be able to get the pin in or out if the windscreen was installed. I took a look at modifying things to be able to put the hinge pin in from the front, but I already had a big cutout to get the pin out on the aft side, and I didn't want a second potential water leak on the front. I wish I had thought a bit before I made the cutout for the hinge pin, but I was simply following the plans.
I had partially done the baggage bay door a long time ago, but couldn't finish it until the front skin was in place. I put the door in place, and found that I had to trim the front edge of its skin a bit. I also found that the contour didn't match the skin very well - this is a common problem. I recalled a story told by a test pilot for a small business jet manufacturer. He was originally hired as a production engineer, with the understanding that he would move into flight test as soon as a position opened up. One night he was walking down the production line when he heard a very loud pounding sound. He followed the noise and found a production line worker beating an emergency exit door with a 10 pound maul. He stopped the guy, and asked him what he was doing. It turned out that there was a problem with the fit of the emergency exits into the fuselage. The exits didn't have the correct contour, and they had to deform each one to get it to fit.
I took a flat piece of wood, laid it against the areas that were standing higher than the fuselage, and proceeded to beat them into submission. The fit is still not perfect, but it is a lot better now.
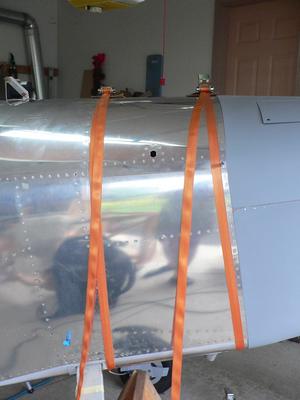 Friday I primed the remaining door parts and fabricated the door latch mechanism. Yesterday I used some straps to pull the door into perfect fit, crawled into the forward fuselage and installed the blind rivets that secure the door's inner skin to its frame. The door becomes very stiff once those rivets are in place, so you need to be sure it is in the right shape when you do the riveting.
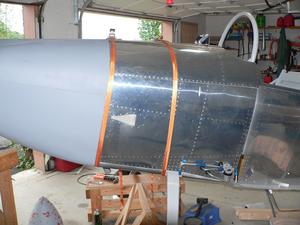 I was careful to get the nylon strap over bulkheads, so the pressure wouldn't deform anything.
Today I didn't get too much done, as Terry was finally home after three weeks back in Green Bay. It wouldn't' have gone over well if I spent all day in the garage on her first day back. :) I did study the door hinge pin, and realized that the way the hinge eyes were oriented, I actually only needed a very small cutout to be able to put it in from the front. I made that mod, and now the hinge pin can go in and out without hitting the windscreen.
Windscreen - First Baby Steps
- Details
- Written by Kevin Horton
- Hits: 3761
Today I installed the items in the right side of the fixed instrument panel - the Hobbs meter, the ELT remote control and the compass. I finished riveting the F-804 channels, then reinstalled the rails that the canopy slides in and installed the canopy.
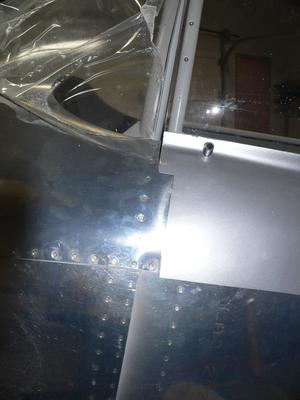 I found that the front of the fibreglas canopy skirt interfered with the aft edge of the F-821 skin. I guess I must not have had it in place when I was working on fitting the canopy. I had to trim both the skin and the canopy skirt. The cutout in the skin will be covered up with the fibreglas that fairs in the windscreen, so the cutout won't be visible.
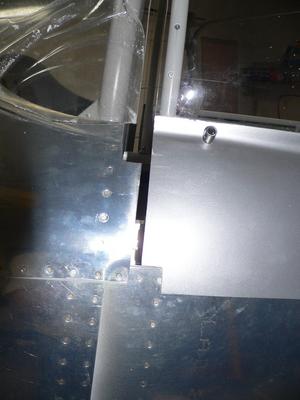 I'll have to put some Ultra-High Molecular Weight (UHMW) tape on the inside of the edge of the skin to keep it from scratching up the forward edge of the canopy skirt. The UHMW tape is very tough and slippery.
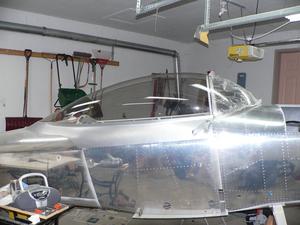 Then I attacked the windscreen. The F-821 forward skin wasn't in place when I was working on the canopy, so I hadn't had to trim the bottom of the windscreen. I did several rounds of check and trim, taking a bit off at a time, as you can't put the plexiglas back on after you cut it off. It was hard to get the windscreen back in exactly the same place every time I fitted it, so I eventually gritted my teeth and drilled a hole at the top centre so I could use a cleco to anchor the windscreen to the top of the canopy bow.
I've still got a few more rounds of trimming to do, then I'll drill the rest of the holes for the screws that fasten the windscreen to the canopy bow.
