Flap Intersection Fairings
- Details
- Written by Kevin Horton
- Hits: 3440
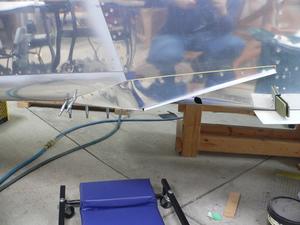 This week I got some wiring clean up work done, and partially installed the flap root end intersection fairings. The flap intersection fairings rivet to the side of the fuselage. I had fitted the fairings when the wings and flaps were temporarily installed, but I had never riveted them in place.
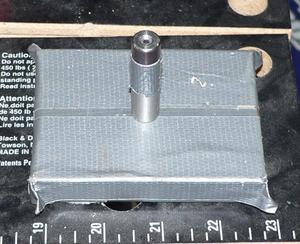 Dimpling the holes was a two person job, with on person inside holding the female dimple die on a weight, and one person outside the male dimple die on a long shaft, tapping it with a hammer. Most of them could be done with the flat plate weight that I made a long time ago.
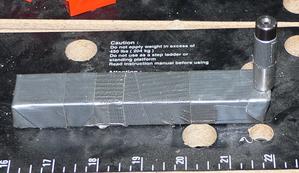 But there were four holes that were too close to a bulkhead, so I drilled a hole near the end of one of my home-made bucking bars.
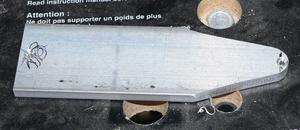 But even that wouldn't work for two of the holes. I eventually ended up countersinking a hole in a piece of aluminum plate. The piece of aluminum didn't have enough weight to do the job, but it was easy to hold a hefty bucking bar against the plate.
After dimpling, I taped off the perimeter and sprayed some zinc chromate primer for corrosion control on the area to be covered by the fairing.
Yesterday I attacked the dimpling. I could get the rivets near the front myself, with one hand on the rivet gun, and the other hand inside on the bucking bar. Terry tried to help me with the other rivets, but she was having a hard time of it and gave up. I'll Shanghai another local builder to help me finish.
Today, for a change of pace, I installed our new dishwasher. Two trips to Home Depot, plus one trip to a friend's place to get some wood spacers, multiple hours of work, and I am almost done. No leaks, anyway.
Defrost Fan
- Details
- Written by Kevin Horton
- Hits: 3282
Earlier this week I attacked the defrost fan. I had cut the hole in the glareshield and ran the wires to the switch a long time ago. But I hadn't finished the job as I needed to figure out where to route the wires to get them to the glareshield area.
I pulled the instrument panel out, then bolted the defrost fan in place. I lost a lot of time trying to puzzle out exactly what I had done when I ran the wires to the switch. I was in a rush when I ran those wires, so I hadn't bothered to draw up a wiring diagram for the system. I figured that I would remember exactly what I had done, and I would make the wiring diagram later.
I thought I had ran the wires from the fuse to the switch, and back to the instrument panel area. I hooked up the multi-meter, but I couldn't get any voltage on the wires. I eventually puzzled out that I had just ran the two wires to the switch, and not to the power or ground. This time I drew up a wiring diagram, then finished the wiring and test it.
I discovered that the defrost fan interferes with my original routing of the static line behind the panel. I need to order some different fittings so I can reroute the static line.
Today it wasn't snowing or raining, so I went out in the driveway and sanded some fibreglas. I went at it until I couldn't feel my fingers or toes, then came in to watch some football.
Misc Progress
- Details
- Written by Kevin Horton
- Hits: 4394
Many weeks ago I found that one of my fuel tanks leaked when I pressurized it with air. I eventually found a leak at a threaded fitting. I searched the RV-List archives, and found that many people reported good results using a wicking thread locker to seal leaks. I eventually found a local supplier for Loctite 290 (Legere Industrial), and purchased some awhile ago. Several days ago I put a several inches of vacuum on the tank and applied the wicking thread sealant. I started another leak test on Friday, but this morning I could see that the air had all leaked out. Drat.
This morning I pressurized the tank again and started going over likely areas with soapy water. I couldn't find any evidence of a leak at the threaded joint that was leaking last time. Some progress at least. I finally found a small leak on the inboard end of the tank, at the upper aft corner of the rib. The good news is that there is a large access cover on that rib, so I can open it up and spread some more Proseal in that corner. I thought about just putting more Proseal on the outside, but I'm convinced that sealant on the inside will be more likely to do the job (I'll put a bit more on the outside too, but for good measure). The bad news is that I don't have any more Proseal. I'll order some.
I've been bogged down in finishing fibreglas fairings for what seems like forever. I hate working on the stuff, so I'm not too motivated to go out in the garage. My progress has been slow as a result. I'm at a phase where I need to sand a bunch of fibreglas filler. I do that outside as much as possible, in an attempt to keep the dust out of the garage. Today it was quite cold (it only warmed up to -16°C), so I had a golden opportunity to work on something else.
This afternoon I decided to attack some of the small items on the infinitely long list of stuff I need to do. I had run out of nut plates for the wing root - they will hold the wing-fuselage intersection fairing in place. The needed additional nut plates arrived a few weeks ago, so I riveted them in place. I also installed a wing rivet that I had somehow missed when I riveted the wing skins a long, long time ago.
 I installed the nut plates that attach the pitot tube mount to the wing, and spent a while poking through my collection of fittings and eventually found that I had the right mix I will need to hook the pitot tube up to the pitot line. I'm using the mix of fittings that Paul Besing suggests on his web page.
Next I installed the fresh air vent for the passenger. The AN525 washer head screws for the front fresh air vent came a few weeks ago, so I replaced the hex-head bolts that I had temporarily used. That turned out to be a much tougher job that I had expected, as the new screws were ever a few thousandths of an inch larger diameter than the bolts I had temporarily used. I tried forcing things in place, but that was obviously not the right answer, so I eventually disassembled everything and enlarged the holes.
 The standard air vents are cheesy black plastic ones, that have a reputation for not sealing very well. Not good in the winter. I ordered some very nice black anodized aluminum eyeballs vents from Van's.
Gear Leg Fairings Update
- Details
- Written by Kevin Horton
- Hits: 4631
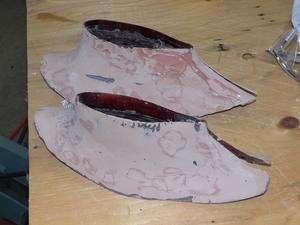 The Christmas break hasn't been quite as productive as I hoped, but I did get some work done. The upper gear leg fairings have have had a lot of massaging, and are now close to the correct contour. I still have several more rounds of fill and sand before I put a coat of paint on. And the paint always allows you to see flaws that had remained undetected til then.
Yesterday I laid up the fibreglas for the lower gear leg fairings. I had thoughts about making them completely removable at one point, but I woke up and decided to do them the way Van recommends. Van recommends bonding the lower fairing to the wheel pants, and splitting it on the same plane as the wheel pant. The part on the front of the landing gear leg fairing will be an integral part of the front part of the wheel pant.
I roughed up the surface of the wheel pant, and cleaned them. The I put 3M 471 Vinyl tape on the bottom of the landing gear fairing, and taped some wax paper to limit the area that resin could run to.
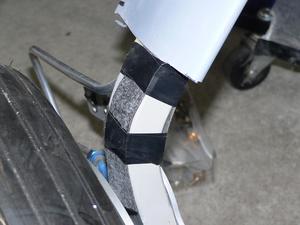 You have to cut the fairings in two, in place, which means that a cut-off wheel is very close to the landing gear leg. I didn't want to risk nicking the landing gear legs, so I taped some pieces of sheet steel to the inside and outside of the landing gear legs.
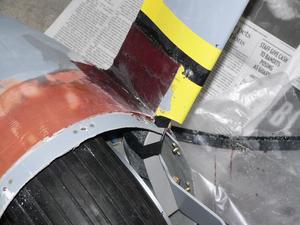 This evening I split the fairings in two. I was a bit worried about that task, but it turned out much better than I feared. I wiggled sharp knife between the new fibreglas and the gear leg fairing, then slipped a thin strip of aluminum in there. That protected the gear leg fairing from the cut-off wheel. There was a small area in the sharp corner between the gear leg and the wheel pant where I couldn't get the cut-off wheel in, but I managed to cut that with a sharp knife (it was sharp - it's dull now :)).
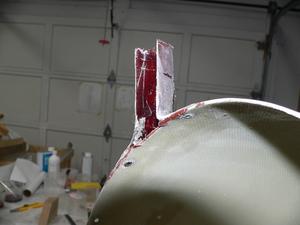 I need to decide whether to shorten the part of the fairing that extends from the wheel pants, or whether to trim some more off the bottom of the gear leg fairings. I also need to put a bit more fibreglas cloth on the outside to strengthen them, and then do a lot of filling. But they are a good start.
Site Software Update
- Details
- Written by Kevin Horton
- Hits: 6386
I updated the Geeklog software that runs this web site today. I think everything is working properly, but there is always that chance that I've missed something. If you run into a problem, please let me know. Either leave a comment on the site, or if comments aren't working, e-mail me at khorton01 AT kilohotel DOT com.
Thanks.
Errors in January 2006 Kitplanes "You Know Yo' Pitot" article
- Details
- Written by Kevin Horton
- Hits: 3873
I was quite dismayed to read several major technical errors in the "You Know Yo' Pitot" article in the January 2006 Kitplanes.
Read on if you are interested in the details.
Read more: Errors in January 2006 Kitplanes "You Know Yo' Pitot" article
