Upper Landing Gear Leg Fairings - Slow Progress
- Details
- Written by Kevin Horton
- Hits: 3510
It's been a crazy week. I was in Montreal for two days, but I had to keep another work project moving. So I did a bunch of overtime, which left no time for RV work. We've had family here all weekend, so I only managed to grab a bit of building time.
I spent what time I had cleaning the modeling clay residue out of the upper gear leg intersection fairings (rubbing alcohol seemed to work better than either lacquer thinner or acetone). Then I laid some fibreglas inside the areas at the back where the fibreglas didn't properly follow the clay contour. I'll sand down the exterior to get the right contour, but I need to get more material on the inside first, or I'll sand right through.
Upper Landing Gear Leg Fairings - The Beginning
- Details
- Written by Kevin Horton
- Hits: 5865
I've been putting off making the landing gear leg intersection fairings for awhile, as I hate working with fibreglas. But, they need to be done before I paint, so I finally bit the bullet and started on them.
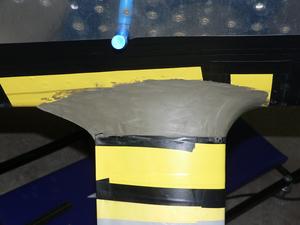 Yesterday afternoon I masked the area up with 3M 471 vinyl tape, and electrical tape. Then I pulled out some oil based modelling clay that I bought months ago. I pushed it into the initial shape with my hands, then used a large spoon to push it around and smooth it out. I also used the outside edge of some 2" and 3" diameter PVC plumbing couplings to help get smooth, consistent radii in some areas. I spent hours, trying to get a very smooth surface, with curves that flowed smoothly, and were the same on the left and right sides.
Here is a shot of the outside of the right upper landing gear leg area.
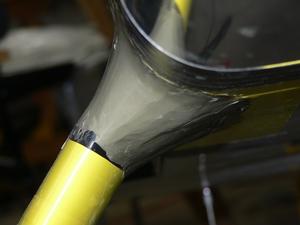 This afternoon I did a bunch more fine turning on the clay, trying to get it perfect.
Here is a shot of the leading edge of the right upper landing gear fairing area.
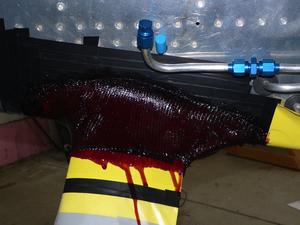 Finally deciding that the clay was perfect, I cut some fibreglas pieces on the diagonal (the fabric will drape around compound curves if the weave is at 45 degrees to the long axis of the piece of fabric). I made a heck of a mess, with fibreglas dripping everywhere - fortunately I had put newspaper over the floor. I was quite dismayed to see that the fibreglas didn't want to smoothly follow the contours along the whole bottom - it tended to sag a bit in some areas. So, all the work to get a perfect surface on the clay was probably a waste of time, as I'm going to end up doing a lot of filling. I'll probably end up laying up some more fibreglas inside the areas where it sagged, and then sand down the outside to get a good contour. Did I tell you how much I hate fibreglas?
I'll give this stuff a couple of days to cure, then break out the Dremel Tool to slit the fairings open along the back edge so I can pull them off.
Left side - freshly laid fibreglas.
Beware Randy Simpson
- Details
- Written by Kevin Horton
- Hits: 4618
There have been a couple of message threads about Randy Simpson's titanium Ti-Downs (sold by his company, Airtime) on the RV-List in the last few months (search the list archives). Randy's Ti-Downs are a work of art, and they are very light and work extremely well. I purchased a set several years ago, and am very happy with them. But, prospective purchasers should think twice, as many people only get their Ti-Downs after many months of badgering Randy by e-mail, letter, and telephone. And several people have paid their money and never received their Ti-Downs.
Some posters on the RV-List believed Randy was simply disorganized, and that he didn't intend to rip anyone off. Others, who paid their money and never received the goods, feel he is a crook, or is running a scam. The following postings on the RV-List are reproduced with the permission of the authors:
We've been trying to contact Randy for over a month by phone and email. We have gotten no response to anything so have pursued a refund via PayPal and our CC company. It may be a good product but the business model is unacceptable and I would not recommend this guy for any reason. - Name withheld by request.
Mine took 3 months to arrive. I left him a voice mail that said I was turning him in to pay pal as non responsive. He called me a week after that and sent the tie downs about three week later. I think that he is just very disorganized. If you wait long enough you will get the product, providing that Randy has not totally forgotten your order. - Name withheld by request.
As others have said, I don't believe he is a crook. He is just a "free spirit" and totally disorganized. I ordered a set in Feb 04 and received them several months later (with a little prodding on my part), but I did receive them and they are a work of art!
So he was definitely delivering them long after you placed your order. I can't understand why he operates the way he does, as he has an excellent product. Nonetheless, I can't in good faith recommend anyone order anything from him until (unless) he gets his act together. - Richard Tasker
Tie downs ordered in March 2003, numerous emails and promises later, result no tiedowns. I should not have to contact him weekly to get the product as others have claimed to do. Questionable business practices and ethics. - Bob
Randy does make wonderful tie downs. But you should think twice before putting in an order.
Jacking the aircraft
- Details
- Written by Kevin Horton
- Hits: 4622
I was ready to start fabricating the upper landing gear leg intersection fairings a few weeks ago. The landing gear leg fairings are each one piece of fibreglas that wrap around the gear leg, with a piano hinge at the back to hold the back edges together. The hinge pin is inserted from the bottom.
I grabbed the right gear leg fairing a few weeks ago and tried to put it on the gear leg. I couldn't do it - the hinge pin has to go up from the bottom, and the tire was in the way. I tried to flex the hinge pin, but it was quite stiff. Then there was an exchange on the Yahoo RV-8 List, and other builders reported that the hinge pin was actually quite flexible, and there was no problem installing it with the tire in place.
I figured I must just be a wimp, so I tried again. I grabbed the gear leg fairings again, and I saw that the two fairings had different diameter hinge pins. The left one was a lot smaller. The left gear leg fairing went in place with no problem. I looked at the plans, and discovered that I had used the wrong type hinge on the right gear leg fairing. :(
I didn't want to redo the right gear leg fairing. The hinge I used will work just fine, once it is installed. But you need to remove the wheel to get the hinge pin in place.
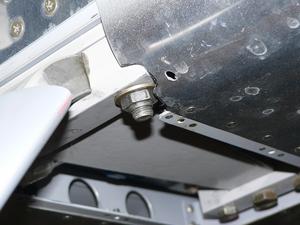 I agonized over how to get the wheel off for weeks. The best answer would be to get an engine hoist to lift the right side of the engine mount where it attaches to the wall. But that would take a lot of driving to go borrow a hoist. I decided to try jacking, using the front bolt on the landing gear leg saddle as a jack point.
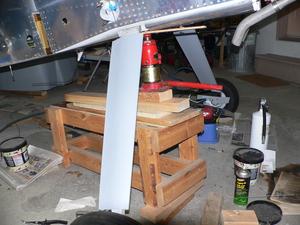 I put a very strong bench under the aircraft, then put some wood on top to support a bottle jack. I put a piece of wood between the top of the jack and the bolt to protect it. I slowly started to jack, but quickly discovered that the aircraft wanted to roll ahead. The garage floor is sloped, which was causing the problem. I raised the front of the bench about 3.5 inches, so the jack was leaning aft. This time the aircraft didn't move, but it certainly wasn't solidly supported. I steadied it with one hand, while I pulled the wheel off with the other hand. I put a block of wood under the axle and lowered the aircraft again before it fell.
The fairing hinge pin went in place quickly, then I put the wheel back on.
Jacking the aircraft like this has to be one of the stupider things I have done, as it wouldn't have taken much to knock the aircraft off the jack. My friend Jim has an arc welder - I think I'll have him weld up a jack stand with a very wide base. I'll bolt the jack to the jack stand, and it will hold the jack in place so it can't move around.
Fuel Tank Leak Check - Good News and Bad News
- Details
- Written by Kevin Horton
- Hits: 7562
I got up early this morning and hit Home Depot when they opened at 8 AM. I searched the plumbing section high and low, and finally found a 2" plumbers test plug. It is a cylindrical piece of rubber, with a thick steel disk on each end of the cylinder. There is a large bolt through the two disks with huge wing nut. You insert the plug in the item to be sealed, then turn the wing nut to compress the rubber, causing its diameter to increase. I stuck one in the fuel filler hole and snugged it in place. No more leak there.
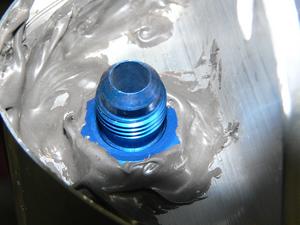 It took a lot of trial and error with soapy water, but I finally found a slow leak at the fitting where the fuel line attaches to the fuel tank. There is a bulkhead fitting that comes through a hole in the tank. A large aluminum nut on the outside secures it in place. I had put Pro-seal around the edges of the nut, but I didn't seal the interface between the nut threads and fitting. I've got a small leak at the threads. It is pain to have a leak to fix, but the good news is that I don't have to open the tank up to fix it. I have to put some sealant around that threaded joint.
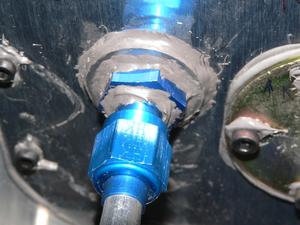 This is the fuel outlet fitting on the other tank. You can see that I did cover the threads with Pro-seal on this tank. I don't know why I didn't do that on the other one.
The fittings on the two tanks are in different places because the left tank has a flop tube for fuel pick up. The flexible tube has a weight on the fuel pickup end, so it goes to the top of the tank in inverted flight. The other end of the tube is connected at the very front of the inboard tank rib, so that is where the fuel line attaches. The right tank has the normal fuel pickup, which only works in normal flight. The fuel line attaches to its fitting in the middle of the inboard tank rib.
This afternoon I hooked up the right tank for its leak test. I had a slow leak, but finally found that I needed to tighten the connection at the fuel line fitting. It was only finger tight. I fixed that, but the water level in the manometer was still coming down a bit. I spent a long while with the soapy water, but couldn't find a leak. I went back down a few minutes ago, and the water level has increased since the last check. I guess the air from the air compressor was warmer than the basement, so the pressure decreased while it was cooling down. Now it has reached equilibrium, so the water level should go up and down as the temperature varies. I'll leave it for a day or so to see whether it is holding pressure.
So, I have to seal up that leak on the left tank, but the initial indications are the right tank doesn't leak. And I have to eventually get the fuel caps to stop leaking. Not as bad as I feared, but not as good as I hoped either.
Update - 1 Dec 05
I left the right tank pressurized for two and a half days. The water manometer level fluctuated up and down a couple of inches, as the temperature in the basement went up and down, and the atmospheric pressure changed. But, the average manometer level didn't decrease, so I'm satisfied that there is no leak.
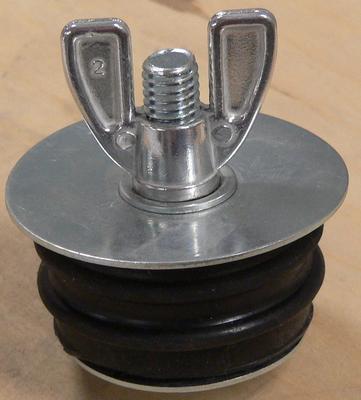 Here is a shot of the 2" plumbers test plug that I used to seal the filler cap opening.
Fuel Tank Leak Test In Progress
- Details
- Written by Kevin Horton
- Hits: 5415
I took Wednesday off, as it looked like the only day this week where it wouldn't rain or snow. It was cloudy, but cold, which allowed me to sand the fibreglas filler on the wheel pants outside. I almost froze to death, but at least I didn't make a mess in the garage.
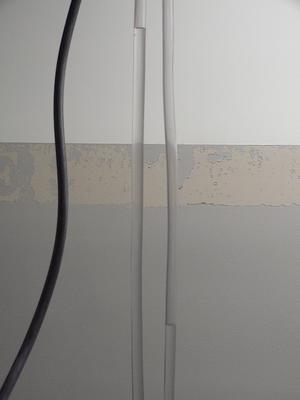
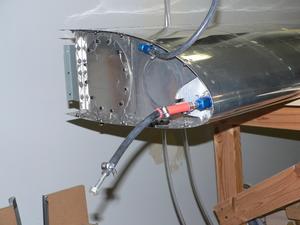 Today I put several coats of thinned resin on the sanded filler to seal it. Then I decided the Pro-seal on fuel tanks was cured well enough to chance a leak check. I cobbled together a hook up to a water manometer, and put about two feet of water pressure (about one psi) in the tank. The fuel cap was leaking. I put some duct tape over the fuel cap and tried again. The duct tape seemed to be stopping that leak, so I watched the water manometer level. It was slowly coming down, so I had a leak somewhere. Drat :(
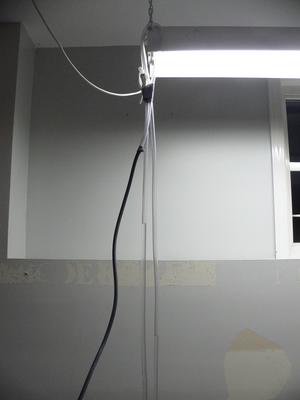 I mixed up some soapy water, and started putting it on all the rivets, joints between sheet metal, etc. I spent about a half hour looking, but couldn't find the leak anywhere. I finally put some of the soapy water on the edges of the duct tape over the fuel cap, and found that it was still leaking. I tried all manner of ways to seal the fuel cap, but it would always leak. I checked the RV-List archives, and found that this is a very common problem. Some people keep plugging away until the cap stops leaking; others put the cap aside and use some other means to seal the tank filler hole for the leak test. The main purpose of the leak check is to confirm that there are no leaks in the rivet joints, etc, so there is some argument to put the fuel cap aside for now. In flight, there is normally no fuel against the fuel cap, so a small leak may not be critical.
 Tomorrow I'll try putting some grease on the fuel cap O-rings. If I can't get it to seal, I'll head to Home Depot to see what I can buy to seal the fuel filler hole.
