Improving the fit of the empennage tips
- Details
- Written by Kevin Horton
- Hits: 5117
This week I finished bonding the reinforcing strips behind the flanges on the empennage tips, and drilled out all the holes to 1/8 inch. Then I realized that the edges of the rudder and elevator skins refused to sit down nicely against the empennage tips. I noted that the flanges were not at the same angle as the skins. The flanges were splayed out a bit, so they rested on the skin only on the very edge of the flange.
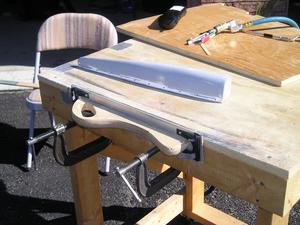
 I decided to remove a bit of material from the edges of the flanges to make the flange surfaces more closely match the skins. The reinforcing strips and thickened resin that held them in place should provide enough extra strength so that it is safe to remove that material from the edges of the flanges. I messed around trying to sand the flanges by hand, but it took too much care to hold the sanding block at the just the right angle, and to be sure to only sand the flange. I was making very, very slow progress. I finally woke up and clamped a long sanding block to the edge of my work table, so it was at 90 degrees to the table top, and at the right height so only the flanges would be sanded. Then it was a quick job to hold the tips against the sanding block and true them out.
I had to put in four rivets in the outboard elevator ribs - I couldn't figure out how to get at them when I riveted the elevators years ago, and I wasn't brave enough to try some of the ways that other builders had used. Today I tried using a back rivet plate, a thin steel bar laid on top of the rivet tail and a hammer to bash the bar, but I couldn't get the rivet to set no matter how hard I swung the hammer. So, I used the same setup, but I placed a rivet gun with flush rivet set on the steel bar, and managed to set each rivet with a long hard blast of the gun. Three of the four rivets came out looking good, but one of the ones on the bottom of one elevator is sitting a big proud of the skin. I don't know what I did to have such good luck - usually my screw-ups end up on the upper surfaces where everyone can see them.
I put the vertical stab and rudder tips on their respective surfaces at the same time, and was dismayed to note that the VS tip sticks up noticeably higher than the rudder tip. I thought I was finished with the filler on those tips, but that was obviously just a pipe dream. I'll have to reinstall the elevators so I can see if I have a similar issue with them.
Electrical Load Analysis
- Details
- Written by Kevin Horton
- Hits: 5477
A site visitor noted that Index for the Electrical System Diagrams had a Electrical Load Analysis listed, but the document was not available on-line. He asked if I could send him a copy, which I did. I hadn't posted it originally because it had too much missing info. It has been fleshed out a bit more now, so I will post it on-line. It is still not 100% complete however.
I used a spreadsheet to create the electrical load analysis. Each item is indicated as being on either the Battery Hot Bus (B), Main Bus (M) or Essential Bus (E). Also, the continuous and intermittent portions of each load are inserted in the corresponding columns. Note: continuous does not necessarily mean the item will be ON 100% of the time that I am flying, but it means that it may be used for long enough periods that the electrical system must be able to handle it continuously.
Read on to see the load analysis.
EFIS?
- Details
- Written by Kevin Horton
- Hits: 3650
I've been on the road for over a week, and just got back this afternoon.
My original plan was to have conventional gyros, albeit electrically powered, rather than the usual vacuum powered. However, several companies are trying to break into the market with low cost solid-state "gyros" that drive LCD displays. These solid-state "gyros" use a combination of accelerometers and rate meters and a microprocessor to calculate the aircraft's attitude. The technology has been used in Attitude and Heading Reference Systems (AHRS) in business jets and regional airliners for many years, but those systems are way too expensive for general aviation aircraft. Now there are lower cost systems available from Blue Mountain Avionics, Grand Rapids Technologies and Dynon Development. And Crossbow has a low-cost AHRS that can drive an attitude indicator display on a Compaq PDA.
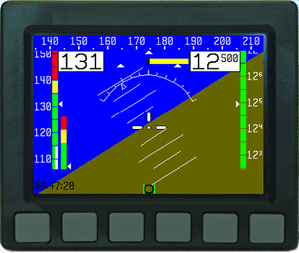
 The Dynon D-10 EFIS (Electronic Flight Information system) has me very tempted. I can just barely fit it into my current panel layout, but I would probably buy a new panel blank and start over, as I would no longer need the removable centre section for the gyros. I would keep my conventional airspeed, altimeter and VSI, so that I could still fly partial panel if the Dynon EFIS died. I probably wouldn't enable all the optional display items that are shown in this image, as that seems to make for an overly busy display.
I have read reports from several early purchasers who have the Dynon D-10 flying - everyone is happy, and no one has any major gripes. I need to get answers to quite a few questions from Dynon, and I need to get a flight in an aircraft with this system, plus do a night evaluation on the ground. If I still like the unit after that, I might send them some money.
Fibreglas - slow progress on the empennage tips
- Details
- Written by Kevin Horton
- Hits: 4294
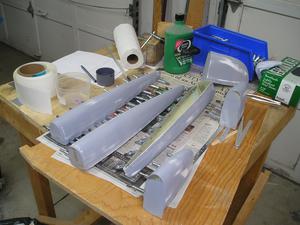
I ended up taking care of a bunch of household chores the first few days of the week, and then finally got motivated to attack fibreglas late in the week. First it was more filler in the low areas on the empennage tips, then sand most of it off, repeat, etc.
 Saturday I finally got the empennage tips (except the rudder bottom) smooth enough that I dared shoot a coat of filler-primer on them. I knew that primer has some magical property that highlights every imperfection in the underlying surface, so I wasn't surprised to find a few pin holes in areas that I thought were perfect. Oh well. But, the tips actually looked better than I had expected they would after that first coat. Saturday night I wet-sanded the filler-primer to get it ready for the next coat.
Today I realized that I really should have bonded in the strips of aluminum that reinforce where the blind rivets attach the fibreglas tips to the tail surfaces. I had forgotten about those. :( And as always, the job takes three times as long as you think it should, and that seems to hold true even if you have already multiplied by three when coming up with your initial estimate. :)
I got the metal strips fabricated, drilled the holes where the rivets will go, and drilled another bunch of holes to help the fibreglas resin bond to the metal strips. I mixed up a small batch of resin with microfibres to bond the strips in place, using cleoces dipped in a bit of oil to hold the strips in place while the fibreglas cures. I only got about 60% of the way through the bonding before the resin started to set, it started to get dark and the mosquitoes arrived, so I stopped for the night. I didn't used to let a few mosquitoes bother me, but this West Nile Virus stuff has me looking at them in a different light.
RV-10 First Flight
- Details
- Written by Kevin Horton
- Hits: 4290
 From Van's web site:
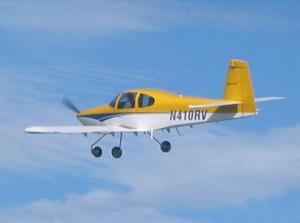
If you called Van's about 8:30 in the morning on May 29, and the phone rang and rang ... well, we have the best possible excuse. Most of the company was standing along the taxiway watching Van taxi the new RV-10 to runway 35. At about 8:40 the big six cylinder spooled up (quietly, with that big muffler) and the airplane was in the air in about 450 feet. Takeoff and climb out certainly looked like an RV!
See Van's RV-10 Page for more info and pictures.
Back to fibreglas :(
- Details
- Written by Kevin Horton
- Hits: 2835
Well, warm temperatures are here, so it is time to start working on fibreglas again - yuck! I hate working with that stuff. You seem to spend all your time sanding, and you always find you need to put another coat of filler somewhere and then sand some more. Horrible, horrible stuff, unless you don't care how it looks, in which case you can skip all the sanding.
I haven't made nearly as much progress as I would have liked over the last week. First the cat we've had for almost 15 years had to be put down due to cancer. That cat spent most of here life sleep either on my wife's lap it seems, so it was a real big deal when she was gone. And now my father-in-law is very ill. So Terry needed me more than the airplane project did the last week. She is back in Green Bay now, so I can get some work done again, at least until I have to head down there.
Today I did an inventory of all the fibreglas work I need to do, then did some sanding and then spread batch of resin on a bunch of parts. I also secured the GPS antenna coax cable to keep it from flopping around in the rear baggage compartment. I also got the ELT tests done.
