Canopy skirt
- Details
- Written by Kevin Horton
- Hits: 3078
I wasn't happy with the fit of the canopy skirt back when I last worked on it (early 2001 - hard to believe how time flies). Yesterday I started messing around with it again, and concluded that I could have gotten the skirt to fit better at the back if I had drilled the holes a bit differently.
So, I pulled the skirt off, and filled in the holes with a mix of fibreglas resin and microfibres. Later this week I'll try drilling the holes again.
Wing tip lights
- Details
- Written by Kevin Horton
- Hits: 4067
Today is Canada Day, which is a holiday. I took a vacation day on Monday, so that made a four day weekend. I managed to spend quite a bit of time working on the project.
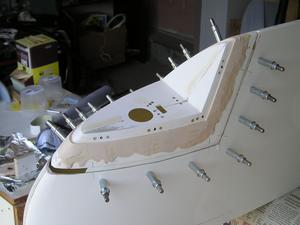 Last fall I fitted the covers for the wing tips lights. They fit reasonably nicely, but the surface of the clear covers sat above the fibreglas in some areas.
I covered the edges of the covers with aluminum tape, and spread some West Systems light weight filler. The covers popped off easily enough after the filler cured, but I was careful to not have filler on more than half the lens at any one time. It took a few rounds of fill and sand, but the covers sit nicely flush with the fibreglas.
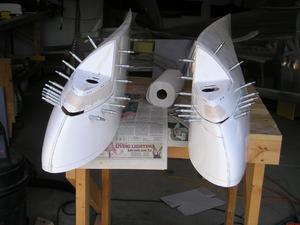 This afternoon I mixed up some West Systems resin with microfibres and used it to bond the wing tip light assemblies into the cutouts in the tips. I used a bit of motor oil on the ends of the clecoes to keep the fibreglas resin from adhering to them. Tomorrow I'll put a couple of layers of fibreglas cloth on the inside to close the holes then go crazy with the filler.
Rounding the hole in the induction air snorkel
- Details
- Written by Kevin Horton
- Hits: 3470
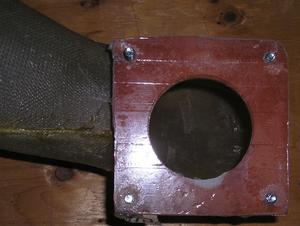 The hole in the end of the induction air snorkel where it mates up to the fuel injection servo was oval rather than round, and it wasn't in the centre of the mounting flange (picture before). Many other builders were complaining about the fit of this piece, so there didn't seem to be any point to having Van's send a new part.
Last week I added a bunch of fibreglas in all the right places, and then used a Kutzall carving burr to round out the hole. I spent quite a bit of effort to make sure to get a smooth, large radius on every corner to try to avoid creating turbulence.
Tail Surface Update
- Details
- Written by Kevin Horton
- Hits: 4095
Last week I finished triming the counter weights on both elevators. It was quite a labourious process, with a lot of trim and check the balance, as I wanted to be sure to not trim too much.
I dimpled all the holes in tail surface outboard ends, and I countersunk the fibreglas tips to accept the dimples. I've still got a bit of touch up work to do on the empennage tips before riveting them in place.
Dynon EFIS - Ordered
- Details
- Written by Kevin Horton
- Hits: 3322
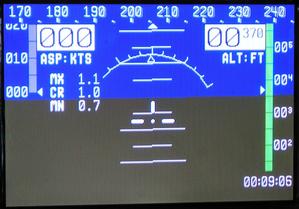 On Sunday Terry and I drove down to the historic city of Kingston, ON. We had a very nice brunch in an outside courtyard and then we visited RV-7A builder Steve Hurlbut. I wanted to get a good look at the Dynon D-10 EFIS that Steve has installed. It was good to see the unit in the flesh. The only negative thing I saw as a small amount of jitter in the pitch ladder on the attitude display. I only saw the jitter once, and it went away after a few seconds.
Today I ordered a D-10 EFIS + internal backup battery + external magnetic sensor module. They predict they will ship it to me in late August, and I don't need to provide any money until they are ready to ship.
I hope to arrange to get a flight with an Dynon EFIS while I am at the EAA Fly-In in late July. If I see something during this flight that really bothers me, I will cancel the order. If worst comes to worst, and I don't see some big problem until after I am flying, I expect Dynon will have increased their price by then, and I should be able to sell my unit on the used market without losing too much money.
Elevator counter weights
- Details
- Written by Kevin Horton
- Hits: 7143
I was at a big conference for the first three days last week, and was on the road for the last two days, so that ate into my building time.
I temporarily mounted the elevators to check whether the elevator tips matched up with the horizontal stab tips. One is pretty much perfect, and the other elevator tip sticks out ever so slightly past the stab tip, but you can't see it unless you take a straight edge and hold it against them. So I am going to leave it as-is. I put some filler on the rudder tip to make it match the vertical stab tip.
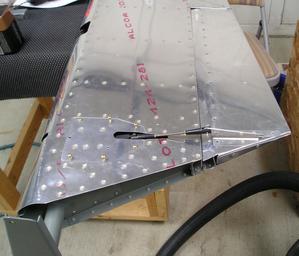 I dimpled the rivet holes on the elevators, and started countersinking the holes in the tips. Then I decided to install the elevator counterweights, as they must be installed before the tips are riveted in place. And the counterweights are too heavy as delivered, so some of the lead must be removed so the elevators balance properly. I needed to shorten the trim tab pushrod and install it, so all the components were in place when I balanced the elevators.
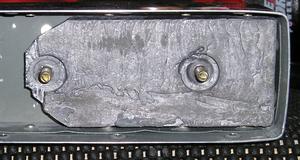 I removed a bunch of lead from the aft end of the outboard counterweight (I'm not done yet, as it is still not quite balance).
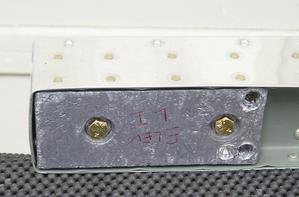 I drilled a couple of small holes in the inboard counterweight. I'll paint the aircraft after I am flying, and that will move the CG of the control surfaces to the rear. I'll mix up some lead shot and epoxy and pour it in the holes to restore the balance.
Why must the elevators be balanced you ask? To prevent flutter. Read on for an over-simplified explanation of flutter
