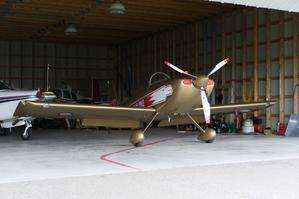
Magneto Failure
- Details
- Written by Kevin Horton
- Hits: 5495
It’s been a busy week. One week ago I had to cancel a flight to Carp, for the EAA Chapter 245 Fly-In Breakfast, due to a hangar door opening winch failure. We quickly determined that the reduction gear box had failed, but the gear box had no data plate or markings on it, so it was not possible to source a direct replacement. We found a larger gear box at Princess Auto, but it wouldn’t fit on the existing mount, so quite a bit of barnyard engineering was required to get it all working again. We (those with aircraft trapped in the hangar) had several work sessions over the course of the week, and finally got it all sorted out on Wednesday evening.
Terry and got up early yesterday morning, to fly to Green Bay, WI. But that plan fell apart at the engine run-up prior to take-off. Terry had noted that she thought the engine sounded a bit different than normal when we were taxiing, but I couldn’t hear anything strange. But, when I advanced the throttle for the run-up, I could tell that the engine didn’t sound right, and the amount of rpm achieved for a given throttle position was quite a bit lower than normal. When I selected the magneto OFF, the rpm increased by 300 rpm, which was very abnormal. This clearly indicated that the magneto timing was much too far advanced.
I left the mag off, and taxied back to the hangar. I removed the cowling and hooked up the mag timing box. I heard a momentary nasty noise from the back of the engine as I turned the prop to Top Dead Centre. That noise didn’t come back, but there was no indication that the mag points were opening and closing at all. We clearly weren’t going to Green Bay, so we unpacked and headed home.
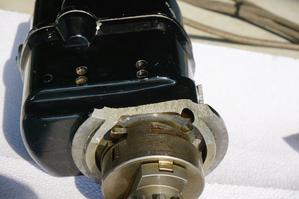 Today I went out to the airport early to dig into the issue. I found that the mag base was broken, and the impulse coupling was very loose. There were signs that the impulse coupling had been hitting the base of the mag. The teeth on the magneto drive gear looked in perfect shape, and I couldn’t see any damage on the teeth on the drive gear in the accessory gear box.
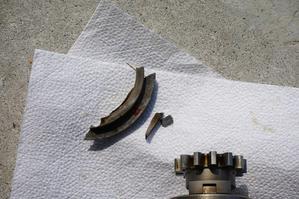 I thought at first that some of the small mag case pieces were inside the engine, but looked around on the floor under the back end of the engine and found that all the missing pieces were accounted for. Whew!
The aircraft currently has one magneto and one Lightspeed Plasma II electronic ignition. The Lightspeed ignition works well, providing more ignition advance than the magneto at cruise power settings for increased efficiency, but it does require aircraft electrical power to function. The magneto will function even if the aircraft electrical system has completely failed, which is a huge plus.
I’ve been watching the developments at E-Mag for several years. They developed two closely related electronic ignition systems that fit in the magneto spot on the accessory case. The E-Mag, like the Lightspeed, required aircraft power. Its brother, the E-Mag model P (aka P-Mag) has an internal alternator, which generates power sufficient at 800 rpm to run the ignition. The P-Mag requires aircraft power to get the engine started, but after the engine is running it will function even if the aircraft electrical system fails, as long as the rpm is kept above 800 rpm. The first design P-Mags had some significant in-service problems, but they updated the design to address the problems, and the latest configuration (series 114) has proven itself in service.
I had decided to replace the mag with a P-Mag when the mag was due for its big inspection at 500 hours. Now that it has failed, I’ll do that change now. I’ve spent several hours planning the mod, making a list of all the things I should require, and I’ll order all the goodies Monday morning.
Wash and Wax Job
- Details
- Written by Kevin Horton
- Hits: 5170
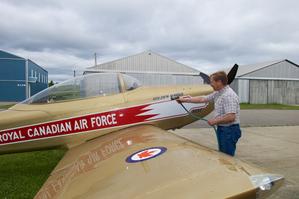 We finally had the right combination of weather and schedule this weekend to wash and wax the RV–8. We never got it done last year, so it hasn’t had this much TLC since 2012. We used the Mother’s California Gold three step process, as recommended by the painter who painted the airplane four years ago. Between the number of steps, the large area to clean and wax, and the intricate shapes to deal with, it takes Terry and I two full days to go the job right.
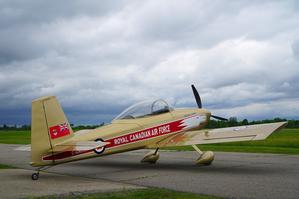 Saturday we got the plane washed, and the upper surfaces and sides cleaned and waxed. This is what it looked like at the end of the day on Saturday.
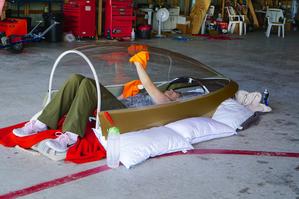 Sunday, we got the lower wing surfaces done, and Terry cleaned the canopy after we removed it from the aircraft. The inside of the canopy had quite a bit of residue from two static cling sunshades that we used last year - l left the sunshades in the canopy all summer two years ago, which was a huge mistake, as they left a lot of almost impossible to remove residue behind. It took Terry a lot of elbow grease and good quality 3M marine transparency cleaner/polish to get the canopy looking like new again.
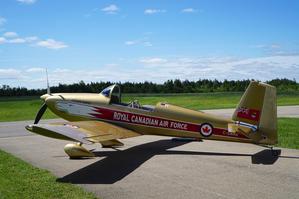 The aircraft looks pretty strange without the canopy.
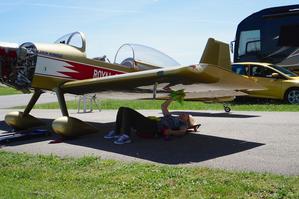 While Terry was working on the bottom of one of the wings, I removed the cowling to assess an issue with the exhaust pipe mount. The four tail pipes are secured as one unit by the exhaust mount, but the four of them are somewhat free to move laterally. I had noted signs that the large heat muff that surrounds the two right most pipes had been hitting the side of the exhaust exit tunnel.
At the moment the four tail pipes hang from two supports that bolt to the back of the oil sump. The supports locate the pipes vertically, but don’t restrain lateral movement. The only thing holding the pipes in one position laterally is the friction in the ball joints at the front of each tail pipe. The engine shakes around quite a bit during startup and shutdown, and I think this flailing would sometime be enough to overcome the friction in the ball joints and leave the pipes resting against the side of the exhaust exit tunnel.
I’ll add a third diagonal support which should hopefully keep them in their proper location.
Thanks Terry for all the help over the last two days!
Picton Fly Out
- Details
- Written by Kevin Horton
- Hits: 5365
Summer weather has finally arrived in the Ottawa area, and Saturday was pretty much perfect. Not a cloud in the sky, very light winds, and a high temperature of 28°C :)
The excellent weather was especially timely, as Saturday was the scheduled date for the second of the three planned group fly-outs from the Smiths Falls Flying Club. the first one, to Peterborough for lunch on 10 May, was a blowout, as the high winds scared most of the participants off. Terry and I missed that one, as I was on my to Europe on that day.
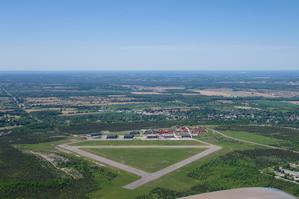 Saturday’s destination was Picton, ON, with a visit to the Waupoos Estates Winery. Picton Airport is one of the many airports built during WWII as part of the British Commonwealth Air Training Plan. These airports typically have three 2500 ft long runways in a triangular shape.
Manitowoc and Back
- Details
- Written by Kevin Horton
- Hits: 3672
We just got back late this afternoon from a trip to Manitowoc, WI in the RV–8 to visit some of Terry’s sisters. We flew down Saturday morning, via a Customs and fuel stop in Sault Ste. Marie, MI. 4.0 hours of flying time, and we landed at 11:30 AM.
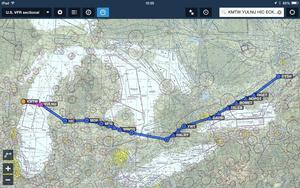 On the way home, we took advantage of the unusually strong westerly winds, and came back non-stop, climbing up to 15,000 ft to cross Lake Michigan. 2.9 hours of flying time, with an average ground speed of 201 kt from take-off to landing, including two separate climbs to 15,000 ft and an instrument approach in Smiths Falls.
I had planned to cross the lake at 17,000 ft, but I should have climbed higher VFR before I picked up the IFR clearance. The 50 kt tailwind during the climb had us halfway across the lake before I got to 15,000 ft, and we were already within gliding distance of the eastern shoreline, so we started a slow descent to 9,000 ft. We had to climb back up to 15,000 ft approaching Toronto’s airspace, as their normal traffic patterns were disrupted with thunderstorms north of Toronto, and ATC couldn’t accommodate us at a lower altitude.
On the Road Again
- Details
- Written by Kevin Horton
- Hits: 3572
I was in Toulouse, France last week, via a stop over in London. I left Saturday morning, 10 May, and got back home late Friday afternoon. I was pretty jet-lagged on Saturday, but had got back on the step by Sunday afternoon, so I took advantage of the apparent good weather to get an RV–8 flight in. The weather upon arrival at the airport wasn’t quite as good as I had expected, with rain showers approaching, so the flight was pretty short. I landed just before the rain started, but didn’t quite manage to get the plane in the hangar before it got wet.
We had hoped to wash and wax the plane last weekend, but we didn’t trust the weather forecast enough to start that task. I really want to get that done before Oshkosh, at the end of July.
Wheel Maintenance
- Details
- Written by Kevin Horton
- Hits: 3774
The weather has been pretty terrible the last few weeks, with long periods of day after day of low cloud and rain. This has definitely put a crimp in my RV flying.
I did get up 10 days ago on one of the rare sunny days, during the week. It was blowing pretty hard though, about 15 kt straight across the runway, so it was good to get some crosswind practice in. I did some aerobatics, then did six landings. The first one was pretty ugly, but all the rest were passable. Then I changed the oil and filter and inspected ahead of the firewall, and did the annual compass swing.
This weekend we had low cloud forecast for both days, so I didn’t plan to do any flying. I did head out to the hangar on Saturday morning to clean, inspect and grease the wheel bearings, and the tail wheel pivot. Of course the clouds lifted and the sun came out as soon as I had the aircraft ripped apart, and it closed back in again as I finished and put it all back together. Oh well.
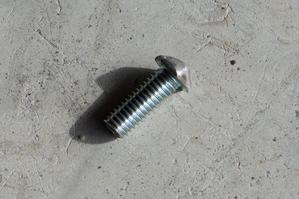 To jack the aircraft, I use a jacking point that I made from a bolt, screwed into the tie down location under the wing at midspan.
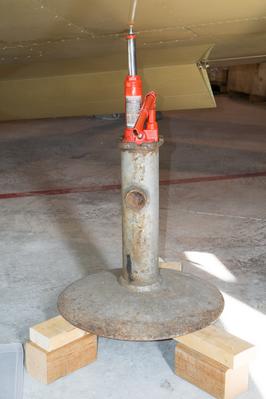 Ron, the hangar owner, has these nice jack stands that support a small hydraulic jack. They are optimized for his Mooney, but they work for the RV if you set them on some wood blocks.
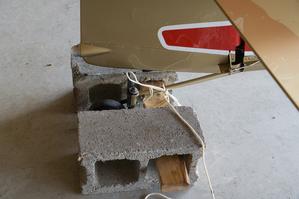 The tie down holes are a bit farther aft than optimal as jacking points, so there isn’t much weight on the tailwheel after you jack one of main wheels clear of the ground. It wouldn’t take much to have the aircraft tip onto its nose, so I tie the tail wheel spring to something heavy for security.
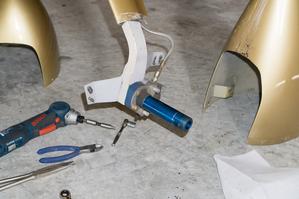 Left wheel off the ground. The bottom of the wheel pants are getting a bit beat up. Oh well.
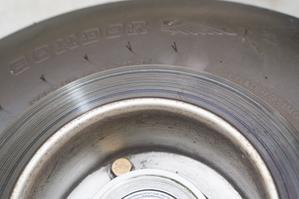 I found a bit of light corrosion on the cylindrical support for the brake disk. I’ll have to keep on eye on that.
