Snow
- Details
- Written by Kevin Horton
- Hits: 3027
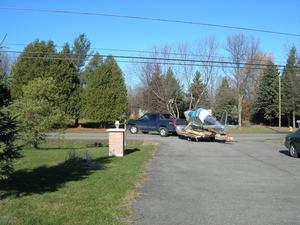
Winter has hit with a vengeance. We've had a pretty good snow storm over the last few days, with probably about 25 cm (10 inches) of snow, mostly on Sunday and Monday. This morning I went into work very early, and left correspondingly early, came home, changed into work clothes, grabbed a dinner to go, then drove to Smiths Falls. I ate dinner in the club house, then drove out onto the airfield. I quickly discovered that although the road to the club house had been cleared, the ramp and taxiways had not. There were quite a few tire tracks heading down the taxiway towards my hangar, and there was a guy on a backhoe plowing the parking lot that I could summon for help if needed, so I decided to see how bad it was. The car was spinning a bit in the thicker spots, but I managed to keep constant forward progress. Then all the tire tracks pulled into the third hangar down, and all I had in front of me was virgin snow, of unknown depth. I kept the speed up, and made it all the way to the end next to the last hangar, which is where the RV-8 is. I almost got stuck turning around, but I managed to get the car pointed back towards the tire tracks I had made. I was so glad for the snow tires I had put on last week.
I went into the hangar to put castors on the Ikea shelves I had assembled. Although you put some thought into where to put shelves, inevitably you eventually wish they were somewhere else. But they always have so much stuff on them that you don't want to unload them so they can be moved. I decided this time to put castors on the bottom, so I will be able to move them around, if needed, without unloading them.
After finishing with the shelves, I went out to the car to bring in the load of stuff I had brought to the hangar. I was dismayed to see that there was enough wind that some snow drifts were forming. I was quite concerned that the snow drifts could cause me grief, so I decided I had better leave ASAP before they got any higher. I almost got stuck a couple of times, but I managed to make it back to the road. Whew. I was afraid for a while that I was going to have a few hours of digging before I got off the airport. Lesson learned - after a snow storm, call the Flying Club to check the ramp and taxiway status before driving out to the airport.
Mounting Elevators - Dealing With the Spacers
- Details
- Written by Kevin Horton
- Hits: 3380
Wednesday night I woke up with one of those Eureka moments, realizing an easy way to deal with those spacers that had given me such grief on Monday. I was having great trouble getting the spacers in between the elevator horns and the centre hinge, and managed to drop the hinge bolt and two washers down inside the rear fuselage. Thursday morning I woke up at 4:30 AM, and felt well rested, so I decided to go into work very early. I left work early, and went to the hangar. I used a magnet on a flexible arm, and managed to recover the bolt that I had dropped, and one washer. The other washer is still AWOL, but I expect that it will eventually escape out the bottom where the tail wheel spring comes out the bottom of the rear fuselage.
I approached the spacer problem completely differently than I had on Monday. On Monday, I installed both elevators, then tried to get the spacers in between the elevator horns and the centre bearing. On Thursday, I removed both elevators. I then slipped the bolt through the elevator horn on one elevator, then put the spacers for that side on the bolt. Then I put the free end of the bolt through the bearing in the centre hinge, then slipped the other two hinges in place. Next, I slipped the spacers for the other side over the end of the bolt, then slipped the elevator horn of the second elevator onto the bolt, then slipped the last two hinges in place. This worked very easily, but it assumed that you have a record of exactly what spacers are needed on each side.
Wing Mounting on Hold
- Details
- Written by Kevin Horton
- Hits: 3466
Today I managed to get two hours of work done at the hangar. I spent most of the time cleaning the Permatex Anti-Seize off the wing spar bolts and out of the bolt holes in the spar. I had used the Anti-Seize as a lubricant when I installed the wings so I could drill the rear spar attachment hole. I have subsequently learned that the Anti-Seize contains graphite, which can promote corrosion of aluminum. I labouriously cleaned the Anti-Seize off the bolts and out of the spar holes using acetone.
I had hoped to install the wings tomorrow morning. But the weather guessers have substantially changed the forecast temperatures. Now they claim that it will get down to -16 deg C overnight, and only get up to -12 tomorrow. I have put the wing mounting work party on hold, in the hope of working on a warmer day.
Some Days You Should Just Stay in Bed
- Details
- Written by Kevin Horton
- Hits: 3492
Today was forecast to the be the warmest day this week, and I had nothing pressing going on at work today, so I decided to take a day of comp time to work on the aircraft.
This morning, I did something I should have done 10 years ago - I cobbled together a way to put the plans on an easel-like plans stand. All through the project, I had the plans laid out flat on a card table. This worked, but I had to pull out a sheet and move it to the top when I wanted to look at it, and it was a pain to get it slid back in order later. Also, I am not the neatest guy on the block, so I have a tendency to allow stuff pile up on any flat surface, including the plans table. I decided that it would be more practical to attach all the plans sheets together at the top, in order, and fasten them to a stand. That way I could flip the sheets over the top to get to the one I need. This morning I bought the hardware, punched holes in the tops of the plans sheets, bolted them between two small pieces of wood, and attached the whole thing to a flip chart stand.
After lunch, I drove to the hangar and assembled the plans stand. I wanted to take a picture of it, but discovered that I had forgotten to bring the camera, which was the first hint of trouble to come. I had one thing I wanted to get done this afternoon, and several more tasks that I could work on. I opened the hangar door, and rolled the wing cradle out to get some light on it. I quickly discovered that the screw holes that I wanted to work on were in a slightly different location than I had remembered, and that I hadn't brought the one-legged nutplate variety that I would need. Drat. I had hoped to get this job done today, as I expected that it would be harder to get to this area once I install the wings on the fuselage, which I hope to do on Saturday. Oh well. I had several other things I could work on.
I decided to install the castors I had purchased on the bottoms of the shelves. It seems that no matter where I install shelving units, I later decide they are in the wrong place. I decided to put castors on the shelves, so I can move them around without unloading them every time I decide they need to be in a different location. But, I quickly discovered that I had managed to leave the bolts that fasten the castors to the shelves at home. Drat.
Next, I attacked the elevators. Yesterday I installed the rudder, and today I would install the elevators. It took a bit of fiddling to get the outer two hinge bolts in place on each elevator, but the bolt at the junction of the two elevators proved much more troublesome. There are a bunch of washers that have to go in between various things at this middle hinge, and it was a real pain to get them in place, as the rudder was in the way. I managed to drop the bolt and two washers down in the bowels of the rear fuselage, and realized that I had not yet brought my magnet on a flexible stalk to the hangar. I bring a load of stuff every time I go out there, but it will be awhile before everything is at the hangar.
I decided that I really should remove the rudder to improve access to the elevator hinge. That was the last straw. I hadn't accomplished anything, I had to undo something I thought I had finished yesterday, and I had run out of patience. I decided that I should stop before I damaged something.
I'll try again Thursday evening, I hope.
Fuel Tanks, Ailerons, Rudder Mounted
- Details
- Written by Kevin Horton
- Hits: 3610
Sunday a week ago, the day after moving the fuselage to the hangar, I spent a few hours installing and torquing bolts on the RH fuel tank, and trying to mount the ailerons. I had a tough time getting washers and spacers in place where the aileron pushrod connects to the aileron, then when I finally had them in place I discovered that I didn't have the correct nuts at the hangar.
I was on the road for two nights last week, and the weather wasn't great the other evenings, so I didn't get any work done at the hangar.
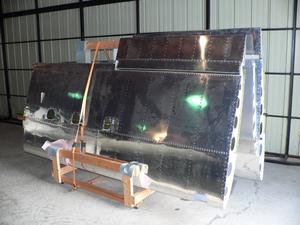 Today, I spent about seven hours at the hangar. I installed and torqued the bolts on the LH fuel tank, then mounted the ailerons. It went much better this time, as I made liberal use of duct tape to help get various washers and nuts in place.
The plans call for AN365 elastic stop nuts on the various bolts in the control system. This meets the accepted criteria, as if those nuts are properly torqued, the spherical rod end bearing is head fixed, and rotation occurs around the bearing, and there is no tendency for the bolt to turn. But, if one of these nuts does come off, there could be a loss of control, so I opted for a "belt and braces" approach, by using MS17825 self-locking castle nuts. These self-locking nuts are also secured with a cotter pin, giving two independent locking means.
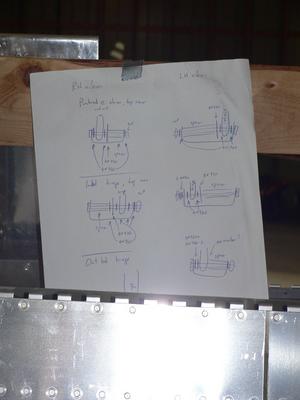 The first time I mounted the ailerons, a long, long time ago, I recorded the exact configuration of washers, spacers, etc needed at each joint. This record proved invaluable today.
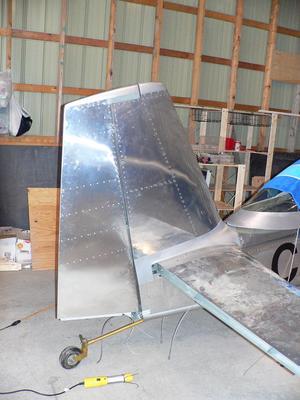 Next, I bolted the rudder in place.
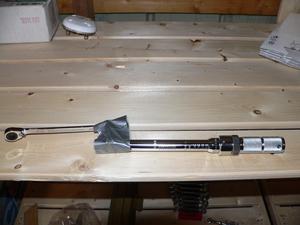
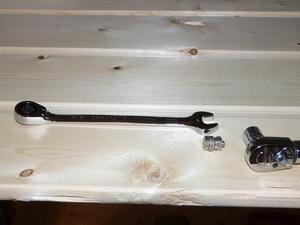 There isn't much room to work with when torquing the nuts at the hinges. I made good use of a ratcheting box end wrench, coupled to the torque wrench via a nut and bolt combination, with the whole thing duct taped together. Of course the setting the torque wrench must be decreased to account for the extra length on the end of the torque wrench.
Move to the Hangar - More Details
- Details
- Written by Kevin Horton
- Hits: 4147
I've got a few minutes, so I'll post more details on the big move to the airport yesterday.
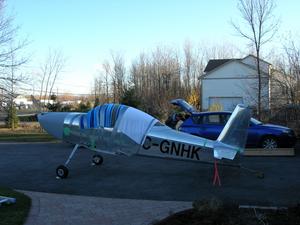 First thing Saturday morning I went into the garage and duct taped some thick towels over the canopy to protect it from any errant stones that might be thrown up by oncoming traffic. Then I moved the fuselage outside. It took a fair bit of back and forth manoeuvring, as the fuselage was in the garage at quite an angle, and I couldn't simply roll it straight out as it would have hit the side of the house. But I eventually managed to work the fuselage out of the garage and parked it, waiting for the trailer to arrive.
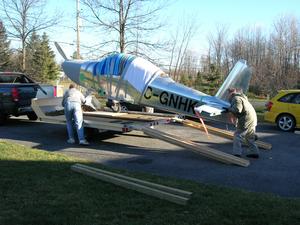 I borrowed two very nice ramps that had been made by local RV-8 builders Mark Richardson and John Perrin. The first plan was to roll the fuselage up on the trailer, determine exactly how far aft the tail wheel support would have to go, then crawl under the fuselage to drill holes for the tail support and bolt it in place. But, that didn't work as my short drill bit was too short, and the long drill bit was too long to allow the drill to fit beneath the fuselage.
All I managed to do when I crawled under the fuselage to try to drill the holes was to snag my back on the transponder antenna and bend it. When I tried to straighten it, I broke it. Grrr. Fortunately it was only a $20 antenna from Aircraft Spruce. I was surprised at how fragile that antenna was. I'll order two, so I have a spare. And I won't put the new one in place until late in the final assembly.
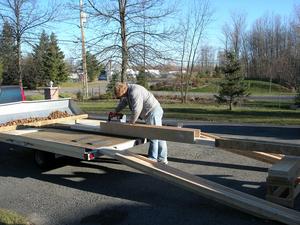 We rolled the fuselage back onto the driveway and drilled and attached the tail wheel support. It was held on with six bolts that went through the floor and a longitudinal member that supported the floor.
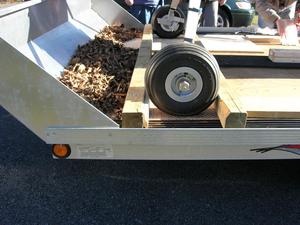 We bolted 4x4s in front and behind the main wheels to act as chocks.
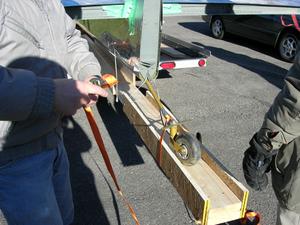 The tail wheel rod was secured with two nylon cargo straps.
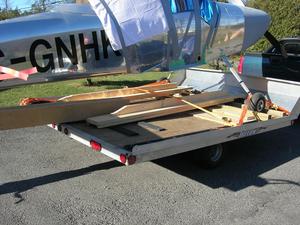 The main gear was secured with nylon cargo straps going fore and aft. We made sure to not forget to bring the ramps along.
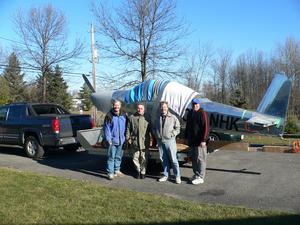 The intrepid RV-8 moving crew: Jim MacLachlan, John Wiseman, myself and Jim Manton.
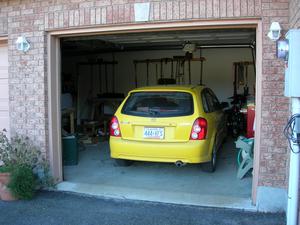 About 2 seconds after we disappeared from sight, Terry had her car in the garage. She waited a long, long time for that.
