Progress
- Details
- Written by Kevin Horton
- Hits: 3367
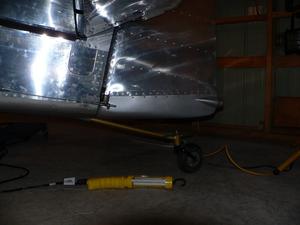 I got out to the hangar for a few hours on Monday, Wednesday and Saturday. I installed the empennage fairing. I got the ailerons rigged (but need to do some confirmatory checks to make sure). I wired the position light and strobe light in the rudder bottom fairing and installed the fairing, and did a functional tests of the position and strobe lights.
I spent a lot of time chasing a minor control restriction that can be felt just before hitting full up elevator. I couldn't find where it was coming from, so ended up disassembling portions of the elevator control circuit so I could see which portion of the circuit was causing the restriction. I eventually tracked it down to something causing the aft end of the most forward elevator pushrod to bind inside the control stick weldment. Unfortunately I haven't yet found a way to see inside so I can see what is causing the restriction. I will disconnect that pushrod during the next hangar visit so I can troubleshoot this. If it isn't easy to fix, I may end up adjusting the pushrod lengths to put the aft stick a bit further forward. That should stop the interference, but will probably require making a small bend in the aft stick so it doesn't hit the front seat back at full forward stick.
I am ohh so close to having everything aft of the rear baggage area 100% finished. All I have to do is install the tail wheel control chains. I need to order two eye bolts to put in the rudder control horn, so the wear from the chains will occur on a replaceable part, rather than on the difficult to replace rudder control horn.
Elevator Pushrod, Flaps, Etc.
- Details
- Written by Kevin Horton
- Hits: 4208
I was in Salt Lake City all last week for meetings and flight testing. I managed to get back on Friday night, in the midst of a big winter storm - over 12" of snow. I didn't try to get out to the airport on Saturday, as I was certain that the taxiway to the hangar wouldn't have been cleared.
Sunday morning I decided to chance a trip to Smiths Falls. I discovered that while some taxiways were clear, the one to my hangar hadn't been cleared yet. I left the car in front of the club house, and trudged down the hangar line all the way to the end, in snow half way up my ankles. I was bushed by the time I got there - I've got to get some snow shoes. Fortunately, the taxiway had been cleared by lunch time, so the walk back to the club house for lunch went much quicker.
Sunday I installed the big elevator pushrod in the rear fuselage. There are a whole bunch of washers that go on each side of the rod end, with the hole shebang bolted in between the two elevator control horns. I threaded a piece of nylon cord through everything, then pulled it tight and slipped a 1/8" drill bit through to hold everything in place. I pulled the cord out, then pushed the bolt through. I do have to lubricate all the rod end bearings though, as they are quite dry, and there is more friction in the elevator control than I would like.
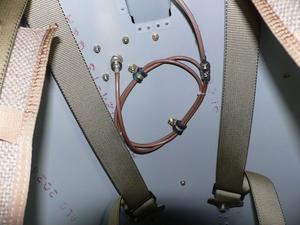 I also finally secured the extra four feet of GPS antenna coax that I had to add when I did the WAAS upgrade to my GNS 430. I had originally chosen the shortest possible routing for the coax, running it right underneath the canopy rail from the instrument panel to the rear seat area. But when I did the WAAS upgrade, I learned that the WAAS version of the GNS 430 had a minimum RG-400 coax length of 13 ft, and my coax was four feet too short. Arrgh. I ordered longer screws for the centre canopy rail, and used the longer screws to hold an Adel clamp to secure the coil of extra coax at the top of the rear baggage area, right by the antenna.
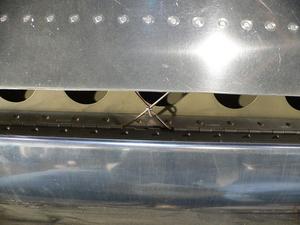 I also put the flaps on the hinges. There are many different ways to handle the hinge pins - I elected to remove some hinge eyes in the middle of the hinge, and used two separate pieces of hinge pin, inserted from the middle on each side, with the two pieces secure to each other with safety wire. The first piece was impossible to get all the way in until I put some Boelube on it, then it was only quite difficult. For the second one I drilled a hole in the end of the piece of dowel so I could put the hinge pin in the hole to allow the dowel to be used to push the hinge pin. That helped a bit. For the next two I realized that the Boelube had been pushed off the end of the hinge pin by the time it had been inserted very far, so I pushed a bit of Boelube into each hinge eye. That made a huge difference - the last two pieces of hinge pin slipped in place very easily.
Then I attempted to attach the flap pushrod to the inboard end of the flaps. I quickly discovered that it would have been much easier to bolt those rod ends in place before riveting the flaps together - I could get the lock nut started, but I couldn't get a wrench on it to tighten it.
Today I took a couple of hours of comp time, and left work early to go to the airport. I bought a cheap 7/16" wrench at Canadian Tire, then used a propane torch to heat it to a nice cherry red then bent a 90° bend in it. The modified wrench allowed me to hold the lock nuts on the end of the rod ends so I could get them tightened in place. I got the flap pushrod lengths adjusted to put the flaps at the correct angle. Next trip I'll adjust the aileron pushrod lengths to match the ailerons to the flaps.
Right Wing Tip Installed
- Details
- Written by Kevin Horton
- Hits: 3486
Normally, I try to get a couple of evenings at the hangar during the week. But this week I had a whole bunch of flying to do, and that fouled up my schedule, so I didn't get there until today.
I had installed the left wing tip a week ago, but when I reviewed the digital photos I had taken before I installed the tip, I noted that the wires for the position light looked like they might possible chaff on some of the attachment screws. So, today I removed the dozen screws that held the tip on (I hadn't put all the screws in, as I have not yet been able to do a functional test on the COM antenna inside the wingtip). A quick look showed that there was no risk of the wires chaffing - the camera angle had made it appear as if there was a problem when in fact everything was fine.
Today I connected up the wiring for the strobe light and the NAV antenna in the right wing tip, and put the wing tip on. There is no way to do a functional test of the NAV antenna on the ground, as the nearest VOR is too far away. So, I put all the screws in.
About this time I heard an aircraft taxi up and shut down outside the hangar. I'm in the last hangar on the row, so there is no reason for an aircraft to be out there. Curious, I went outside, to find that Mark Richardson had come by for a visit in his RV-8. He offered me a flight, and I quickly agreed. It was great to get back in an RV. But, eventually my feet started to freeze, so we came back to the airport. Mark hadn't put boots on the aileron control rods where they enter the fuselage. We suspect that the cold air that gets in under the floor is cooling down the passenger footwells, as they protrude down right next to where that cold air would be blasting in. Hopefully the situation will be better with my aircraft. Maybe I should glue some insulation onto the lower surfaces of the footwells before I put them in place.
Next I prepared to install the AN4 bolts that fasten the root end of the fuel tanks to beefy angles on the sides of the fuselage. I was extremely dismayed to see that the slots in the angle on the fuel tank didn't line up with the holes in the angle on the fuselage. It turned out that I had put the fuselage angles on the wrong side of the fuselage. It was a pain in the butt to get those angles installed the first time, and now I would have to remove them and redo it. Grr. I was so frustrated that I almost packed up and went home, but I snapped out of it and jumped to the task. 45 minutes later I had the angles back on the correct sides of the fuselage.
I forgot to take my camera to the airport today, so there are no pictures.
Bell Tail Wheel
- Details
- Written by Kevin Horton
- Hits: 7976
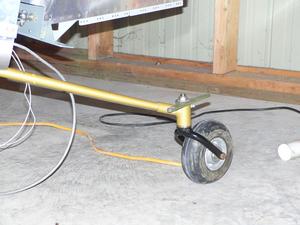
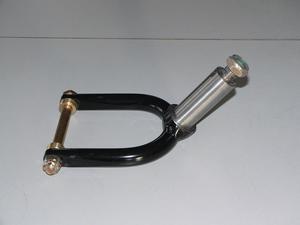 The tail wheel that Van supplies doesn't have very much clearance between the ground and the bottom of the tail wheel fork. Many people report that if the tail wheel goes in a small hole that the tail wheel fork may hit the other side of the hole with quite a lurch. Doug Bell Sr, the father of RV-8 builder Doug Bell Jr, decided to do something about the problem. He designed a replacement tail wheel fork that is a slip in replace for Van's tail wheel fork, and he started selling them - comparison pictures here. Mine arrived on Monday, and it is a thing of beauty. I installed it on Saturday - it was a very quick job.
Left Wing Tip
- Details
- Written by Kevin Horton
- Hits: 4920
I'm slowly grinding my way through all the things that need hooking up in the wings. I've got the Duckworks landing light and taxi light all hooked up. Getting the lens in turned out to be a bit of a Chinese puzzle. I had never had the light assembly and the lens in place at the same time before. The lens is bigger than the hole, and it sits inside the wing skin. You have to manoeuvre it on edge through the hole, then slip it in place. It is a bit like the overwing exits on small business jets, where you pull the exit inside the aircraft, then turn it on edge and throw it out the hole. But with the landing light lens, you do it in reverse, and from outside the aircraft. It turns out that perhaps I should have trimmed the plexiglas on the lens a bit closer to the screw holes. The lens would hit the light mount, which stopped me from getting it into the hole. I eventually unscrewed the attachment screws on one end of the light mount, which allowed me to push it aft, making room to get the lens inside the wing. Then I slid the lens outboard, which allowed me to reach in the hole and reinstall the screws that held the light mount. I need to use a piece of safety wire with a hook bent on the end to help pull the lens forward into the curve of the leading edge skin so I could start the screws.
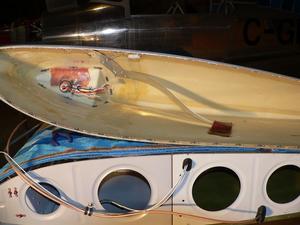 Yesterday I finished off hooking up the various things in the left wing tip - position light, strobe light and COM 2 antenna. Here you see the wing tip upside down on the wing. The aft end of the COM antenna is secured to the upper surface of the tip with fibreglas.
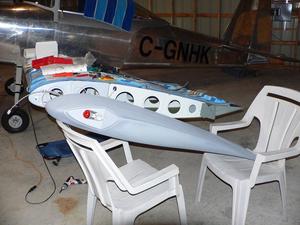 Bob Archer suggests to do the antenna hookup with the wing tip sitting upside down on the wing. That would work well for his NAV antenna, which mounts to the upper surface of the wing tip. But the COM antenna mounts to the lower surface of the wing tip, so I used two plastic chairs to hold it in place a bit outboard of the wing. The various wires and cables would be running forward as they went from the wing into the wing tip, so by pulling the wing tip aft, I was able to have enough of a space between the wing and the wing tip to make the hookups.
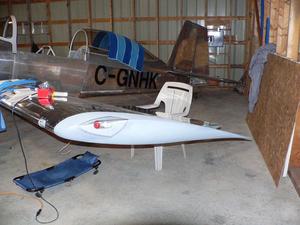 I only put in about 20% of the screws that attach the wing tip, as I have not yet been able to do a functional test on the antenna. I need to pull the aircraft to the door of the hangar so I can try to talk to someone on the radio. I'll wait until I reinstall the COM 1 antenna on the bottom of the fuselage - I took it off to avoid damaging it when I was crawling around under the aircraft all bundled up in my winter clothes.
Certificate of Registration
- Details
- Written by Kevin Horton
- Hits: 3597
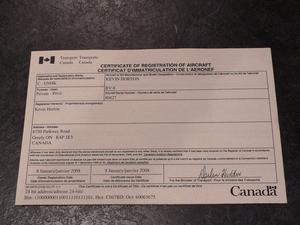 The Certificate of Registration arrived in the mail today. I wasn't expecting it for some time, as I had heard rumours of long delays in the TC paperwork. I put the application in the mail about three weeks ago, to be sure that the C of R would arrive before the final inspection (for some reason, you can't do the final inspection unless you have received the C of R). I'm still quite some time from being ready for the final inspection, but it is nice to know that the C of R won't be a road block.
