Canopy Skirt Spacers
- Details
- Written by Kevin Horton
- Hits: 3487
I pondered the gaps between the canopy skirt and the vertical tubes in the canopy framework for a few days, and finally decided how to proceed. I measured the gap at each hole, and then laid up a bunch of flat pieces using between one and seven layers of fibreglas cloth. This gave me a wide variety of different thicknesses to make spacers from. I needed spacers from 0.025" to 0.150" thick.
 I first did a test with three spacers to be sure that the concept would work. They bonded well, and the fit was quite good.
 I used some 1/8 inch bolts and washers to hold the spacers tight to the skirt while the resin cured. I was afraid that I might have trouble getting the hardware off, but the hardware for the three test spacers popped free fairly easily.
I fibreglassed all the spacers in place this afternoon. I'll remove the hardware tomorrow morning before the resin is completely cured. I'll test the fit later in the week. Tomorrow I'll work on tidying up the wire bundles, I think.
Alternate Air Door, again
- Details
- Written by Kevin Horton
- Hits: 4252
I was in Montreal all week until Thursday evening. This weekend I finally started slowly at the remaining fibreglas work. I had been delaying the fibreglas work on the alternate air door installation, as I was waiting for some longer blind rivets to arrive. My induction snorkel seems to be curved a bit more than the one in Van's pictures, so the lower two holes needed a much longer rivet than the ones they sent.
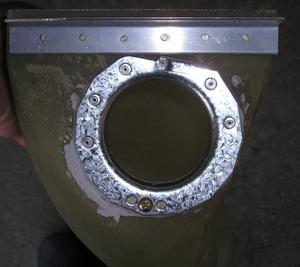 You can see that there was quite a large gap to fill between the lower part of the metal ring and the snorkel. A thick mixture of flox and resin made a great paste to fill the gap.
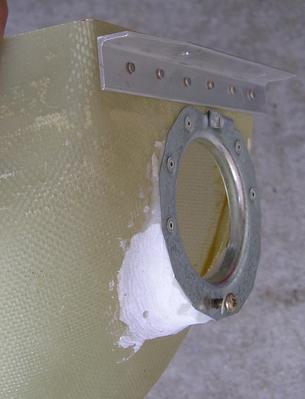
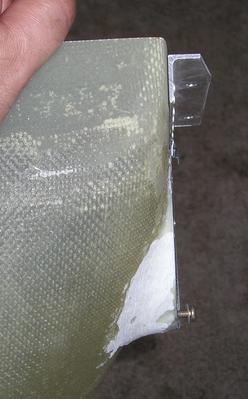 The surface of the filled area is a bit rough where I ground off the lumps of excess material. I brushed on a coating of resin to seal and smooth the surface after taking these photos. I'll finish the alternate air door installation after that resin cures.
I then rolled a thinned coat of resin on the inside of the lower cowling to seal some areas of porosity. I screwed up though, and used too much acetone to thin the resin. It seems to be curing very slowly. Hopefully it will turn out OK.
Next I clecoed the canopy skirt back on to confirm the fit, and decide what remained to do. It fits well along the upper and lower edges, but I have some gaps to fill between the inside surface of the skirt and the vertical tubes of the underlying framework.
Battery Arrived
- Details
- Written by Kevin Horton
- Hits: 4449
I was in Wichita all last week, and didn't get back until Saturday night. I'm heading back on the road tomorrow too. :( I'm going to be on the road this summer quite a bit more than I had expected. But, I've got a whole bunch of vacation time saved up, and I'm going to take four or five weeks off whenever things slow down, so hopefully I'll be able to make some good progress then. I've got to get this thing flying.
My Odyssey PC-680 battery arrived while I was away. I bought it on e-Bay, from someone who seems to be making quite a business out of selling them. He has good prices, he sells a lot of batteries, and no one has registered a single complaint against him. The battery looks to be new, it was well packed, and it was fully charged. So, if you are looking for a good price on an Odyssey battery go to e-Bay, and look for batteries for sale from "odyssey_world".
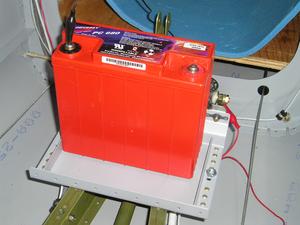 I will have to make up some spacers to go between the edges of the battery tray and the battery, as it is a lot smaller than the tray. I figure I'll make something out of wood, varnish it and bolt it into place. I've also got to make up the battery cables, now that I can figure out how long they need to be.
I used some patch cables to hook the battery to the electrical system. I was finally able to do a functional test on the starter control wiring. The power supply I was using didn't have enough "oomph" to properly work the starter contactor.
Project Status - 7 May 2003
- Details
- Written by Kevin Horton
- Hits: 6336
I've been working on this project for a depressingly long time, but I am ever so slowly getting closer to the end. I started on the kit in the fall of 1997, almost seven years ago.
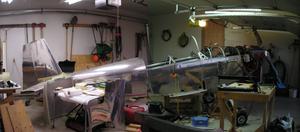 Big Picture - The structure is essentially complete. Here you see the fuselage, with engine and prop attached. The wings and the rest of the tail surfaces are in the basement. The engine installation is mostly complete, but I still have to fabricate the top of the plenum chamber for the cooling system, and I have to finish off a few other small details.
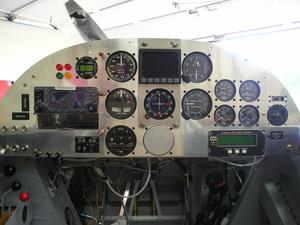 The avionics and instrument panel installation is essentially complete. I still have to paint the instrument panel and permanently install the fixed, outer parts of the instrument panel. I have a few cockpit details to finish off. The wiring is still a real mess, as I have barely started to tidy up the wire bundles. The cowling is mostly complete, and the canopy is about half done.
I refuse to predict when I will fly, as I would be setting myself up for failure and frustration if I had a schedule to meet. I am enjoying working on the project, and I try to do something everyday. Some day I will be done. See the more complete To Do List for a better idea on how much I have left to do.
You can see bigger versions of these photos in the Construction Photo Gallery.
Yahoo RV-8 List Out of Service
- Details
- Written by Kevin Horton
- Hits: 3142
The original Yahoo RV8-list e-mail list is out of service. There is some sort of failure that prevents new messages from making it to the list. Doug Reeves has set up a replacement e-mail list. If the old list starts working soon, the new list will probably be shut down.
The original RV8-list had grown to over 900 members. It will be interesting to see how quickly the new list grows.
Cockpit details
- Details
- Written by Kevin Horton
- Hits: 3555
The 12 volt power supply I had been using to power up the aircraft's electrical system died last week. I was checking out some wiring and suddenly everything went dead. I opened up the power supply and checked the fuse - it was good. None of the components showed obvious signs of distress either. I checked the continuity of the input and output wiring - OK.
The power supply was one of several that another builder had assembled. He gave them to other builders, with the understanding that they would in turn pass them on to someone else. Ken Balch, an RV-8 builder, gave me his when he was done with it. I served at least three builders before it gave up the ghost.
So, I ordered an Odyssey PC-680 battery. Hopefully it'll arrive this week. I'll keep it trickle-charged, and use it to power the electrical system. I choose the PC-680 as it has gotten raving reviews from RV flyers. The best price I could find in Canada was $CDN 175, so I ordered it from the US, for $US 53.50 + $US 19 for shipping, which is a total of about $CDN 97. I'm prepared to pay a small premium to support local business, but not an extra 80%.
I spent a few days in Montreal last week, so I didn't make much progress. This weekend I made a bracket to hold the cockpit end of the cable for the alternate air door. And I punched the hole in the firewall for the cable to go through. I also started working on the cockpit heat control.
