Fibrelglas, with no end in sight...
- Details
- Written by Kevin Horton
- Hits: 3561
I got an e-mail message from the wife of a local multiple RV builder about a week ago. She had been to me web site, and noted that I was using red Bondo glazing putty. She told me that they had used that stuff on their first RV. It looked great at first, but the paint started to bubble after a year. I was quite depressed, needless to say.
I posted questions on the RV-List and the Yahoo RV8 group. I got quite a few responses, both on and off the lists. The general consensus was that it was OK to use the red glazing putty, if a few precautions were taken. There was a risk of problems if it was not given enough time to cure before painting over it, in which case it would release solvents under the paint. But, there seemed to be a good history of no problems if only thin layers were used, and if it was allowed to cure for several days before painting it.
I've been making slow progress on the fibreglas parts. I riveted all the tail section tips, except one elevator (I have to dimple four holes) and the rudder bottom. I had a minor crisis when I riveted the left elevator tip on - I heard something moving around inside the elevator. I was afraid I would have to do some surgery to open the elevator up. I pulled the elevator off the aircraft so I could figure out what was going on. I eventually discovered that there were four washers loose inside the elevator. There was just enough open space in the trim tab area that I could get the washers out without drilling out any rivets.
The rudder bottom and empennage fairing are mostly pin hole free, but they need at least one or two more cycles of prime, sand, fill before they are done. The bottom 90% of the canopy skirt is looking great, but the lip that attaches to the canopy has too many wavy parts. I decided tonight that I needed to start over in that area. I sanded off the primer and glazing putty, and I'll put on a layer of West Systems epoxy and filler, then sand that down to get rid of the waves.
The cowling bottom has glazing putty curing in the pin holes - I'll sand it this weekend and prime it. The cowling top has a layer of primer, but I haven't had time to put any filler in the pin holes yet.
And Even More Fibreglas ...
- Details
- Written by Kevin Horton
- Hits: 3642
It's been a busy few days. A hole in my work travel schedule opened up, so I booked last week off before any other work commitments could get put in that week. I spent much of the week fighting with the fibreglas.
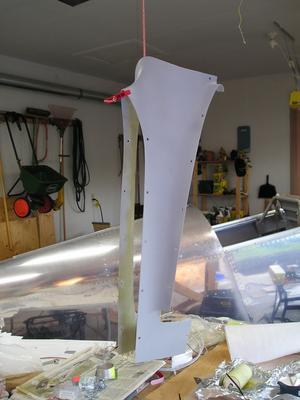
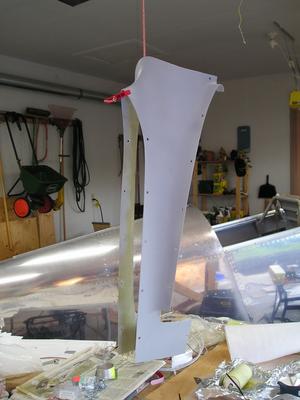 I finally got all the tail surface tips in good enough shape for paint, except for the rudder bottom. I decided to paint them silver for now, as the metal won't get painted until after the flight test program, and silver is the best match. The paint looked great, until it dried. Then some areas were shiny, and some were flat. Another coat. A bit better, so one more coat. One of the six pieces looked good, but the rest needed a fourth coat. I riveted the horizontal stabilizer tips on today, and the rest will go on this week.
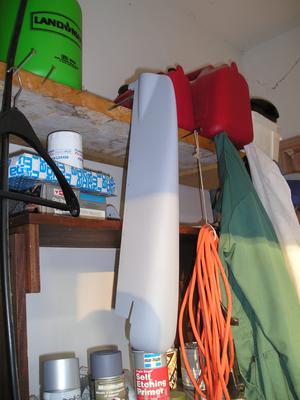 I put the first coat of primer on the rudder bottom and the empennage fairing. The rudder bottom isn't in too bad shape, but the empennage fairing has a good number of pin holes to fill.
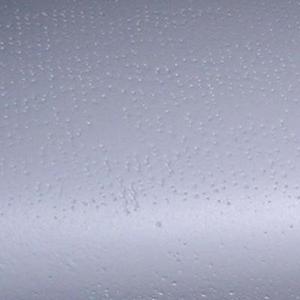 Then I started on the lower cowl. I didn't think it had too many pin holes, but I just about had a heart attack after spraying the first coat of primer. Thousands of pin holes. Several tens per square inch, I think. :(
I was looking at the cowl of an RV-8A last year in Oshkosh, and saw quite a few pin holes. I couldn't understand how someone would bring their aircraft to the big show looking like that. Now I understand. I thought he had done a poor job filling pin holes, but he probably got 99.99% of them.
This is a close-up of part of the lower cowling, showing the horror of pin holes.
 I had been using a UV-activated filler that another builder had recommended to me. He liked it because he could squeegee it on, then put the part outside for a few minutes and then sand it. I tried the stuff, but I found it was too thick, and it was hard to get a thin layer. Plus it was hard to sand, and it didn't cure as fast as I expected. So, I tried some automotive glazing putty. It was much thinner - I could squeegee it on and have it only go in the pin hoses, plus a very thin coat on top. It took over an hour to cure, but it was easy to sand and paint went over it well. It is my current pin hole weapon of choice.
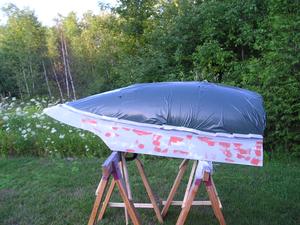
The canopy skirt is slowly coming along. Still lots of pin holes to fill, etc. The red blotches are the glazing putty curing.
I have been supporting the canopy on saw horses, but that is a real PITA. If I need to move it inside or outside, I have to take it off, carefully set it on the grass. Move the saw horses, carefully pick the canopy up and get it set on the supports that are C-clamped to the saw horses. This is an accident waiting to happy. So, this evening I built a canopy stand on castors. It is 95% complete - it should be operational tomorrow.
Back to work tomorrow.
Fibreglas, and more fibreglas
- Details
- Written by Kevin Horton
- Hits: 3440
I was on the road for several days last week, so I didn't make much progress on the project. I took a week of vacation this week, so I'm trying to make progress on the fibreglas.
Yesterday I sanded the canopy skirt so much my arms were aching. I finally realized that I needed to get some better sanding blocks - something with a decent handle so it is not so hard to hang onto them. The new ones work much better.
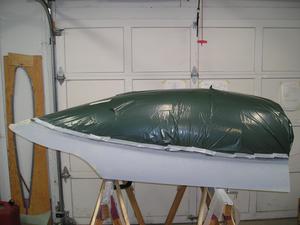 Today I did some more sanding, put some filler over the rivet heads, and sanded some more. Late this afternoon I taped some garbage bags over the plexiglas, and sprayed the first coat of primer on the canopy skirt. I knew the surface wasn't smooth enough yet, but the primer helps you see where the uneven areas are. And there sure are a lot of spots that need filler. Wow. I still have a lot of work to do on this yet.
I've done several cycles of sand, prime, repeat on the tail surface tips. They are almost ready for a coat of silver paint, except for the one on the bottom of the rudder. Tomorrow I'll start on it, and the empennage fairing, and the cowlings. Plus more sanding on the canopy skirt. Ugh. :( I don't know how people actually build a composite aircraft. I've only got a few square feet of the stuff to deal with, and it is just about driving me nuts trying to get it smooth enough for paint.
IO-360-A Power Chart Available
- Details
- Written by Kevin Horton
- Hits: 5119
I've been on the road a fair bit lately, and I've had a bit of spare time in the evenings. So I did a lot more work on my Pilot's Operating Handbook for the RV-8. I had originally started using OpenOffice to create it, but I ended up not being able to get the figures looking the way I wanted. Most people use Microsoft Word, but I don't have it installed on my home computer. I wanted something that would work both on my work PC laptop, and my home Macs. So I eventually decided to learn LaTeX, as it is very well suited to technical documents with figures, charts, etc.
LaTeX was a bit of a struggle at first, but I'm over the hump now. It integrates well with gnuplot, which will make it easy to get good looking graphs in the performance section.
I just finished the Cruise Power Chart, and I realized that some other RVers with IO-360A engines might be interested in it. I copied the format from a Mooney M20J, but all the data is from a spreadsheet I developed from the Lycoming Operator's Manual. I checked the manifold pressure and rpm combinations against the power charts for a Cessna 177RG and a Beech Sierra 200 B24R, both with IO-360-A1B6 engines. The spreadsheet matches the Cessna and Beech powers very closely. Mooney calls for manifold pressures that are about 1.5" higher than Cessna and Beech. That might explain why Mooneys are faster than other similar aircraft.
The spreadsheet to calculate power is available in my Links section. There is a link to it in the Top Links block on the right side of this page.
The Cruise Power Chart I created is available as a PDF file.
Canopy Tribulations
- Details
- Written by Kevin Horton
- Hits: 3752
I made a depressing discovery on Monday when I took a close look at the canopy. I noticed that the edge of the plexiglas was touching a diagonal tube on the canopy frame. This would put a lot of stress on that spot, and a crack would likely start there. Any crack would probably propagate up the canopy. Very bad news.
The instructions recognize the potential for the edge of the plexiglas to touch the canopy frame vertical and diagonal tubes. The builder is instructed to relieve the edge of the plexiglas in half-moon shaped spots to keep it from touching those tubes. I had done that, but I hadn't removed quite enough plexiglas at that spot. I had noticed this a few months ago, and marked the plexiglas where it needed to be removed. But I couldn't do the work then as the plexiglas was temporarily riveted to the frame, so I planned to do it when I removed the plexiglas later. But I forgot, and I was in too much of a rush when I riveted the assembly together on Sunday, and I didn't give it as close an inspection as I should have before I started riveting.
I couldn't leave the plexiglas touching the frame, as it would almost certainly crack. I couldn't drill out the rivets and remove the plexiglas as I had used marine adhesive to seal the skirt. I would almost certainly damage the skirt and canopy when removing it. I had to devise a way to fix it in place.
I grabbed my collection of needle files and started filing the edge of the plexiglas. It took hours, and hours and hours, but I eventually was able to file away the offending plexiglas, and then smooth the new edge very carefully. It took all week, but it turned out OK. Lesson learned (again) - Don't be in too much of a rush. A few minutes of haste can require hours to recover from.
Several RV-8 builders have noted that the rivets along the top aft part of the canopy skirt eventually move a bit, and this cracks the paint. They said that if they did it again they would put a layer of fibreglas over those rivets so any movement wouldn't crack the paint. I decided I should take advantage of their experience.
Today I masked off the lower portion of the canopy using electrical tape, and cleaned and sanded the canopy skirt. Then I cut some 1" strips of 1.5 oz "deck" cloth and fibreglassed it over the row of rivet heads at the top of the canopy skirt. Tomorrow I'll pull the peel ply off and see how it turned out. If it looks good, I'll roll a couple of coats of thinned resin over the filler on the skirt and start sanding, filling pin holes, etc.
Canopy, riveted
- Details
- Written by Kevin Horton
- Hits: 4467
I was on the road for quite a bit of the last three weeks, so progress has been depressingly slow. I did some odds and ends of fibreglas work, and spent quite a bit of time preparing the canopy for assembly.
I also spent a lot of time trying to resurrect my ancient iBook laptop which finally died, but it looks like it had a major failure. So, I went out and bought a new 12" PowerBook G4. Very nice machine, but it take a fair bit of time to install all my software, and restore the backup from the old iBook.
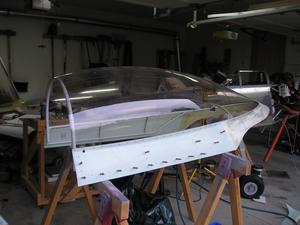 Today I was finally finished prepping the canopy for assembly, so I screwed up my courage and got Terry to help me. I was quite afraid that it might crack as I pulled blind rivets that hold the plexiglas to the frame, but it all came out OK. I only did the rivets around the plexiglas - I'll do the ones at the bottom of the skirt tomorrow morning.
I wanted some sort of sealant to go between the plexiglas and the fibreglas canopy skirt to make the joint watertight. Some builders use Pro-seal, the same stuff that is used to seal the fuel tanks. But I had had enough of that messy Pro-Seal, so I looked for another solution. Some builders use Lexel, but I couldn't find a local distributor.
So, I ended up using a marine product that is designed for the installation of plexiglas windows on boats - Sikaflex 295 UV. The only downside of the Sikaflex is that it only comes in one colour - black. I laid a small bead of it between the frame and the plexiglas (except around the canopy bow at the front) to provide a bit of cushion for the plexiglas to ride on. I also put a bead between the plexiglas and the skirt. I'll buy another tube and cut the tip very small so I can run another very small bead along the edge of the canopy skirt.
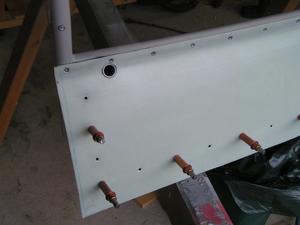 Here is a close-up of the front of the canopy, showing the canopy bow and the canopy skirt
