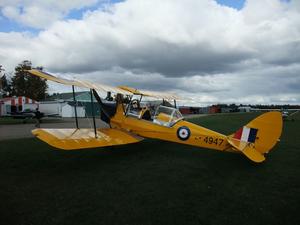
Annual Inspection Complete - Engine Set Back
- Details
- Written by Kevin Horton
- Hits: 5097
This afternoon I finished off the annual inspection. I did the annual compass swing, then checked the cylinder compressions while the oil was hot. I also drained the oil and replaced the filter. I had meant to take an oil sample to have analyzed, but I forgot. Drat.
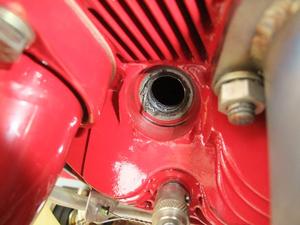 The lower spark plug on cylinder #2 has always been a bit stiff to thread in and out. I bought a thread chaser from Aircraft Spruce, and used it to clean some carbon out of the #1 & #3 lower plug holes - it seemed to do a good job. Then I tried it on #2 cylinder, but it didn't feel right when I screwed it in, so I removed it. I was horrified to see that a piece of the cylinder head thread is coming off, exposing the helicoil thread insert. I need to get an experienced engine guy to look at this and recommend what the proper repair is. I've got a copy of Lycoming Service Instruction 1043A, which covers the replacement of helicoil thread inserts. That job can be done with the cylinder on the engine.
 I had hoped to get the aircraft flying tomorrow, and take Terry on a fall leaves photo flight. That won't happen. I'm guessing it will be at least a week before the aircraft flies again, and that assumes I can find a local maintenance guy who has all the parts in stock to fix this. Worst case is the cylinder will need to come off and be sent out for repair - in that case it could be many weeks before the next flight.
Autopilot Progress
- Details
- Written by Kevin Horton
- Hits: 4158
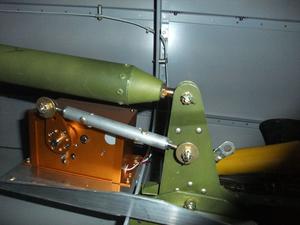 I spent quite a bit of time at the airport over the last week working on the autopilot installation. I got the pitch servo installed and connected to the elevator bellcrank. The pitch servo wires are nicely secured in place under the floor and up inside the left landing gear box. I took a quick look at the task of connecting all the wires that connect to the autopilot control head today, but discovered I need some more butt splices. I had thought I could cut the Molex pins off the wires for the old Navaid servo, crimp on D-sub pins and insert them in the Trio autopilot connector. But, the wires aren't long enough so I will need to spice them. I've secured the wires in place for now and will finish off the autopilot installation once I acquire the needed connectors.
The autopilot also needs to be fed pitot and static pressures. The pitot and static plumbing was a bit of a mess, so I decided to rip it all out and switch to the neat pitot-static connectors that SteinAir sells. The tubing can be easily removed from these connectors, and they seal well - at that is what everyone tells me. I pulled out the old connectors this morning and put all the new stuff in. At first it leaked like a sieve, but I eventually figured out that I hadn't pushed the tubing far enough into the connectors. The ability to quickly pull out tubing and replace it with a plug really helped when chasing down the leak, as it allowed me to isolate portions of the system to narrow down where the leak was. I eventually found that the leak was in the line to the altimeter, but could't get the leak to stop. I pushed the tubing to the altimeter so hard into its manifold connector that I couldn't get it out again, and broke the manifold when I pulled really, really hard to try to get the tubing out. I hadn't ordered a spare manifold, so I had to swap back to the old plumbing on the right side of the instrument panel.
I'll finish up the autopilot installation after the butt splices and additional pitot-static fittings arrive.
Smiths Falls Flying Club Clubhouse Grand Opening
- Details
- Written by Kevin Horton
- Hits: 3441
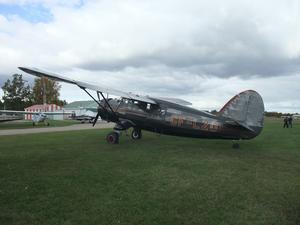 Today was the grand opening of the new clubhouse at the Smiths Falls Flying Club. A surprisingly large number of aircraft flew in for the event, including this rare Noorduyn Norseman from Alberta. The Norseman is a Canadian designed bush aircraft that first flew in 1935, and was produced until 1959. Approximately 20 are still in service. Note how the ailerons droop when the flaps are down, to lower the stall speed.
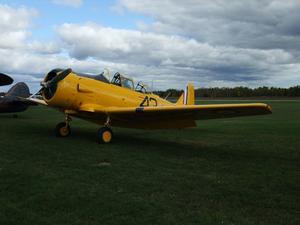 A Tiger Moth and Harvard flew in from the Vintage Wings collection, and their Corsair did a couple of circuits and low approaches, but I was quite disappointed that it didn't land.
Trio Autopilot Pitch Servo Mount
- Details
- Written by Kevin Horton
- Hits: 6071
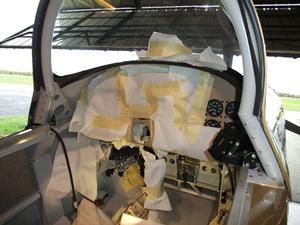 The hole in the instrument panel where the Navaid Devices wing leveler control head was installed turned out to be too small for the new Trio Avionics Pro Pilot autopilot. The new autopilot was 3.14" in diameter, slightly more than the expected 3 1/8", whereas the hole was 3.10" in diameter. I purchased a 3" sleeveless sanding drum and some high quality [Norton 3X] sand paper at Lee Valley Tools.
I removed the transponder and GNS 430W from their trays, and covered up pretty much everything else to keep the sanding dust out. Then I attacked the hole with 100 grit paper on the sanding drum, and was happy to see that it removed material very quickly. Too quickly in fact, as I overshot the desired hole size very slightly. I smoothed out the edge with finer sandpaper on the drum, and ended up with a hole 3.16" in diameter.
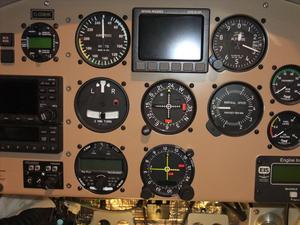 Here is the new control head sitting happily in its hole. It is the round one on the left on the bottom row.
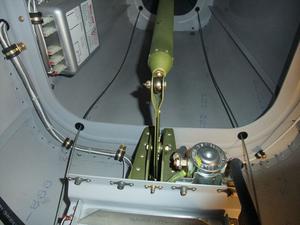 Next, I attacked a mount for the pitch servo. The typical place to install the pitch servo in RVs is next to the bellcrank just behind the aft baggage compartment. If the aircraft does not have an aft-mounted battery, the pitch servo tray can be mounted ahead of the bellcrank on top of the baggage bay ribs. But, my battery sits there, so the servo has to go behind the bellcrank. If I was installing the servo when I was building the aircraft, I would have extended one of the angles which support the bellcrank, so the angle extended aft to provide a support for the servo.
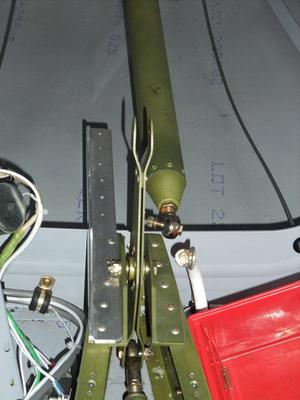 I decided to rivet a new angle on top of the original one, as it would be difficult to exactly duplicate all the hole dimensions closely enough if I tried to replace the original angle with a longer one.
I had to temporarily remove the battery tray to get access to buck the rivets that attach the new long angle.
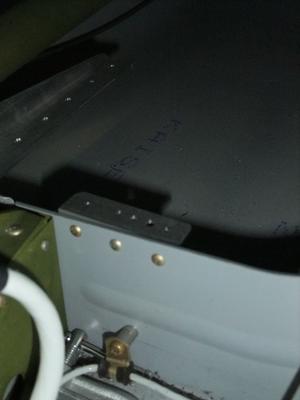 A small piece of angle was riveted to the bulkhead to support the front end of the servo.
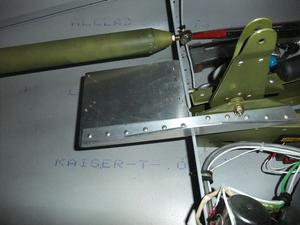 Here is the mount, all riveted in place.
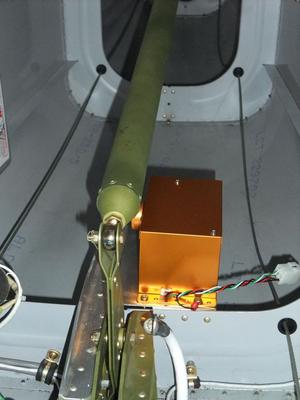 And here is the servo in place on the mount. I drilled a hole for the control rod in the bellcrank, and determined what length rod I need. I'll fabricate the control rod at home tomorrow.
I also started running the wiring that runs between the autopilot control head and the pitch servo. I got it through the landing gear box and the front spar, which were the two biggest hurdles. Now I need to open up some of the Adel clamps so I can secure the wiring in place, and connect the wiring up at the servo end. I will also run a cable for the eventual 406 MHz ELT upgrade. The new 406 ELT will get position data from the GNS 430W GPS, and it needs a new cable to carry that data. Given that I have access under the floor now, this is the perfect time to run that cable. I'll cap the ends and stow them, so it is ready when I need it.
Annual Inspection, More Progress
- Details
- Written by Kevin Horton
- Hits: 3507
I took a day of comp time and worked on the aircraft today. I finished off the inspection of the airframe this morning, and then put the various inspection panels back on. I'll do the firewall forward part of the annual inspection and the compass swing in early October.
I repacked the wheel bearings for the first time since the first flight - they looked in great shape. I used a Lisle Handy Packer bearing packing tool to push clean grease into the bearings. That tool really helped do the job quickly, and with a minimum of mess. It is highly recommended. You can find it at Aircraft Spruce, but it can be found at many other places online, some with prices quite a bit cheaper than ACS.
This afternoon I removed the rear baggage bay floor and aft wall and the cockpit floors, as I need to run wires under there for the autopilot. I also removed the old wing leveler, and did a trial fit of the autopilot in the instrument panel. I discovered that the new autopilot control head is slightly larger diameter than the advertised 3 1/8", and it doesn't quite fit in the hole in my instrument panel. I'm going to purchase a 3" drum sander so I can slightly enlarge the hole.
Annual Inspection Expiry Date
- Details
- Written by Kevin Horton
- Hits: 3643
I got a nice e-mail from Bernie W., reminding me that annual inspections are actually due at the end of the 12th month following the date of the inspection, so it actually doesn't expire until the end of September. I had actually looked for that little detail a few months ago, and failed to find it then. Now that I looked again, I see that Bernie is correct. The info is in CAR Std 625.86, plain as day, at least if you are a lawyer. Thanks Bernie.
But, as Bernie also noted, things like the annual compass swing, ELT recerts, etc, do expire 12 months to the day after they were completed. So, I couldn't have flown yesterday anyway, as the compass swing had expired. I will do the last items on the annual inspection in early October, and signing it off in October rather than September will give me another month before I have to do it all over again.
