Saturday I visited RV-8 builder Ken Tattersal in Metcalfe. Ken started his kit about eight months ago, so he has what is known as the pre-punched kit. This means that both the skins and the underlying structure are punched with pilot holes. You can cleco the parts together, then use a drill to enlarge the holes to the final size. Earlier kits, like mine, had pilot holes in the skins, but no holes in the underlying structure. You had to draw centre lines on all the flanges on the structure, get every thing clamped in place in a jig, ensure you could see the centre lines on the flanges through the holes in the skins, then drill the rivet holes. The new kits don't require a jig, nor do they require the painstaking measuring, aligning and cross checking before you drill the holes. You basically grab the pieces, and some cleocs, throw them up in the air and it assembles itself before it hits the ground :)
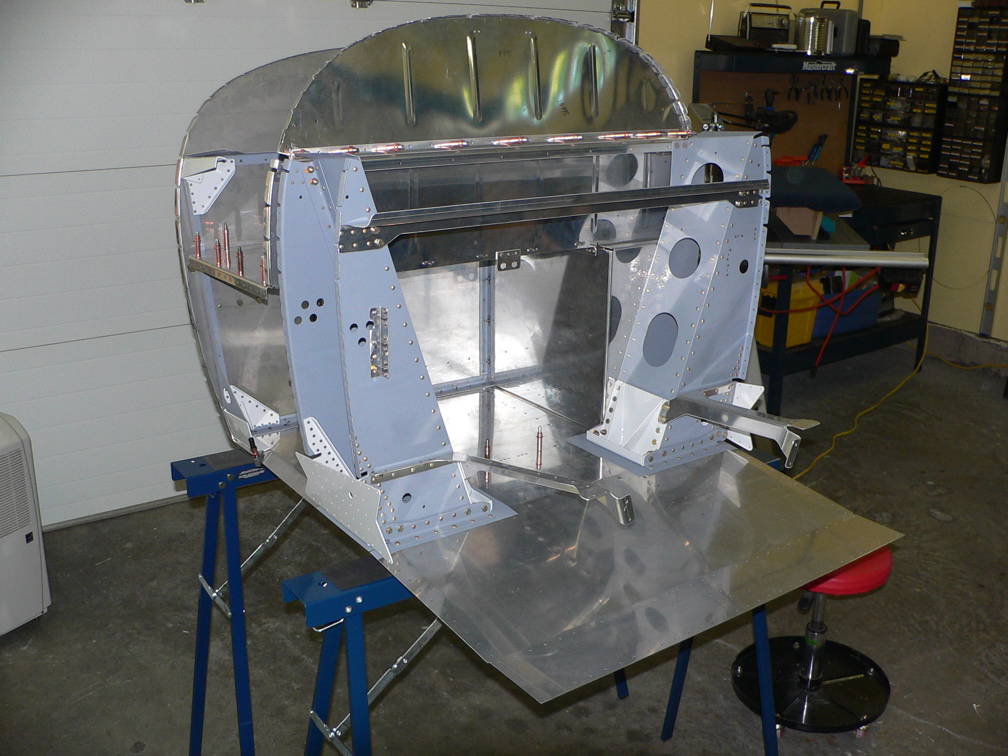
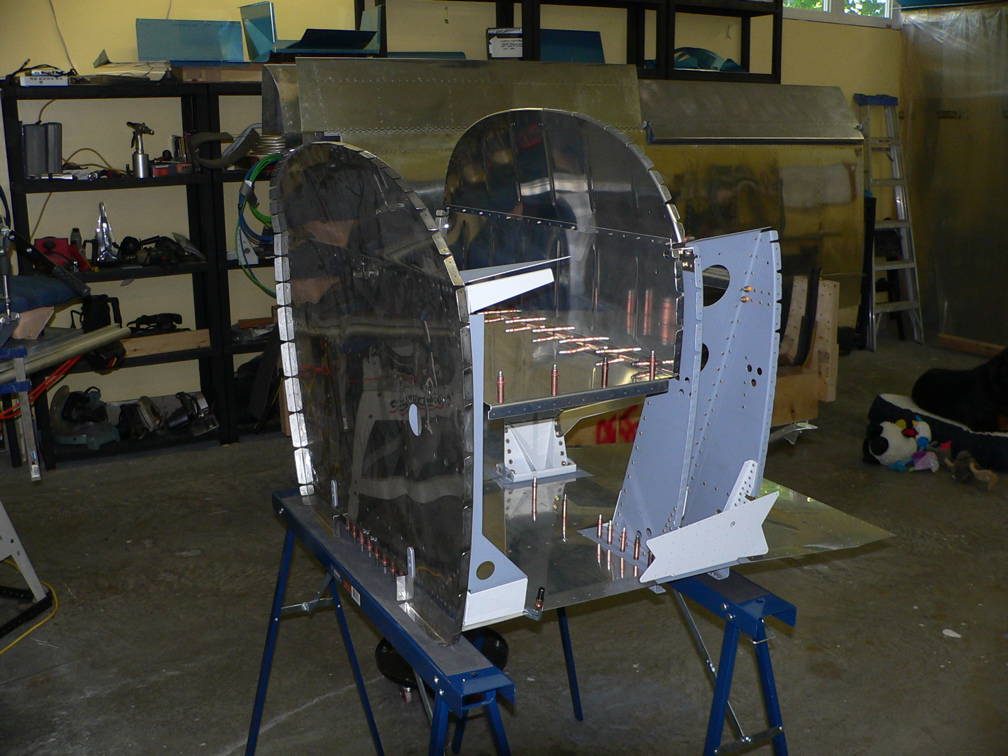 Here is the forward fuselage, from the firewall to the forward spar area. No jig was needed. It was assembled on a couple of steel saw horses. The fuselage is assembled in three sections - forward fuselage, cockpit area and aft fuselage. First the bulkheads and internal structure are riveted together, then the longerons are slipped in place and the skins are riveted on. Ken is doing a beautiful job, and he will have a great aircraft when he is finished.
 Ken told me that it took him 3.5 hours to assemble the landing gear boxes. This included the time to deburr all the edges, cleco the parts together, final drill the holes, deburr the holes, prime and rivet. I spent more than 3.5 hours just scratching my head trying to figure out how to deal with some of the problems I had with my landing gear boxes.