 I focused on the wing leveler servo mount this weekend. It took a bit of trial and error, but I think that it will work out nicely. I started off with the measurements that I got from Ray Lynn, but they seemed to put the pushrod right up against the bottom side of the fore-aft reinforcing angle that goes from the top of the wing spar carry through to the landing gear box. I think part of the discrepancy is that his measurements likely are to the top of the spacer that goes under the mounting tabs on the servo, whereas I measured to the top of the deck only. I ended up lowering the mounting tray deck by 5/16 inch. That will let me use the third hole from the pivot in the servo arm if required to get more pushrod travel, and I can put spacers under the servo mounting tabs if I need to raise it to get more clearance to the rudder cable.
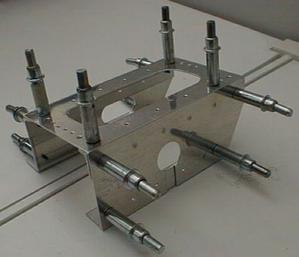
The first picture shows the rear side of the tray. I've already got a bunch of wires that will have to run fore and aft under the tray, so I needed to allow the tray to be installed without disturbing them. I plan to rivet the two pieces of angle to the floor first, using blind rivets. The two vertical flat pieces on the front and rear faces have holes in them to allow the wiring bundle to pass through, with slots that go all the way to the bottom so the tray can be slipped over the wires.
 I pondered how to get the trays in place for quite awhile. I thought I might have to assemble them in place, which would be a real trick. I eventually decided I could rivet everything together but the two angles at the bottom, then use screws and nutplates on the angles to fasten the vertical pieces to them.
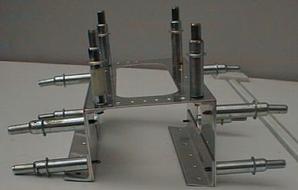
The second picture shows the tray from the inboard end. You can see the two pieces of angle that attach the whole works to the floor. Those two pieces of angle had to be squeezed a bit to make the angle less than 90°, as the floor slopes up.
 The last shot shows the tray looking from the front. The outboard end (left in the picture) is cut away at the bottom, as it has to go over a piece of angle that sits at the outboard edge of the floor.
I'll prime the tray parts once it warms up enough to paint outside in the driveway, then I'll assemble and install it.
Larger versions of these photos can be seen in the Construction Photo Gallery.