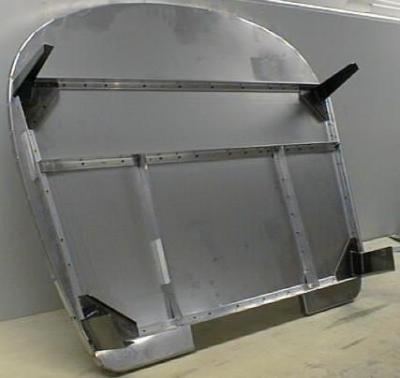
Here is the firewall after drilling and clecoing it together. I've got to prime the parts (except the stainless), and then rivet it together.
 The fuselage kit arrived while I was away on the road. It wasn't supposed to get shipped until after I got back, but there was a screwup and it got sent early. Fortunately my boss volunteered to pick it up at the shipping deport, and some coworkers helped him get it in the garage. Thanks guys!
First I had to unpack the crates and check everything against the packing list to make sure it all arrived. It turned out that I had the right number of parts, but one was damaged, and another one was meant for an RV-8A (version with a training wheel on the front) instead of the RV-8 that I am building (third wheel on the back, preferred by "real men" :-) Vans is sending the replacement parts.
Read on for more.
I had planned on finishing the wings before I tackled the fuselage, but on Sunday every job I started on the wings hit a road block where I needed to go to a hardware store to buy some tool or little piece of something. I wasn't in the mood to go out, so I started drilling and clecoing the firewall together instead.
The basic firewall sure goes together easily. The firewall is covered with pilot holes where every rivet goes, and all the reinforcing angles have a few pilot holes in them so you can cleco them on. Then it is just a matter of drilling through each pilot hole with the right size drill and deburring everything. I hear horror stories of what it was like to assemble the firewalls of earlier models where the builder had to get everything lined up properly himself (and I am sure the guys who tell those stories used to walk five miles to school, uphill both ways too).
I've decided to work on the fuselage during the week, and the fuel tanks on the weekends.