Prop Installed
- Details
- Written by Kevin Horton
- Hits: 3391
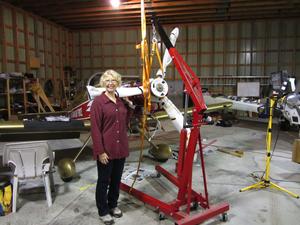
Terry helped me install the prop this morning. I used a nylon cargo strap to make a sling, and lifted the prop with an engine hoist. Terry was in charge to keep the prop steady, and ensure that the blades didn’t hit anything as I manoeuvred it in place.
The engine hoist was a big improvement over the nylon strap hanging from a rafter that I had used in the past. The engine hoist allowed very small vertical movements to get the prop perfectly lined up.
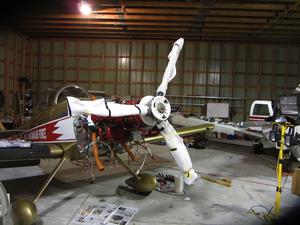 I’ll leave the foam wrapping on the prop blades until I am finished doing all the engine installation work, as they provide good protection against minor dings.
After installing the prop I got a few odds and ends installed, then called it a day.
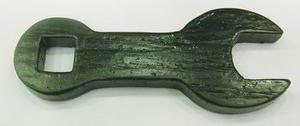 I bought aAvery prop bolt wrenchat Oshkosh this year, and it was a great purchase. The other times I installed the prop, I used a combination wrench as an extension to a torque wrench. That worked, but you had to be very careful to ensure the ends of the wrench didn’t dig into the prop hub. The Avery tool is a copy of a Hartzell design, and it has slightly shorter jaws on the open end portion, which makes it much less likely to hit the hub. It also has a 1/2" drive socket, so you can snap it onto the torque wrench.
Engine Back on the Mount
- Details
- Written by Kevin Horton
- Hits: 3493
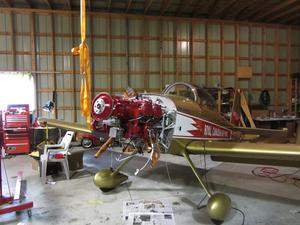
I spent several hours at the hangar today. The big accomplishment was getting the engine back on the engine mount. Those dynafocal mounts are a real bear to install, due to the fact that all four bolts are at an angle, pointing towards the centre of the engine. You can’t get the last bolt to line up unless the other three bolts are tight, to pull the engine into place. But, with the engine pulled tightly into place it is not possible to wiggle the fourth rubber mount bushing to get the hole in it to line up with the hole in the engine. You end up having to loosen the bolts a bit so the last mounting bushing can be moved, then prying it into alignment with a padded screwdriver.
I’ve still got one of the four mount bolts to torque, as I forgot the modified wrench I need for the top left one at home.
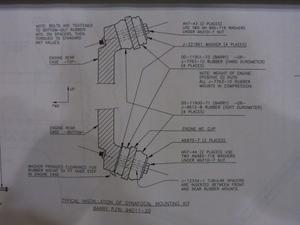
This is the part of the plans that show the details of the dynafocal mount.
Sunday I hope to get the prop installed. Then I’ll still have a long list of things to reinstall or hookup - baffles, cables, hoses, wires, etc.
Picked up Engine and Prop
- Details
- Written by Kevin Horton
- Hits: 2775
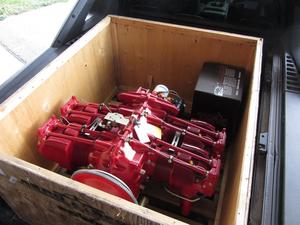
I picked up the engine and prop today at a local trucking depot. They are safely in the hangar now. I’ll start the reassembly this weekend.
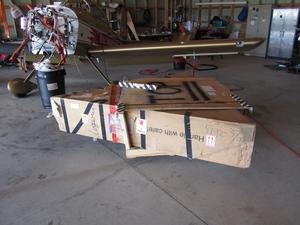
Wichita, London & Basel
- Details
- Written by Kevin Horton
- Hits: 3087
It’s been a crazy four weeks, but I’m finally back home for at least seven weeks, I think. I was in Wichita from 12 Sep to 27 Sep for two flight test projects back to back, then home for less than 36 hours before heading to Europe on the 29th (one day in London, then meetings in Basel, Switzerland). I got home on Friday afternoon, and have enjoyed a nice weekend at home.
In principle, the engine and prop should arrive this week, so hopefully next weekend I’ll be busy putting it all back together. I doubt I’ll get the job done next weekend, but I should get most of the way there.
While I was in London I visited the Churchill War Rooms, a very highly rated piece of history. This comprises the underground Cabinet War Rooms where Prime Minister Winston Churchill and his War Cabinet ran the British portion of WWII, and the attached Churchill Museum, which chronicles his life. The Churchill War Rooms are a “must visit” for anyone interested in WWII history. Following the war, the underground complex was preserved pretty much the way it was during the later stages of the war, including all the maps, etc left as they were.
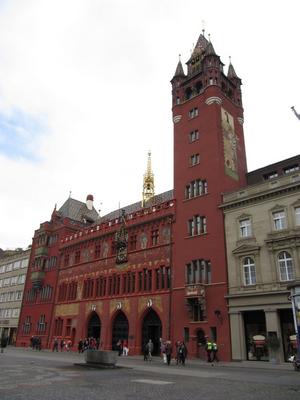 After a day off in London I flew to Basel, Switzerland. Basel is a very nice small city with a lot of history, on the Rhine river. Here we see Basel City Hall - The original city hall was destroyed in an earthquake in 1356. The new city hall was built between 1504 and 1514.
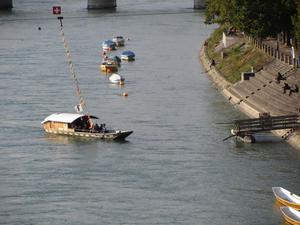 I was quite interested to see four small cable ferries that crossed the river, powered solely by the river current. Each ferry was attached via a pulley and cable to another cable that went straight across the river. The fact that it was attached to a cable running across the river stopped it from drifting down stream. The ferry would turn about 45 degrees to the left or right, so the river current pushed it across the river.
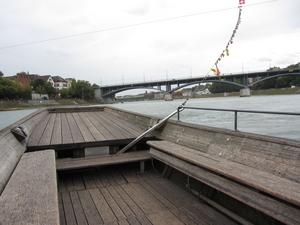 The cable attachment on the ferry is pivoted, and is moved to one side or the other to control the natural angle of the ferry. Here the ferry is moving from right to left. When it is time to go back to the other side of the river, the cable attachment arm is swung over to the left side of the ferry.
Engine Done
- Details
- Written by Kevin Horton
- Hits: 2801
I got word from Aero Sport Power on 14 Sept that they had finished the work on the engine and ran it in their test cell. Unfortunately, I’ve been on the road since the 12th, and won’t be back home for more than a day at a time until early October. I’ve asked Aero Sport to schedule the shipping so it arrives back in Ottawa the first week I’m back. The prop should also arrive back home that same week.
At the moment, after I finish this series of trips I don’t have any big away trips scheduled until at least late November. Hopefully that plan will hold, as I’d really like the get the aircraft back in the air and get the initial break-in done ASAP.
Paris Trip Photos
- Details
- Written by Kevin Horton
- Hits: 1985

Terry and I spent some time over the last week culling our pictures from the trip to Paris, and I posted a subset of the Paris trip photos on the web for family and friends.
